Now let's implement a conversations list on Android. The Android equivalent of UITableView and UITableViewSource are ListView and BaseAdapter. There are parallel concepts for these Android classes compared to iOS, such as implementing abstract methods and recycling cells during scrolling. There are a few different types of adapters used in Android such as ArrayAdapter or CursorAdaptor, although BaseAdapter is generally best suited for simple lists.
Let's implement our conversations screen. Begin by making a new Android Activity in your Activities folder named ConversationsActivity.cs. Let's start with only a couple of changes to the class definition as follows:
[Activity(Label = "Conversations")]
public class ConversationsActivity :BaseActivity<MessageViewModel>
{
  //Other code here later
}
Perform the following steps to implement a couple of Android layouts:
- Create a new Android Layout in the
layoutfolder of theResourcesdirectory namedConversations.axml. - Drag a ListView control from Toolbox onto the layout and set its Id field to
@+id/conversationsList. - Create a second Android Layout; the
layoutfolder in theResourcesdirectory namedConversationListItem.axml. - Drag a Medium Text and a Small Text control onto the layout from the Toolbox.
- Set their IDs to
@+id/conversationUsernameand@+id/conversationLastMessage. - Finally, let's set each of their Margins fields to
3dpin the Layout tab of the Properties box.
This will set up all the layout files we'll need to use throughout the conversations screen.
Now we can implement BaseAdapter as a nested class inside of ConversationsActivity as follows:
class Adapter : BaseAdapter<Conversation>
{
  readonly MessageViewModel messageViewModel =
    ServiceContainer.Resolve<MessageViewModel>();
  readonly LayoutInflater inflater;
  public Adapter(Context context)
  {
    inflater = (LayoutInflater)context.GetSystemService (Context.LayoutInflaterService);
  }
  public override long GetItemId(int position)
  {
    return messageViewModel.Conversations [position].Id;
  }
  public override View GetView(int position, View convertView, ViewGroup parent)
    {
      if (convertView == null)
      {
        convertView = inflater.Inflate (Resource.Layout.ConversationListItem, null);
      }
    var conversation = this [position];
    var username = convertView.FindViewById<TextView>(
      Resource.Id.conversationUsername);
    var lastMessage = convertView.FindViewById<TextView>(
      Resource.Id.conversationLastMessage);
    username.Text = conversation.Username;
    lastMessage.Text = conversation.LastMessage;
    return convertView;
  }
  public override int Count
  {
    get { return messageViewModel.Conversations == null ? 0
      : messageViewModel.Conversations.Length; }
  }
  public override Conversation this[int index]
  {
    get { return messageViewModel.Conversations [index]; }
  }
}
The following is a review of what is going on inside the adapter:
- We subclassed
BaseAdapter<Conversation>. - We passed in a
Contextparameter (our activity) so that we can pull out theLayoutInflater. This class enables us to load XML layout resources and inflate them into a view object. - We implemented
GetItemId. This is a general method used to identify rows, so try to return a unique number. - We set up
GetView, which recycles theconvertViewvariable by only creating a new view if it is null. We also pulled out the text views in our layout to set their text. - We overrode
Countto return the number of conversations. - We implemented an indexer to return a
Conversationobject for a position.
Overall, this should be fairly similar to what we did on iOS.
Now let's set up the adapter in our activity by adding the following to the body of ConversationsActivity:
ListView listView;
Adapter adapter;
protected override void OnCreate(Bundle bundle)
{
  base.OnCreate(bundle);
  SetContentView(Resource.Layout.Conversations);
  listView = FindViewById<ListView>(
    Resource.Id.conversationsList);
  listView.Adapter =
    adapter = new Adapter(this);
}
protected async override void OnResume()
{
  base.OnResume();
  try
  {
    await viewModel.GetConversations();
    adapter.NotifyDataSetInvalidated();
  }
  catch (Exception exc)
  {
    DisplayError(exc);
  }
}
This code will set up the adapter and reload our list of conversations when the activity appears on screen. Note that we called NotifyDataSetInvalidated here so that ListView reloads its rows after the number of conversations has been updated.
Last but not least, we need to modify the OnLogin method we set up earlier in LoginActivity to start our new activity as follows:
StartActivity(typeof(ConversationsActivity));
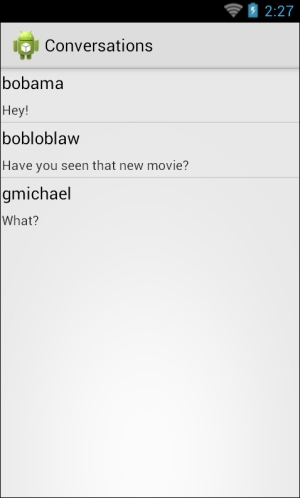
Now if we compile and run our application, we can navigate to a conversations list after logging in, as shown in the following screenshot: