To begin our exploration of what Xamarin.Mobile offers, let's access the address book within a Xamarin application. For iOS, the first step is to make a Single View Application project by navigating to iOS | iPhone Storyboard. Make sure you add Xamarin.Mobile to the project from the Component Store.
Now, let's implement a simple UITableView with a list of contacts:
- Open the
MainStoryboard.storyboardfile. Delete any existing controllers created by the project template. - Create
UINavigationControllerwithUITableViewControlleras its root child controller. - Set the class of
UITableViewControllertoContactsControllerfound under Identity Inspector in Xcode. - Save the storyboard file and return to Xamarin Studio.
Open the automatically generated ContactsController.cs file and start implementing the table view. Add using Xamarin.Contact, to the top of the file, and make the following changes to the controller:
public partial class ContactsController :UITableViewController, IUITableViewDataSource
{
  public ContactsController (IntPtr handle) : base (handle)
  {
    Title = "Contacts";
  }
}
We filled out the title for the navigation bar, "Contacts," and set the class to implement IUITableViewDataSource. This is a new type of interface that Xamarin has created to simplify using Objective-C protocols from C#. It is the exact same as creating a class that inherits from UITableViewSource, as we did in earlier chapters, but you can do it from your controller as well. Xamarin has done some tricks here. They have created an interface with methods that can be optionally implemented, which isn't something that C# supports. This type of interface can make your code a bit cleaner by reducing the need for a new class, which is great for very simple controllers.
Next, let's add some code to load the contacts:
Contact[] contacts;

public async override void ViewDidLoad()
{
  base.ViewDidLoad();
  try
  {
    var book = new AddressBook();
    await book.RequestPermission();
    contacts = book.ToArray();
  }
  catch
  {
    new UIAlertView("Oops!","Something went wrong, try again later.",null, "Ok").Show();
  }
}
To use Xamarin.Mobile for loading contacts, you must first create an AddressBook object. Next, we have to call RequestPermissions in order to ask the user for permission to access the address book. This is an important step since it is required by iOS devices before an application can access the user's contacts. This prevents potentially nefarious applications from retrieving contacts without the user's knowledge.
Next, we used the System.Linq extension method ToArray to enumerate over the address book and store it in member variable named contacts. You can also foreach over the AddressBook object depending on your needs.
If you were to compile and run the application at this point, you would be greeted by the standard iOS pop up requesting access to contacts, as shown in the following screenshot:

If you accidentally hit Don't Allow, you can change this setting by navigating to Settings | Privacy | Contacts on the device. In the iOS Simulator, you can also reset all privacy prompts in the simulator by closing the application and going to Settings | General | Reset | Reset Location & Privacy.
So for the next step, we'll need to implement the IUITableViewDataSource interface so that we can work with the array of contacts and display them on the screen. Add the following methods to the controller just like you would to UITableViewSource:
public override int RowsInSection(UITableView tableview, int section)
{
return contacts != null ? contacts.Length : 0;
}
public override UITableViewCell GetCell(UITableView tableView, NSIndexPath indexPath)
{
var contact = contacts [indexPath.Row];
var cell = tableView.DequeueReusableCell(CellName);
if (cell == null)
cell = new UITableViewCell(UITableViewCellStyle.Default, CellName);
cell.TextLabel.Text =contact.LastName + ", " + contact.FirstName;
return cell;
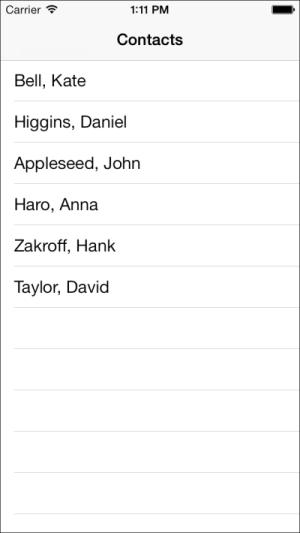
}Also, add a CellName constant string to the class by selecting a string identifier such as ContactCell. Now if you compile and run the program, you'll be able to see the list of contacts on the device. The following screenshot shows the default list of contacts in the iOS 7 Simulator:
In a very similar fashion, we can retrieve a list of contacts in Android with Xamarin.Mobile. All of the APIs in Xamarin.Mobile are identical in Android with the exception of the requirement that Android.Content.Context be passed in a few places. This is because many native Android APIs require a reference to the current activity (or to an other context such as Application) in order to function properly. To begin, create a standard Android Application project by navigating to Android | Android Application in Xamarin Studio. Make sure to add Xamarin.Mobile to the project from the Component Store.
In parallel to iOS, let's create ListView to display a list of contacts as follows:
- Open the
Main.axmlfile from thelayoutfolder under theResourcesdirectory in the Android designer. - Remove the default button from the project template and add ListView to the layout.
- Set Id to
@+id/contacts. - Save the file and open
MainActivity.csso we can make some changes to the code.
Begin by removing most of the code; we don't need the code that came from the project template. You will also need to add a using statement for Xamarin.Contacts. Next, let's implement BaseAdapter<Contact> inside the MainActivity class as follows:
class ContactsAdapter : BaseAdapter<Contact>
{
  public Contact[] Contacts { get; set; }
  public override long GetItemId(int position)
  {
    return position;
  }
  public override View GetView(int position, View convertView, ViewGroup parent)
  {
    var contact = this [position];
    var textView = convertView as TextView;
    if (textView == null)
    {
      textView = new TextView(parent.Context);
    }
    textView.Text = contact.LastName + ", " + contact.FirstName;
    return textView;
  }
  public override int Count
  {
    get { return Contacts == null ? 0 : Contacts.Length; }
  }
  public override Contact this[int index]
  {
    get { return Contacts [index]; }
  }
}
This will display each contact in TextView for each row in the ListView. One thing that we've done here in order to simplify things is add a property for the array of contacts. This should be pretty straightforward and similar to what we've done in past chapters.
Now, let's set up the adapter in OnCreate as follows:
protected async override void OnCreate(Bundle bundle)
{
  base.OnCreate(bundle);
  SetContentView(Resource.Layout.Main);
  var listView = FindViewById<ListView>(Resource.Id.contacts);
  var adapter = new ContactsAdapter();
  listView.Adapter = adapter;
  try
  {
    var book = new AddressBook(this);
    await book.RequestPermission();
    adapter.Contacts = book.ToArray();
    adapter.NotifyDataSetChanged();
  }
  catch
  {
    new AlertDialog.Builder(this).SetTitle("Oops").SetMessage("Something went wrong, try again later.").SetPositiveButton("Ok", delegate { }).Show();
  }
}
This code calling Xamarin.Mobile is identical to what we did on the code for iOS except here, this had to be passed for the Android Context in the constructor for AddressBook. Our code changes are complete; however, if you ran the application right now, an exception would be thrown. Android requires permission in the manifest file, which will notify the user of its access to the address book when it is downloaded from Google Play.
We must create an AndroidManifest.xml file and declare one permission as follows:
- Open the project options for the Android project.
- Select the Android Application tab under Build.
- Click on Add Android manifest.
- Under the Required permissions section, check ReadContacts.
- Click on OK to save your changes.
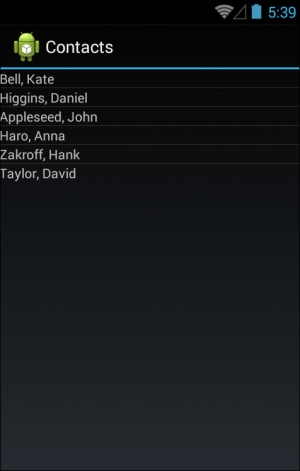
Now if you run the application, you will get a list of all the contacts on the device, as shown in the following screenshot: