
The default template for Android projects has a little more built-in functionality than iOS. Android user interface layouts are defined in XML files that are readable by humans and editable. However, Xamarin Studio has provided an excellent design tool that allows you to drag-and-drop controls to define your Android layouts. Let's add some more features to your application and start using the Android designer.
Return to Xamarin Studio and carry out the following steps to add features to your app:
- Open the Android project you created earlier in this chapter in Xamarin Studio.
- Under Resources | layout in your project, open
Main.axml. - You will see the Android designer open in Xamarin Studio.
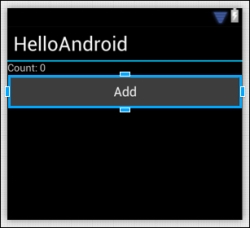
- Drag TextView from the Toolbox section on the right to the layout just above the button labeled Hello World, Click Me!.
- Type some default text such as
Count: 0into the label. - In the Properties pane on the right, you'll see the id
@+id/textView1. Let's change it to@+id/myTextto be consistent with the button. - While we're here, go ahead and change the text on the button to something more appropriate such as
Add. - Click on the play button to compile and run the application. If you still have the Android emulator, you can simply switch to it. Otherwise, you will have to start it again.
Your Android application will now look identical to the changes you made in the designer, as follows:
Now, let's interact with the new label from the code. Switch back to Xamarin Studio and open MainActivity.cs. Let's modify the activity to interact with the TextView field instead of the button. We use the FindViewById method to retrieve a view by the ID we set up in the layout file. Xamarin Studio has also autogenerated a static class named Resource for referencing your identifiers.
So let's retrieve the instance of the TextView field by placing this code in OnCreate as follows:
TextView text = FindViewById<TextView>(Resource.Id.myText);
The Resource class is a static class that the Xamarin designer will populate for you. For future reference, you may have to build your Android project for new IDs and other resources to show up in your C# files in Xamarin Studio.
Next, let's update the Click event on the button:
button.Click += delegate
{
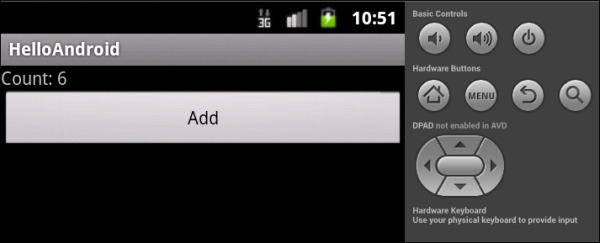
text.Text = string.Format("Count: ", ++count);
};This will rewire the button to update the text in TextView instead of on the button itself. Now if we run the application, we'll get an Android app that functions identically to the iOS one in the previous chapter. The Android app will look like the following screenshot:
Since we've added some of our own views to our layout, let's add a second activity to build on our understanding of activities in Android.
Return to Xamarin Studio and perform the following steps:
- If necessary, open the Android project you created earlier in the chapter in Xamarin Studio.
- Create a new Android activity in the project under the Android section. Name it
SecondActivity.cs. - Under Resources | layouts, create a new Android layout named
Second.axml. - Open
SecondActivity.csand, add the following code toOnCreate:SetContentView(Resource.Layouts.Second);
- Open
SecondActivity.cs, add the following line of code to theClickevent of your button:StartActivity(typeof(SecondActivity));
- Open
Second.axmland drag a button into the view. Set its text toFinish, for example, and set its ID to@+id/finish. - Finally, open
SecondActivity.csand add the following lines to itsOnCreatemethod:var finish = FindViewById<Button>(Resource.Id.finish); finish.Click += (sender, e) => Finish();
- Build and run your application.
Your application's button will now launch a new activity in addition to incrementing the count on the label. Once SecondActivity is visible, you can click on its button to finish the activity and return to the first activity. Down the road, if you need to pass information from one activity to another, you will need to create an Intent object to pass to StartActivity. The second activity in your app is shown in the following screenshot:
