
With our server-side changes complete, the next step is to implement our new service in our XamChat iOS and Android applications. Luckily, as we used an interface named IWebService, all we need to do is implement that interface to get it working in our application.
Before we begin, it is necessary to go through our existing code and change the data type on the IDs of all our classes from int to string. This is because the latest version of Azure Mobile Services uses a GUID (Globally Unique Identifier)to identify all the objects in its tables. A GUID is a 128-bit unique identifier that can't be expressed as an integer.
Now we can start setting up our service in our iOS application by performing the following steps:
- Open the
XamChat.iOSproject that we created earlier in the book. - Create an
Azurefolder within theCorefolder. - Create a new class named
AzureWebService.cs. - Make the class
publicand implementIWebService. - Right-click on
IWebServicein your code and select Refactor | Implement Interface. - A line will appear; press Enter to insert the method stubs.
When this setup is complete, your class will look something like the following:
public class AzureWebService : IWebService
{
  #region IWebService implementation

  public Task<User> Login(string username, string password)
  {
    throw new NotImplementedException();
  }

  // -- More methods here --

  #endregion
}Next, we need to add a reference to the Azure Mobile Services client's .NET library. To do this, we will use the Xamarin Component Store and perform the following:
- Right-click on the Components folder in your iOS project.
- Click on Get More Components.
- Search for
Azure Mobile Services, or select it if it is in the featured section. - Click on Add to App.
Tip
For more information on the Xamarin Component Store, check out Chapter 9, Third-party Libraries.
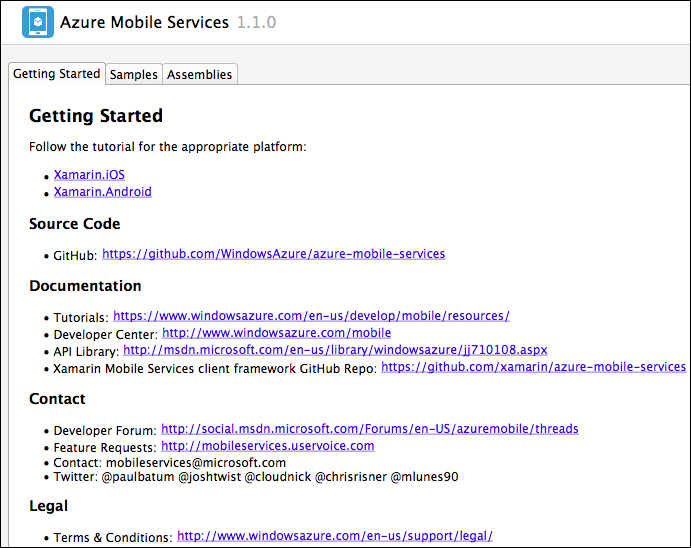
This will download the library and open the following Getting Started tab, complete with documentation and samples, in Xamarin Studio:
Close this tab and modify our AzureWebService.cs file. Add using Microsoft.WindowsAzure.MobileServices to the top of the file, and then make the following changes:
public class AzureWebService : IWebService
{
  MobileServiceClient client = new MobileServiceClient("https://your-service-name.azure-mobile.net/", "your-application-key");

  public AzureWebService()
  {
    CurrentPlatform.Init();
  }

  // -- Existing code here --
}
Make sure you fill in your mobile service name and application key. You can find your key on the Dashboard tab of the Azure Management Portal under the Manage Keys section. Notice the use of CurrentPlatform.Init(); calling MobileServiceClient will not work properly without calling this first. Our service's constructor is a good location to place this.
Now let's implement our first method, Login, in the following manner:
public async Task<User> Login(string username, string password)
{
  var user = new User
  {
    Username = username,
    Password = password
  };
  await client.GetTable<User>().InsertAsync(user);
  return user;
}
This is fairly straightforward, because of how nice this library is to use. The GetTable<T> method knows to use a table named User, based on the C# class name. Upon the first call, the dynamic schema feature will create two new columns named Username and Password based on the C# properties of our class. Note that the InsertAsync method will also fill in the user's Id property for later use in our application.
Next, open the AppDelegate.cs file to set up our new service and perform the following:
//Replace this line
ServiceContainer.Register<IWebService>(() => new FakeWebService());

//With this line
ServiceContainer.Register<IWebService>(() => new AzureWebService());
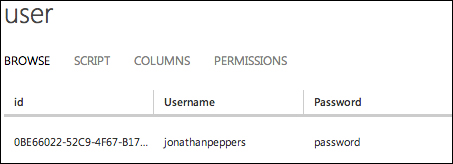
Now if you compile and run your application upon log in, your app should successfully call Azure Mobile Services and insert a new user. Navigate to the Data tab of your Azure Mobile Service in the Azure Management Portal and select the User table. You should see the user you just inserted, as shown in the following screenshot:
Tip
It is generally a very bad idea to store passwords in plain text in your database. A simple approach to make things a bit more secure would be to store them as a MD5 hash. You should be able to make this change in the custom JavaScript that we are using to insert the password on the User table. A complete guide to securing Windows Azure applications can be found at http://msdn.microsoft.com/en-us/library/windowsazure/hh696898.aspx.
Next, let's make a new class named Friend.cs. Add it to the Azure folder next to the other class specific to Azure as follows:
public class Friend
{
  public string Id { get; set; }

  public string MyId { get; set; }

  public string UserId { get; set; }

  public string Username { get; set; }
}
We'll use this class to store the friend's information about each user. Note that we also have an Id property, and all the classes saved in Azure Mobile Services should have a string property named Id. This will be the table's primary key in the SQL database.
Next, let's modify the Message and Conversation classes to prepare for push notifications down the road. Add a new property to the Message class as follows:
public string ToId { get; set; }Then add the following new property to Conversation.cs:
public string MyId { get; set; }Here we'll need to insert some test data for our application to function correctly. The easiest way to insert data would be from C#, so let's implement the following simple method on our service to do so:
public async Task LoadData()
{
  var users = client.GetTable<User>();
  var friends = client.GetTable<Friend>();

  var me = new User
  {
    Username = "jonathanpeppers",
    Password = "password"
  };
  var friend = new User
  {
    Username = "chucknorris",
    Password = "password"
  };

  await users.InsertAsync(me);
  await users.InsertAsync(friend);

  await friends.InsertAsync(new Friend { MyId = me.Id, Username = friend.Username });
  await friends.InsertAsync(new Friend { MyId = friend.Id, Username = me.Username });
}
Next, let's add the following method to AppDelegate.cs and call it from within FinishedLaunching:
private async void LoadData()
{
  var service = ServiceContainer.Resolve<IWebService>() as AzureWebService;

  await service.LoadData();
}
If you run your application at this point, it would insert two users and make them friends with each other. Before doing so, let's add some more code to the LoadData method to insert conversations and messages as follows:
var conversations = client.GetTable<Conversation>();
var messages = client.GetTable<Message>();

var conversation = new Conversation
{
  MyId = me.Id,
  UserId = friend.Id,
  Username = friend.Username,
  LastMessage = "HEY!"
};

await conversations.InsertAsync(conversation);
await messages.InsertAsync(new Message { ConversationId = conversation.Id, UserId = friend.Id, Username = friend.Username, Text = "What's up?", Date = DateTime.Now.AddSeconds(-60),});
await messages.InsertAsync(new Message { ConversationId = conversation.Id, UserId = me.Id, Username = me.Username, Text = "Not much", Date = DateTime.Now.AddSeconds(-30),});
await messages.InsertAsync(new Message { ConversationId = conversation.Id, UserId = friend.Id, Username = friend.Username, Text = "HEY!", Date = DateTime.Now,});
Now if you run the application, it will seed the database with some good data to work with. I'd recommend removing the call to LoadData once it is successful the first time, and perhaps removing the method entirely when development is complete.
Before going further, let's set up the rest of our IWebService interface. It can be implemented as follows:
public async Task<User> Register(User user)
{
  await client.GetTable<User>().InsertAsync(user);
  return user;
}

public async Task<User[]> GetFriends(string userId)
{
  var list = await client.GetTable<Friend>().Where(f => f.MyId == userId).ToListAsync();
  return list.Select(f => new User { Id = f.UserId, Username = f.Username }).ToArray();
}

public async Task<User> AddFriend( string userId, string username)
{
  var friend = new Friend { MyId = userId, Username = username };
  await client.GetTable<Friend>().InsertAsync(friend);
  return new User { Id = friend.UserId, Username = friend.Username };
}
Each method here is pretty simple. Register is very similar to Login, but the main complication for the other methods is the need to convert a Friend object to User. We used the ToListAsync method from the Azure library to get a List<T>; however, since our interface uses arrays, we quickly converted the list to an array. We also utilized a couple of basic Linq operators such as Where and Select to accomplish our implementation of IWebService.
Now let's complete the methods related to conversations and messages as follows:
public async Task<Conversation[]> GetConversations(string userId)
{
  var list = await client.GetTable<Conversation>().Where(c => c.MyId == userId).ToListAsync();
  return list.ToArray();
}

public async Task<Message[]> GetMessages(string conversationId)
{
  var list = await client.GetTable<Message>().Where(m => m.ConversationId == conversationId).ToListAsync();
  return list.ToArray();
}

public async Task<Message> SendMessage(Message message)
{
  await client.GetTable<Message>().InsertAsync(message);
  return message;
}
This completes our implementation of IWebService. If you run the application at this point, it will function exactly as before with the exception that the app is actually talking to a real web server. New messages will get persisted in the SQL database, and our custom scripts will handle the custom logic that we need. Feel free to play around with our implementation; you might discover some features of Azure Mobile Services that will work great with your own applications.
At this point, another good exercise would be to set up Azure Mobile Services in our Android application. To do so, you will merely need to add the Azure Mobile Services component, a reference to System.Net.Http.dll, and link the two new *.cs files that we added to the iOS project. After that, you should be able to swap out the ServiceContainer.Register call in your Application class. Everything will function exactly like on iOS. Isn't cross-platform development great?