The next fairly important screen is that of our friends list. When creating a new conversation, the app will load a list of friends to start a conversation with. We'll follow a very similar pattern to load our list of conversations.
To begin, we'll create UIBarButtonItem which navigates to a new controller named FriendsController, by performing the following steps:
- Double-click on the
MainStoryboard.storyboardfile to open it in Xcode. - Add a new Table View Controller to the storyboard.
- Select your view controller and click on the Identity Inspector tab. It is the third tab from the left, located on the right-hand side of the screen.
- Under the Custom Class section, enter
FriendsControllerinto the Class field. - Create a new Bar Button Item element and place on the top-right of the navigation bar of the
ConversationsControllerclass. - In the Attributes Inspector of the bar button, set its Identifier to Add. This will use the built-in plus button, which is commonly used throughout iOS applications.
- Create a segue from Bar Button Item to the
FriendsControllerby right-clicking and dragging the blue line from the bar button to the next controller. - Select the push segue from the pop up that appears.
- Save the storyboard file and return to Xamarin Studio.
You should see a new FriendsController class that Xamarin Studio has generated for you. If you compile and run the application, you'll see the new bar button item we've created. Clicking on it will navigate you to the new controller.
Now let's implement UITableViewSource to display our friends list. Start with a new nested class inside FriendsController as follows:
class TableSource : UITableViewSource
{
const string CellName = "FriendCell";
readonly FriendViewModel friendViewModel =ServiceContainer.Resolve<FriendViewModel>();
public override int RowsInSection(UITableView tableView, int section)
{
return friendViewModel.Friends == null ?0 : friendViewModel.Friends.Length;
}
public override UITableViewCell GetCell(UITableView tableView, NSIndexPath indexPath)
{
var friend = friendViewModel.Friends[indexPath.Row];
var cell = tableView.DequeueReusableCell(CellName);
if (cell == null)
{
cell = new UITableViewCell(UITableViewCellStyle.Default, CellName);
cell.AccessoryView =UIButton.FromType(UIButtonType.ContactAdd);
Cell.AccessoryView.UserInteractionEnabled = false;
}
cell.TextLabel.Text = friend.Username;
return cell;
}
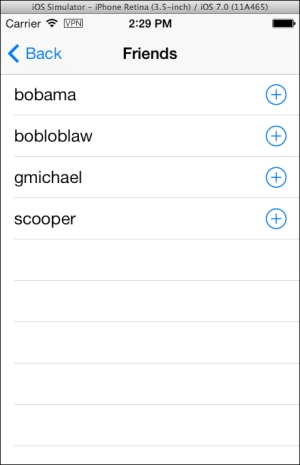
}Just as before, we implemented table cell recycling and merely set the text on the label for each friend. We used cell.AccessoryView to indicate to the user that each cell is clickable and starts a new conversation. We disabled user interaction on the button just to allow the row to be selected when the user clicks on the button. Otherwise, we'd have to implement a click event for the button.
Next, we'll need to modify FriendsController in the same way as we did for conversations as follows:
readonly FriendViewModel friendViewModel =ServiceContainer.Resolve<FriendViewModel>();

public override void ViewDidLoad()
{
  base.ViewDidLoad();

  TableView.Source = new TableSource();
}

public async override void ViewWillAppear()
{
  base.ViewWillAppear ();

  try
  {
    await friendViewModel.GetFriends();

    TableView.ReloadData();
  }
  catch(Exception exc)
  {
    new UIAlertView("Oops!", exc.Message, null, "Ok").Show();
  }
}
This will function exactly as the conversations list; the controller will load the friends list asynchronously and refresh the table view. If you compile and run the application, you'll be able to navigate to the screen and view the sample friend list we created in Chapter 4, XamChat – a Cross-platform App, as shown in the following screenshot: