Once you have created, validated, installed, and made the custom workflow template available in Web Publisher, you can test it by sending content in a workflow instance created from the custom workflow template.
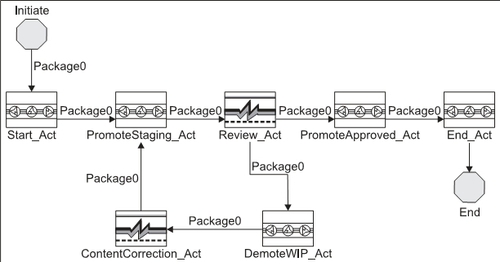
Figure 20.1 depicts the sequence of activities in the custom workflow we created in the previous chapter. This should serve as a good help while testing the workflow steps.

Figure 20.1: Custom workflow template
However, you first need to create the Web Publisher users that will participate in the workflow. In our case, we need to create a content author user and a content manager user in the Docbase before we can start using and testing the workflow.
The following steps will explain how to create users in Documentum:
- Log in to Documentum Administrator as an administrator or superuser and go to User Management | Users.
Choose menu option File | New | User to open up the New User creation screen.
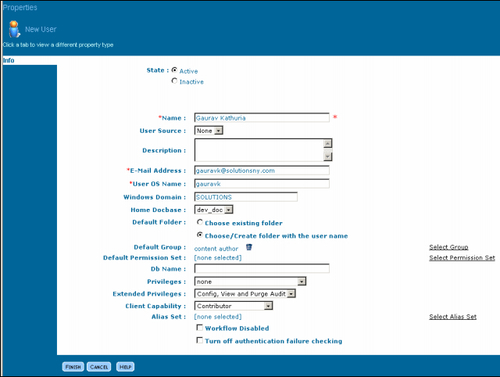
- Fill in the details for creating a content author user as shown in figure 20.2.

Figure 20.2: Creating a content author user
The User OS name gauravk already exists in the Windows domain and is used by Documentum for OS system authentication purposes. So, you need not provide a password for the NT user in the user creation screen shown in figure 20.2. However, you will have to specify the user settings/parameters as per your own environment.
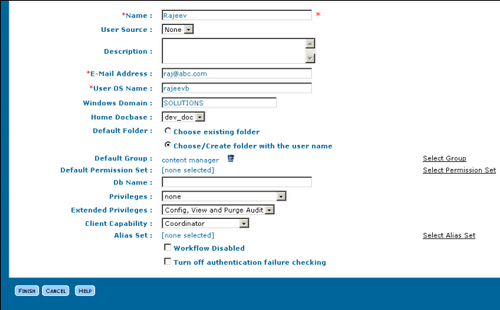
Similarly create a content manager user as per the details shown in figure 20.3.

Figure 20.3: Creating a content manager user
For details about users, groups, and their attributes please refer to the Documentum Content Server Fundamentals and Administration manuals.
