In this section, we will discuss in detail the steps involved in creating an Alias Set.
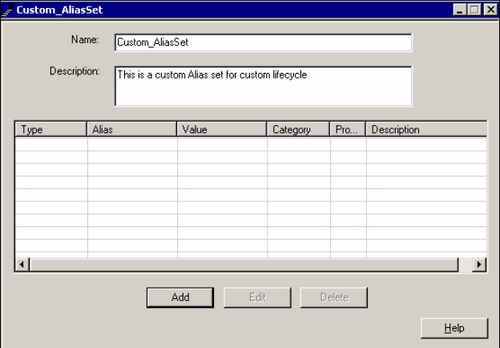
In our custom DocApp TestDocApp, choose the menu option Insert | Alias Set to create a new Alias Set. Figure 12.1 shows an empty Alias Set screen. Provide a unique name for the custom Alias Set along with a short description to explain its purpose.

Figure 12.1: Blank Alias Set screen
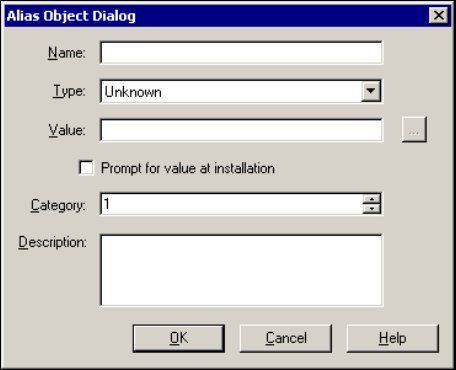
To add a new Alias in the Alias Set, click on Add. Clicking this button opens up the Alias Object dialog box as shown in the figure 12.2.

Figure 12.2: Adding a new Alias in the Alias Set
Provide a name for the Alias in the Name text box. Choose an Alias Type from the Type dropdown. The available Alias Types in the dropdown are:
- Unknown
- User
- Group
- User or Group
- Cabinet Path
- Cabinet or Folder Path
- Permissions Set
Depending upon the chosen Alias Type, the values in Value field get populated when you click on the ellipsis button (…).
Choose the Prompt for value at installation checkbox if you wish the System to prompt for a value for the Alias while resolving the Alias.
Alias Category is not used by the system but can be utilized for categorizing the Alias Sets for your custom application.
A short description can be provided to explain the intent/purpose of the Alias. Click the OK button.
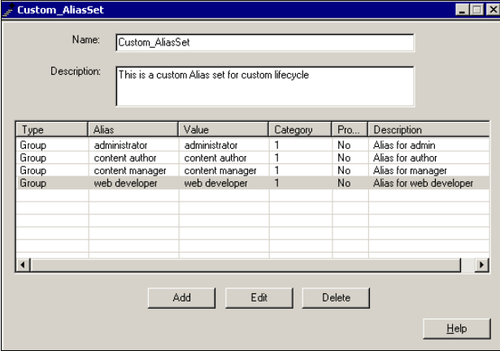
After you have provided Aliases for the Alias Set, the added Aliases are shown as individual rows in the Alias Set screen, as shown in figure 12.3.

Figure 12.3: Newly created Alias Set
Choose the Custom_AliasSet Alias Set shown in the left window pane of Documentum Application Builder, right-click, and choose Check in selected object(s) to checkin the Alias Set in Docbase.
