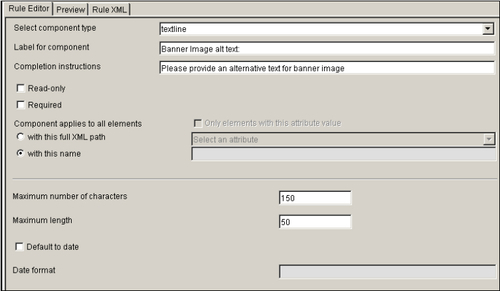
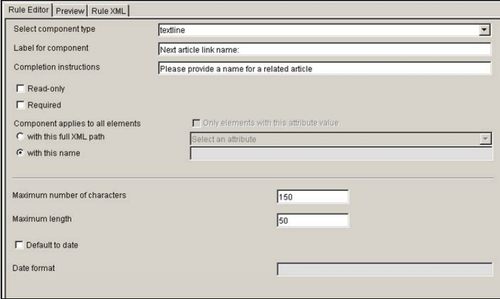
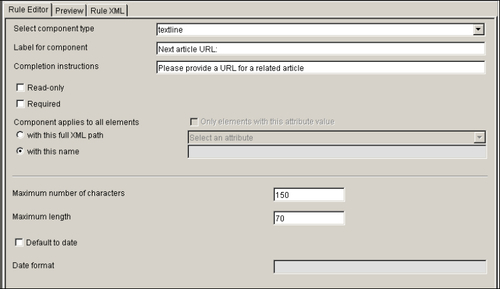
Having created a Template file for our News Article example in the previous chapter, we are all set to go ahead and design a Rules file for the Template. Recall that a Rules file is a simple XML file used to define the various fields in a Template file. Rules files reside in Documentum Web Publisher within the Site Manager | Rules folder in the Docbase. Follow the steps mentioned in the following section to create a Rules file for your Template file. Note that Documentum allows you to associate a particular Rules file with multiple Template files.
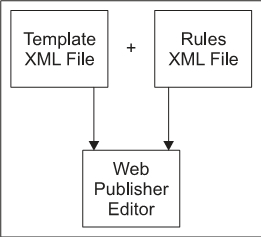
Figure 14.1: Association of Rules file and template file
In this section, we will discuss the detailed steps for creating a Rules file.
- Log in to Web Publisher as an administrator or a web developer user and go to the Site Manager | Rules folder. It is a good approach to create a new folder within the Rules folder to identify and separate specific Rules files for your custom application.
Choose the menu option File | New | Folder. The new folder creation screen comes up as shown in figure 14.2.
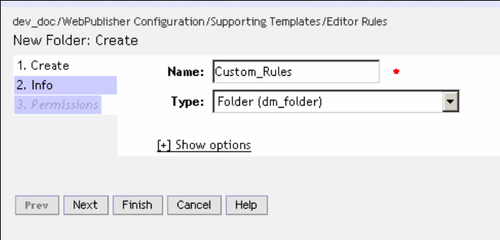
Figure 14.2: New folder for storing Rules files
Provide a valid name for your custom Rules folder (say
Custom_Rules) and click on the Finish button. You could also attach some ACL (Permission Set) to the custom Rules folder for security reasons, allowing and disallowing certain groups and users from accessing the same. This can be done by clicking on the Permissions tab shown in figure 14.2. - Rules files can be created using any of the available XML/text editors, but that would require you to understand and learn Documentum's Rules file syntax and follow the instructions as provided in Documentum manuals. Instead, Documentum has developed a simple Rules file editor application in Web Publisher that assists you in automatically creating a Rules file based on the parameters you choose/specify through a simple Rules file creation GUI screen.
A simple configuration step needs to be performed before you can start using the Rules file editor application. Click on the Preferences button in Web Publisher and go to the Web Developers tab as shown in figure 14.3.
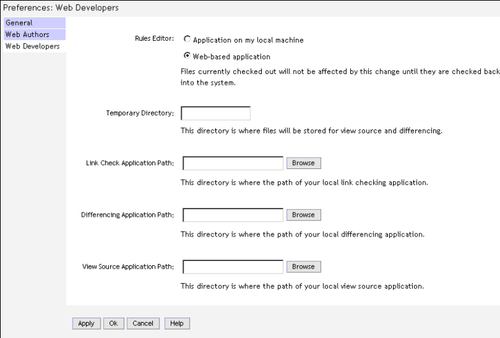
Figure 14.3: Setting preferences for Documentum's Rules editor application
In the Rules Editor section, choose the radio button for Web-based application. Click on Apply and then OK. This ensures that when you create a new Rules file or edit an existing Rules file, Documentum's internal Rules file editor is automatically invoked.
- Having set the Rules editor preferences, go within the custom Rules folder
Custom_Rulesand choose menu option File | New | Rule. The new rule creation screen is shown in figure 14.4. Provide some valid name for the rules file (saycust_news_art_rule.xml)and click on OK.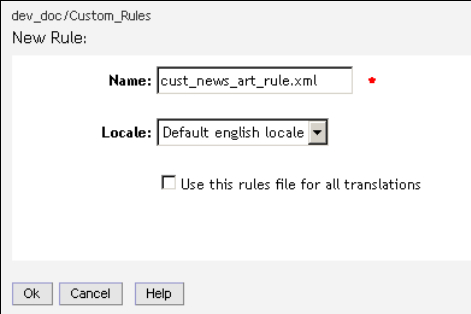
Figure 14.4: Providing a name for the custom Rules file
- The system asks you to browse through existing categories in the Docbase and choose the Template for which the Rules file needs to be created, as shown in the figure 14.5.
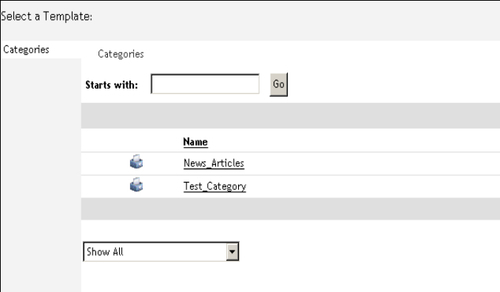
Figure 14.5: Existing categories in Docbase
Refer to figure 14.6; select the category that houses the template we created in the previous chapter (News_Articles) and select the checkbox against the Template file (cust_news_art_ templ.xml in our case). Finally, click on OK.
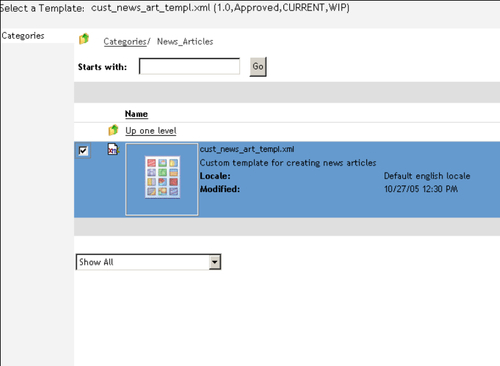
Figure 14.6: Choosing the Template file for which a Rules file needs to be created
Documentum invokes the Rules file editor as shown in figure 14.7. We can now add Rules to the various fields in the Template file.
All the XML elements in the Template file are shown under the Tree View tab of the Rules editor. You simply need to select these XML elements individually and add Rules to them.
Note that within the Tree View tab, the template XML elements are in a read-only mode, preventing you from modifying the Template file structure. However, by switching to Text View tab, you have the flexibility to alter the structure of XML elements in the associated Template file.
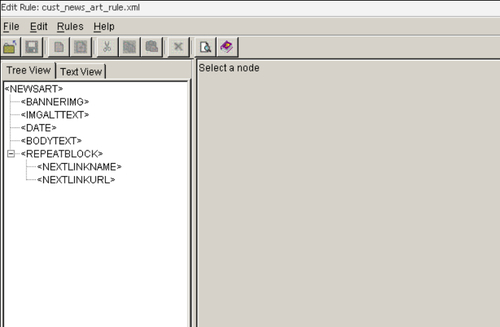
Figure 14.7: Rules file editor
It is recommended to save the Rules file during the creation process by choosing File | Save. At any point of time you can close the Rules editor and exit by choosing the option File | Close.
- Refer to figure 14.8; select an XML element from the Template file (say <BANNERIMG>) under the Tree View tab and choose menu option Rules | Add Rule.
The following types of widgets can be created in Web Publisher editor for the template XML elements:
- Textline: This is a single-line text field widget allowing content authors to type text without any formatting.
- Content: This is a multi-line text field widget allowing content authors to type text and format the same via available menu options such as: bolding, italicizing, changing fonts, etc.
- Choice: This is a drop-down selection list allowing content authors to choose a particular value from existing values. Values in the list can be populated from either a hard-coded fixed list or dynamically via a DQL query in Docbase.
- Textselector: This is a widget allowing content authors to choose some text from a chosen existing file within the Docbase.
- Graphic: This is a selection list widget allowing content authors to choose an image from the existing images in the Docbase.
- Checkbox: This is a check-box widget allowing content authors to either select or de-select it.
- Xselector: This is a file-selection widget allowing content authors to choose a file from a list of existing files in the Docbase.
- Repeating Blocks: This is a widget that serves as a container for other elements. Designating a set of elements/fields as repeatable allows you to render those elements multiple times in the editor. This allows content authors to duplicate a particular field or specify multiple values for multiple instances of the same field.
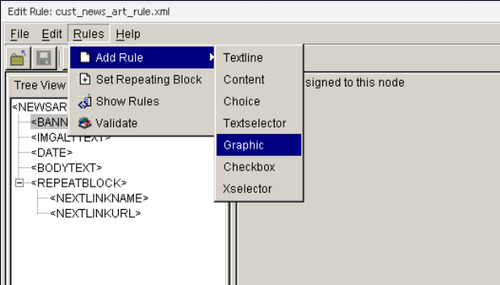
Figure 14.8: Adding a Graphic rule
As shown in figure 14.8, choose the Graphic option to add a rule for the <BANNERIMG> template element.
- Fill in the fields for the graphic widget as shown in figure 14.9. Provide some label for the field, say Banner Image. Provide some instructional label for the convenience of content authors, say Please choose a banner image. Make the field mandatory by choosing the checkbox against Required.
- Define the selection list for displaying the existing images in the Docbase from which the content authors can choose. Choose the display option as List control.
Enter a DQL query to populate the selection list:
dm_document where folder(/Test_WebCabinet/Custom_Images)
Note that you need not provide the keywords
select * from.The assumption here is that there pre-exists a folder
Custom_Imagesin the Docbase within theTest_WebCabinetweb cabinet containing image files. If it does not exist, create one and place some images within it.The attribute name to be used in the select query is to be provided, say
object_name. This eventually translates into the following DQL:select object_name from dm_document where folder(/Test_WebCabinet/Custom_Images)
Click on the Test Query button to check if the entered DQL syntax is correct and find out the query results that will be shown in the widget at run time.
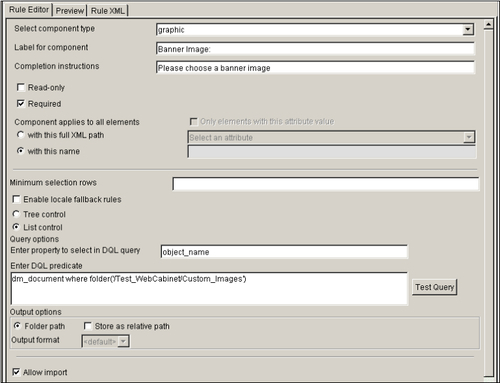
Figure 14.9: Defining Rules for the graphic element
- You can optionally provide an option for content authors to import images within a specified folder in the Docbase through the graphic widget by selecting the Allow import checkbox.
- Click on the Browse Docbase button shown in figure 14.10 and select the folder where image files will be imported and saved.
- Select the object type with which the imported images will be associated by clicking on the Select button next to the Type field.
- Select the Lifecycle that the imported images will be attached to, by clicking on the Select button next to the Lifecycle field.
- Select the category that the imported images will be associated with, by clicking on the Select button next to the Category field.

Figure 14.10: Allowing image import options in the graphic element
- Save the Rules file and click on the Preview tab (refer to figure 14.11) to see how the Banner Image field will appear when the content author creates content using the News Article template.
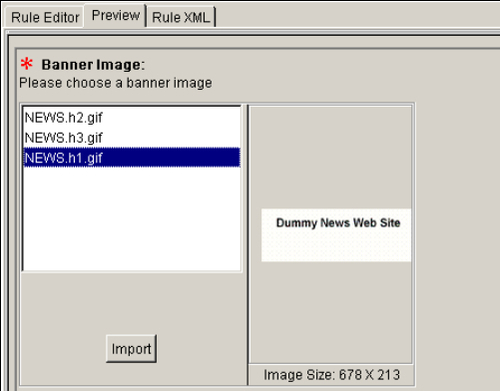
Figure 14.11: Preview of the banner image graphic widget
Notice that the Import button has also been added allowing you to import image files from your local machine to the specified folder location within the Docbase.
- In order to view the automatically system-generated Rules file code for the graphic element, click on the Rule XML tab (refer to figure 14.12):
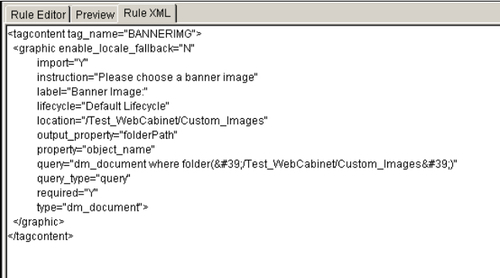
Figure 14.12: System-generated Rules file code
Similarly, you can create other widgets for the remaining template fields by selecting the Rules editor widget types shown in figure 14.13.
Template XML element
Rules file widget
BANNERIMG
Graphic
IMGALTTEXT
Textline
DATE
Textline
BODYTEXT
Content
REPEATBLOCK
Repeating Block
NEXTLINKNAME
Textline
NEXTLINKURL
Textline
- After highlighting the respective template XML elements and adding Rules to them, you can save the Rules file and exit the editor by choosing menu option File | Close.
Check-in the newly created Rules file (
cust_news_art_rule.xml) and make the Template file (cust_news_art_templ.xml) available by clicking the Make Available button as discussed in the previous chapter.For your convenience, shown next are some screenshots taken while creating Rules for the remaining template XML elements. You may treat these as guidelines while creating your Rules files:
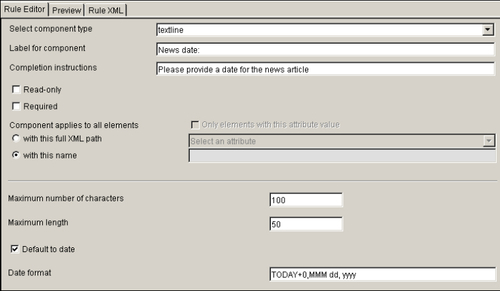
Figure 14.15: Textline widget for DATE element
Note that the default date format in figure 14.15 has been set as: TODAY+0,MMM dd, yyyy.
Whenever content is created using the News Article template, the News date: field will be pre-populated with that particular day's date in the specified format.
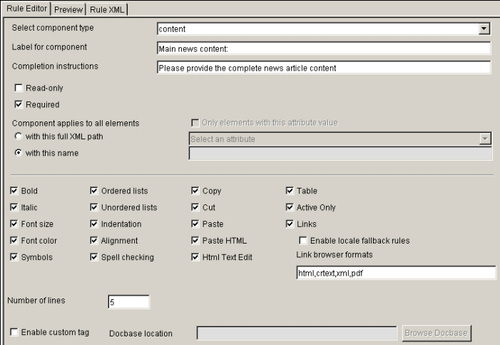
Figure 14.16: Content widget for BODYTEXT element
In figure 14.16, numerous formatting options can be selected for the multi-line text field. Additionally, you can choose the checkbox shown against the Links option to allow content authors to create hyperlinks to existing files in Docbase. Link browser formats allows you to specify the various file formats you wish to be displayed for the content authors to choose from. By default, only html and crtext formats are enabled, allowing files with .htm, .html, and .txt extensions to be shown.
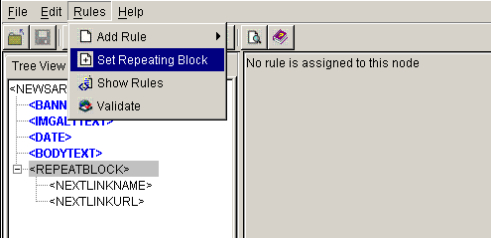
Figure 14.17: Setting a repeating block for the REPEATBLOCK element
The <REPEATBLOCK> template element encloses <NEXTLINKNAME> and <NEXTLINKURL> elements, signifying that content authors can provide multiple article link names and their URLs within this block. In order to make <REPEATBLOCK> a repeating block widget, highlight it and choose menu option Rules | Set Repeating Block, as shown in figure 14.17.

Figure 14.18: Defining a repeating block
Provide a label and instructional text for the convenience of content authors in the repeating block, as shown in figure 14.18.

