We have set up Content Server in the previous chapter and are all set to create our first Docbase. Once the Docbase is ready, we can create our custom DocApps in the Docbase and play around with our custom‑defined objects.
First things first—let's come up with a good (and of course rational) name for your Docbase before we jump ahead. In this book, dev_doc is the name we have chosen. Our custom Docbase will be referred to by this name throughout this book.
As with almost all commercial software, there are a handful of prerequisites for setting up a Docbase. There is no harm repeating that one should always consult the concerned Release Notes in their entirety to avoid any unforeseen hiccups during the installation process.
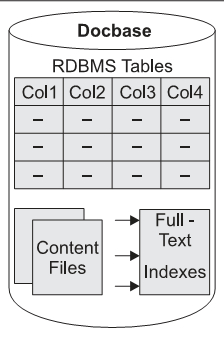
Figure 6.1: Logical representation of a Docbase
Figure 6.2 lists some points to be borne in mind before commencing with Docbase creation:
|
Entity |
Comments |
|---|---|
|
Content Server |
Should be setup correctly before creating a Docbase. |
|
Windows Regional Settings |
Need to be set to specify a four-digit date format. |
|
Docbase Name |
Limitations: Maximum length is 32 characters. Can consist of letters, numbers, and underscores. The first character should be a letter. Should not contain white spaces or non-alphanumeric characters. Cannot have the name "docu". Must be unique in the case of multiple Docbases on the same Content Server. |
|
Docbase ID |
Limitations: Must be a number in the range 1 to 16777215. Should not start with zero (0). Must be unique in the case of multiple Docbases on the same Content Server. |
|
Docbase Owner |
Limitations for installation owner's user name: Consists of numbers, letters, hyphens, and underscores. The first character should be a letter. All characters must be ASCII. Password should consist of numbers, letters, periods, hyphens, and underscores. Must be unique in case of multiple Docbases on the same Content Server. |
|
ODBC Data Source |
Should be correctly configured in case of SQL Server. |
- Set up a DSN (Data Source Name) on the Content Server machine, so that the Docbase can connect and talk to the underlying SQL Server RDBMS. On your Windows machine, go to Programs | Administrative Tools | Data Sources (ODBC). Choose System DSN and click the Add button.
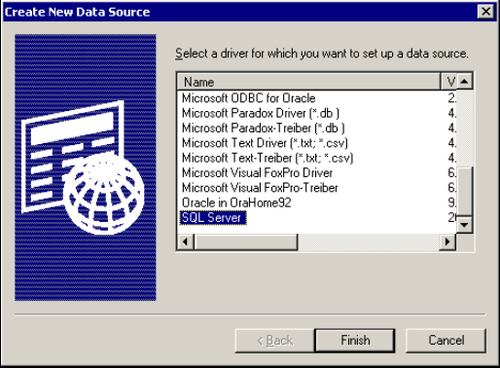
Figure 6.3: Selecting SQL Server as the Data Source
- Specify the DSN name and a short description. Also provide the host name of the SQL Server DB. In this example, SQL Server was installed locally on the same machine as the Content Server.
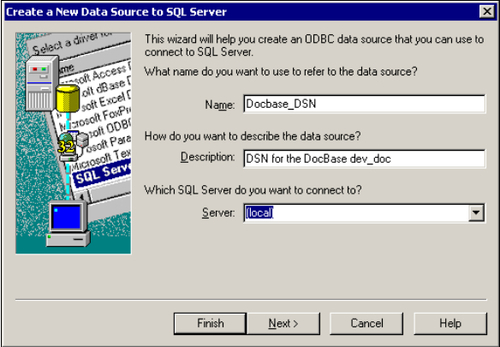
Figure 6.4: Specifying SQL Server server name
- In the case of SQL Server authentication, provide a valid login ID and password.
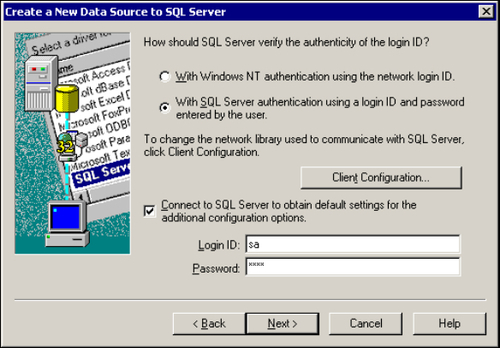
Figure 6.5: SQL Server authentication credentials
- Do not change the default database or the language of SQL Server system messages unless required. Click the Next button till you reach the Finish button.
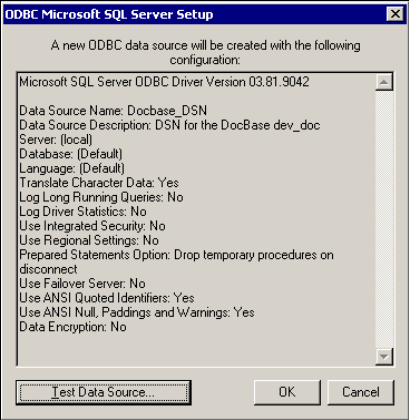
Figure 6.6: Testing the data source
- Click on Test Data Source to check whether the database connection can be established correctly. If this works fine, click OK.
The created DSN now shows up along with other DSNs in the System DSN tab. Finally click on OK. We have successfully created a DSN for connecting to a SQL Server database.
- Log in as the installation owner on the Content Server machine and go to Programs | Documentum | Documentum Server Manager. From the Documentum Server Manager panel, select the Utilities tab and click on Server Configuration.
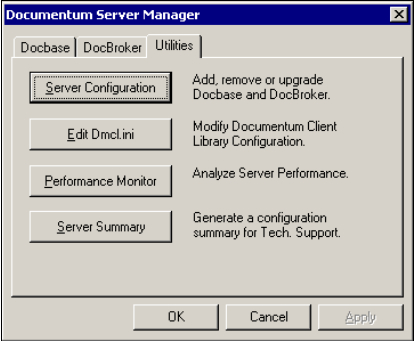
Figure 6.7: Documentum Server Manager
The following error message might be seen if the domain is unavailable due to connectivity issues or if some changes have been made to the domain the user is a member of:
"Unable to initialize admin dll (OSEnv)"
- Enter the installation owner's password and click Next.
- If required, optionally enable the Trusted Content Services (TCS) and provide the license key. Then click the Next button.
- If required, optionally enable Content Services for EMC Centera and provide the license key. Then click the Next button.
- Select the configuration type:
- Express Configuration
- Quick. Less information needs to be provided during the installation procedure. Default parameters provided by Documentum during setup.
- Limits the amount of customization we can do to the Docbase and Content Server.
- Custom Configuration
- Lengthier mechanism requiring more inputs from user during installation.
- Allows customization of Docbase configuration scripts, data files, etc.
This example uses the Express Configuration type to create the Docbase.
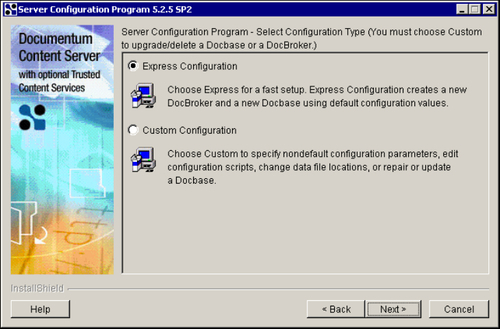
Figure 6.8: Choosing configuration type
- Express Configuration
- If required, optionally choose Content Storage Services. Then click the Next button.
- Provide a valid Docbase Name and Docbase ID (as per the limitations specified in the beginning of the chapter). Choose Docbase Size, Windows Authentication Domain, and specify whether the Windows Service Startup Type for managing the Docbase should be automatic or manual.
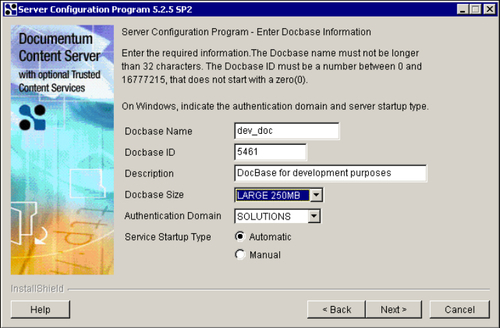
Figure 6.9: Specifying Docbase parameters for setup
- Either allow Documentum to create/configure a Docbase owner (database user) for you or choose an existing SQL server database account if you have already made one.
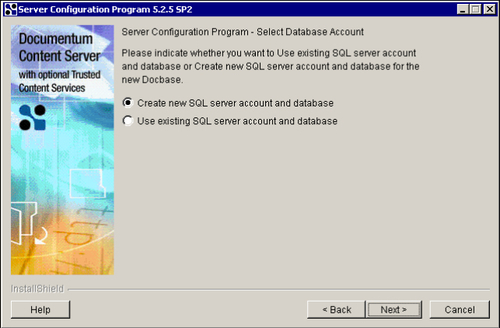
Figure 6.10: Setting up database account
- Select the DSN for database connectivity (created in the initial few steps).
In this example, the defaults provided by Documentum for Docbase owner name (the name of the specified Docbase) have been chosen. The default database name is in the following format:
DM_<Specified Docbase name>_docbase - Provide the Docbase owner password and SQL Server DB administrator user name and password.
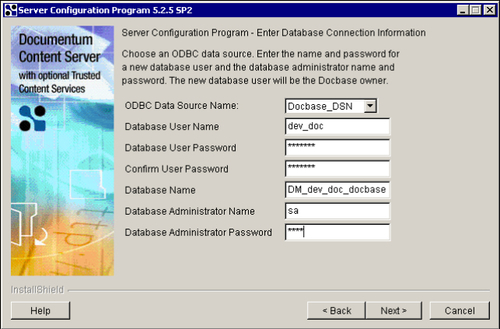
Figure 6.11: Providing Database connection parameters
After the Docbase has been created and if someone has unknowingly changed the password for the Docbase owner (DB owner), then the following error message is seen during Docbase startup:
[DM_SESSION_I_RETRYING_DATABASE_CONNECTION] info: "The following error was encountered trying to get a database connection: STATE=28000, CODE=18456, MSG=[Microsoft][ODBC SQL Server Driver][SQL Server]Login failed for user 'dev_doc'.
- Provide an SMTP server name or IP address and a valid email address for the Documentum installation owner. Click the Next button.
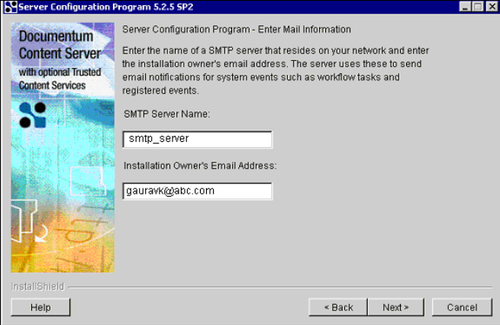
Figure 6.12: Specifying SMTP server and installation owner's email address
- Choose the WebPublisher DocApp to be installed on the Docbase in case we need to use Web Publisher with the Docbase in question.
- This completes Docbase creation and the newly created Docbase shows up in the Documentum Server Manager panel under the Docbase tab.
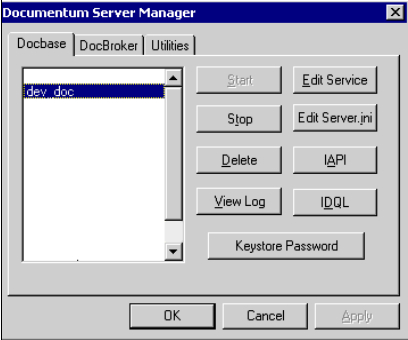
Figure 6.13: Newly created Docbase as seen in Documentum Server Manager
The following error message is seen during Docbase startup if Docbase was configured on a Content Server with case-insensitive SQL Server:
[DM_SESSION_I_INIT_BEGIN]info: "Initialize Crypto Objects."
[DM_SESSION_E_INIT_FAILURE1]error: "Failure to complete Crypto Objects initialization."
[DM_SERVER_I_START_ID]info: "Docbase dev_doc was not successfully opened.
You can create multiple Docbases on the same Content Server with different names to serve the purpose of a development Docbase and a test Docbase (for example). Also, you can create multiple servers for a single Docbase so that request processing is spread across multiple servers to achieve performance gains. However, a detailed discussion regarding such configuration is beyond the scope of this book.
