We discussed earlier that almost everything in Documentum is treated as an object, and objects are nothing but instances of object types. The key to a successful implementation in Documentum is designing the custom object types well.
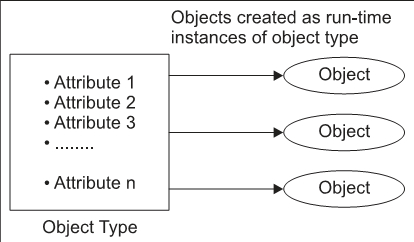
Figure 11.1: Logical representation of a Documentum object type
As discussed in Chapter 2 Documentum object types adhere to a hierarchy protocol. A subtype extends from a supertype and can itself be a supertype for another object type. Figure 11.2 shows a snapshot of the object type hierarchy in Documentum. Note that while SysObject (dm_sysobject) is a subtype of Persistent objects in Documentum, it is the supertype of objects such as Folders, Documents, Jobs, and Methods. Though not depicted in the figure, the Folder object (dm_folder) in turn is a supertype of the Cabinet object (dm_cabinet).
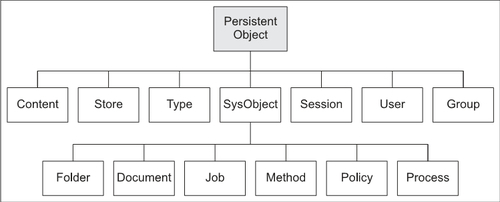
Figure 11.2: Sample object type hierarchy in Documentum
Having understood the basics of Documentum objects, let us continue with our case study of the dummy newspaper site and design/create an object type for the center pane news article.
In this section, we will discuss in detail the steps for creating object types. First you need to identify the object types needed for the application. For the center pane article, we need to have one object type, say cust_newsarticle (short for custom news article) and the News Article template will be associated with this object type. In order to create a new object type, choose Insert | Object Type in the DocApp builder and specify the name cust_newsarticle under Type name as shown in figure 11.3. The new object type shows up in the checked-out mode under the Object Types folder in the left tree pane in Application Builder.
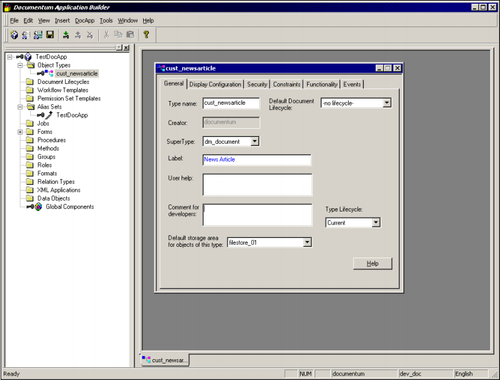
Figure 11.3: Creating a new object type
Object type names are unique and globally accessible within the Docbase, so it is critical to adopt an intelligent naming convention for your custom object types to distinguish them from the thousands of existing objects in the Docbase. Additionally, when deploying the object types to other Docbases, a good naming convention avoids any potential naming conflicts in the target Docbase.
Figure 11.4 shows some limitations we need to keep in mind while naming object types.
|
Limitation |
|---|
|
Should not begin with 'dm_' since Documentum names its internal objects with the naming scheme: dm_ |
|
Should not begin with: white space, single quote (') or a numeral |
|
Should have a maximum length of 18 characters |
|
Should not have a name that matches with a reserved word in Documentum DQL (for example: CABINET, DELETED, SELECT, INTEGER, etc.) |
The Object Type General tab is shown in figure 11.5:
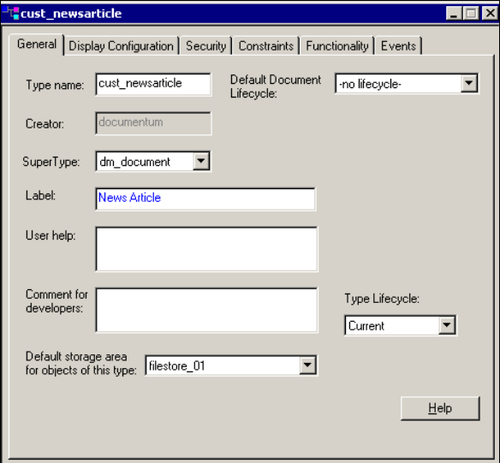
Figure 11.5: Object Type General tab
Each object type can either extend from an existing object type in Documentum or have its supertype as NULL.
In our case, News Article is a document object type and so we extended it from dm_document object type. Other object types shown in the Super Type dropdown are: dm_job, dm_folder, dm_user, etc.
Each object type in Docbase is stored within its own database table in the Docbase's underlying RDBMS.
As a rule of thumb, do not extend the object type hierarchy too deep (deeper than three levels) since internally this amounts to as many database joins by Documentum. You could, for example, extend your custom object type cust_newsarticle from dm_document and further extend another custom object type (say cust_newsarticle_sub) from cust_newsarticle, but not deeper than this!
Tip
It is better to decide the name and supertype of custom object type well, because after checking in the object type in the Docbase, you cannot change its name or its supertype.
Now follow these steps to finish off with creating object types:
- Under the Display Configuration tab, the specific attributes to be shown for the specific object type under specific conditions can be configured.
However, note that this feature is applicable only to WDK 5.2 + applications (such as Webtop, Web Publisher, etc.) and Desktop 5.2 + applications (such as Desktop Client).
You can see in figure 11.6 that by default three application scopes are shown for DcDesktopClient (Desktop), Web Publisher and Webtop (WDK clients).
For each of these scopes, you can choose which specific attributes (shown in the bottom section of figure 11.6) need to be shown under their respective tabs in the Properties screen.
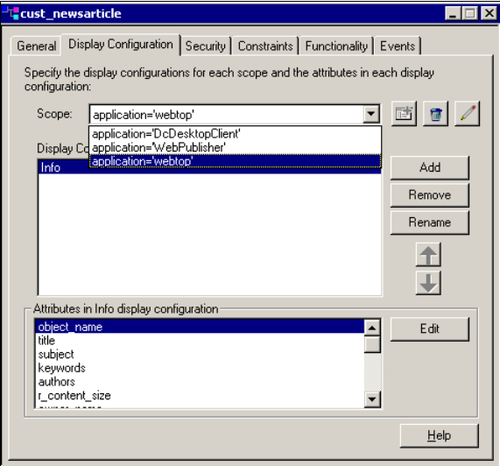
Figure 11.6: Object Type Display Configuration tab
- The Properties screen in Web Publisher (refer to figure 11.7) shows the various tabs such as Info, Publishing, History, etc. The attributes shown under each of these tabs can be configured via the Display Configuration section in Object Type.
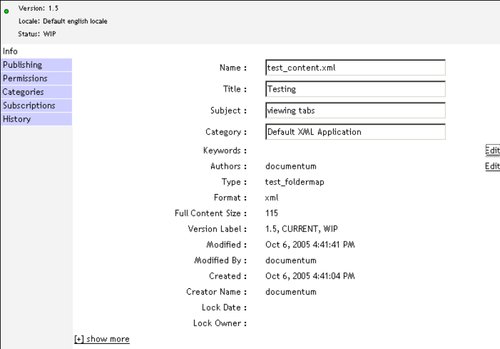
Figure 11.7: Properties screen tab in Web Publisher
- Under the Display Configuration List, you can introduce a new tab or rename an existing tab by clicking on the Add or Rename buttons respectively, as shown in figure 11.6. You can even remove a tab altogether via the Remove button.
Under the Attributes in… display configuration section, you can choose the specific attributes to be shown for the selected tab by clicking on the Edit button.
- Within the Security tab (refer to figure 11.8), there is an option to associate a default Permission Set (Access Control List) with an object type. This ensures that whenever an object is created from this object type, it will be assigned the Permission Set that we have set as default for the object type in question.
This is a good mechanism for controlling permission levels for accessing or modifying the objects of a specific object type
For specifying the Permission Set, choose from the existing Permission Sets shown in the Name: dropdown. All other fields such as Owner, Description, Permissions, and Your Permission are read-only fields, automatically populated by Documentum once you have chosen a Permission Set from the dropdown.
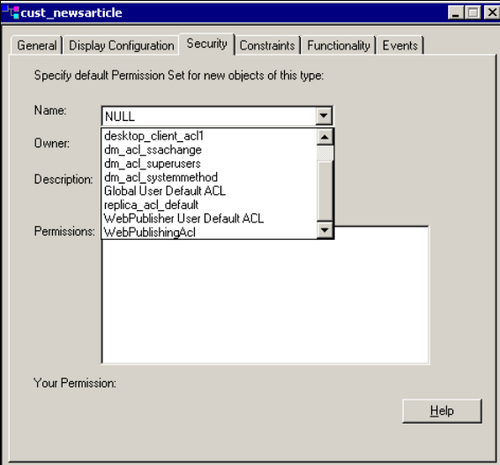
Figure 11.8: Object Type Security tab
- Within the Constraints tab (refer to figure 11.9), you can specify consistency checks using Docbasic (Documentum's proprietary language) expressions for the object type's attribute values. Under the Constraint expression section, enter a Docbasic expression.
Suppose we need to ensure that whenever a content object is created from the object type
cust_newsarticle, itssubjectproperty should never be left blank. The Docbasic expression in such a scenario would be:not(subject = "")After entering the Docbasic expression, click on Check Syntax to confirm that the entered Docbasic expression has the correct syntax. You can refer to the Documentum Docbasic reference manual to read about Docbasic and its application usage.
If the attribute constraint is not met, the error message that needs to be shown to the user by the application should be entered in the Error message string… section.
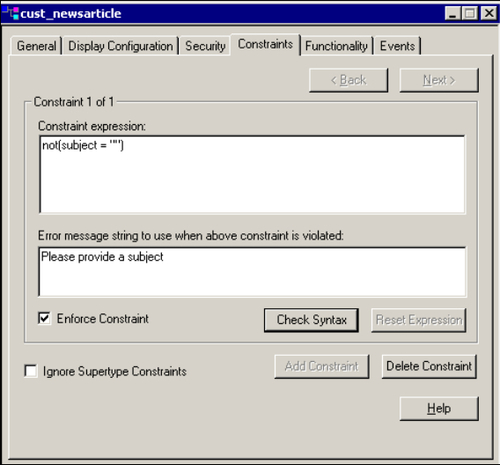
Figure 11.9: Object Type Constraints tab
- In our case, if the subject attribute for the content object is left blank, the error message Please provide a subject is shown to the content creator.
You can add multiple constraints, by clicking on the Add Constraint button. On doing so, the Back and Next buttons get enabled, allowing us to move back and forth between the added constraints.
- In our case, if the subject attribute for the content object is left blank, the error message Please provide a subject is shown to the content creator.
- An object type inherits most of its functionality from the supertype extended by it. Also, the components of the default DocApp are used to implement most of the functionality inherited from the supertype.
Using Documentum Application Builder, you can perform a variety of operations such as:
- Adding a new functionality class and the component used to implement it.
- Specifying a different component to implement a functionality class inherited from the supertype.
- Disabling an inherited functionality class altogether.
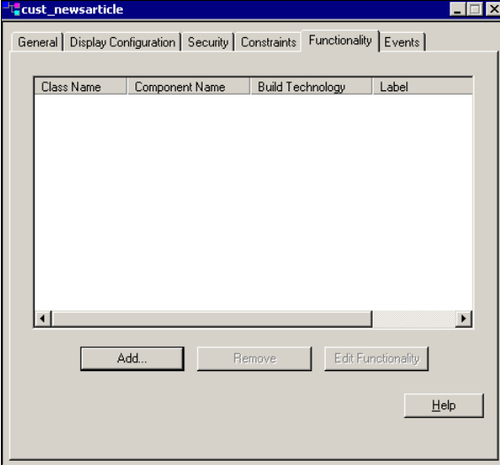
Figure 11.10: Object Type Functionality tab
- Figure 11.10 shows the Functionality tab for Object Type in Documentum Application Builder.
- Under the Events tab (refer to figure 11.11), you are shown the system events (read-only) for the object type.
You can add, modify, and remove application-specific events by clicking on the Add, Remove, and Edit... buttons respectively. These events are used for auditing purposes in the Docbase.
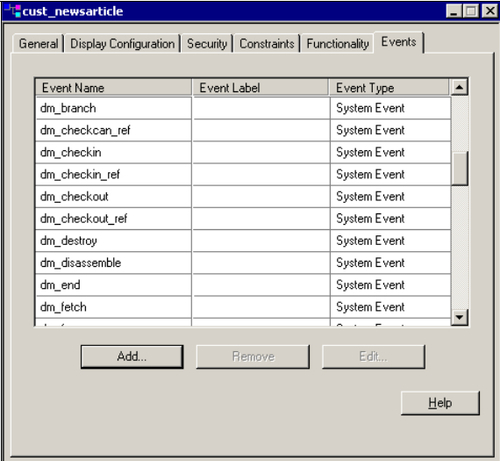
Figure 11.11: Object Type Events tab
- After you have filled in the relevant data in all the necessary tabs, right-click on the object type
cust_newsarticle(in the left tree pane) and choose the option Check in selected object(s) to check-in the object type in Docbase. Doing so makes the newly created object type available in the Docbase for applications. - Till now the object type
cust_newsarticlewas not associated with any lifecycle. Let us now associate it with Documentum's Default Lifecycle, so that whenever content is created from this object type, it is automatically attached to the Default Lifecycle.Insert Default Lifecycle into the TestDocApp by choosing Insert | Object from the Docbase | Document Lifecycle menu option.
Once the Default Lifecycle is included in our DocApp, open it in Edit mode as shown in figure 11.12.
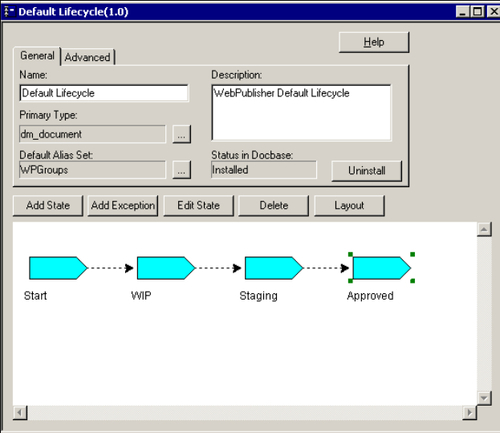
Figure 11.12: Documentum Default Lifecycle
- Please click on the small box (...) shown against the Primary Type field and in the opened popup (refer to figure 11.13), move the
cust_newsarticleobject type from Available Subtypes to Acceptable Subtypes section by clicking on the à button. Finally, click on OK.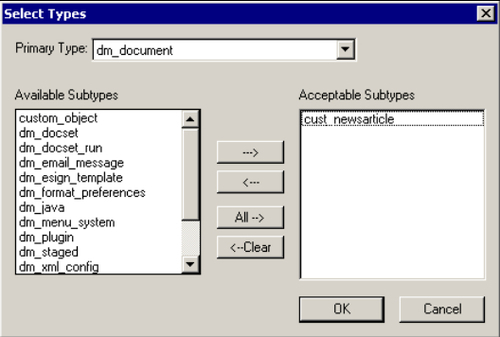
Figure 11.13: Select Types popup
Tip
Remember to check-in the lifecycle (refer to figure 11.14) in the Docbase as Same version and not as a Major/Minor version. This will prevent creation of multiple Lifecycle versions in the Docbase and hence avoid possible confusions arising out of numerous versions.
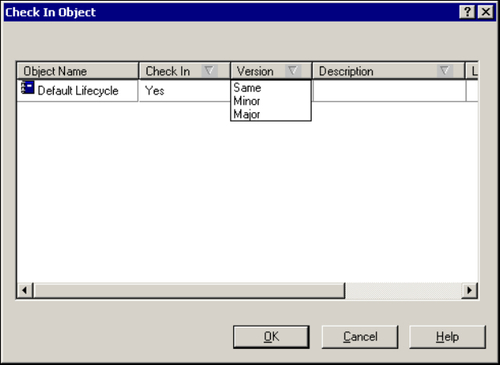
Figure 11.14: Checking in lifecycle object in the Docbase
- After the Default Lifecycle has been checked in, the system brings it back to Draft state, thus making it unavailable for use by applications. Open the lifecycle in View mode and click on Validate and then Install to install the lifecycle back in the Docbase.
- Now we need to specify a default lifecycle for the newly created object type. Open the object, type
cust_newsarticlein Edit mode and choose Default Lifecycle from the Default Document Lifecycle dropdown as shown in figure 11.15. Checkin the modified object type back into the Docbase.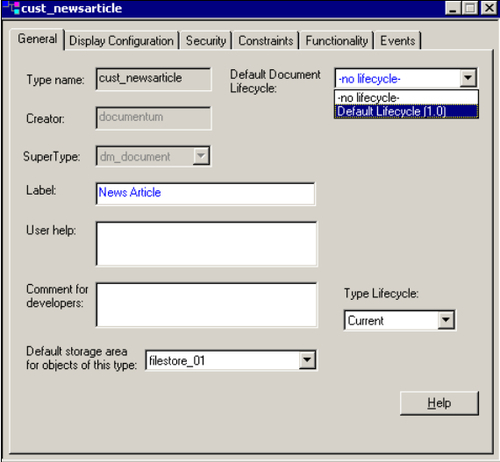
Figure 11.15: Setting a lifecycle for the object type
We will be covering lifecycles in detail in the next chapter; so don't worry if you don't understand the relation between object type and lifecycle well.
