We have created a Template file and associated it with a Rules file in the previous chapters. What now remains is the creation of a Presentation file (XSL) to format the data in the content file into a suitable rendition such as HTML, WML, etc. The website pages are nothing but the web renditions of content XML files via Web Publisher presentation files and so the design and creation of Presentation files is crucial in a web content management project.
Additionally, Presentation files separate the structure of content from its layout. While the templates and Rules files simply capture the structure of the content to be entered by content authors, the Presentation files focus on how the entered content is formatted for generating web renditions.
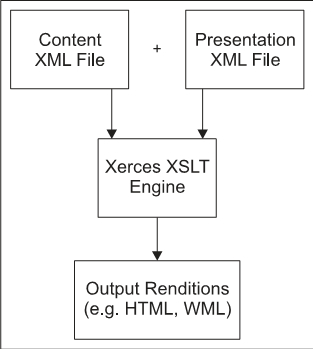
Figure 15.1: Creation of renditions via stylesheets
A rendition is created by Documentum whenever a content file is saved and checked into the Docbase. Behind the scenes, Web Publisher applies the Presentation file (XSL stylesheet) to the content XML file and generates the prescribed rendition. Presentation files in Web Publisher are of two kinds:
- Editor Presentation files (XSL stylesheets): Used for formatting Web Publisher editor XML content and stored in the Docbase at the following location: Site Manager | Presentations | Editor.
- External Presentation files (HTML wrappers): Used for external applications and stored in the Docbase at the following location: Site Manager | Presentations | External. External presentation files provide standard frames and wrappers to the content embedded within the
<body></body>elements of HTML content files.
Creating Presentation files in Documentum is not a big deal and the following steps explain how they can be easily built and associated with template files.
- Log in to Web Publisher as an administrator or a web developer user and go to Site Manager | Presentations | Editor. As we saw with Rules files, it is a good approach to create a new folder within the Editor folder to identify and separate specific Presentation files for your custom application.
- Choose the menu option File | New | Folder. The new folder creation screen comes up as shown in the figure 15.2.
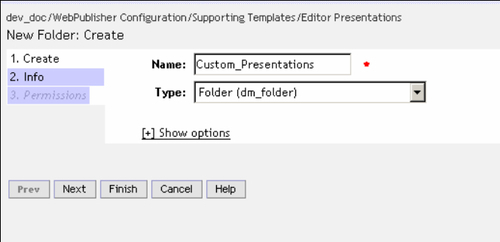
Figure 15.2: New folder for storing Presentation files
- Provide some valid name for your custom Presentation file folder (say Custom_Presentations) and click on the Finish button. You could also attach some ACL (Permission Set) to this folder as in the case of Rules files.
- Create a valid/well-formed industry-standard XSL stylesheet in your favorite editor such as XML Spy®, Notepad, etc. and provide some meaningful name to it (say
cust_news_art_pres.xslfor the News Article template). Save the newly created Presentation file within a convenient folder location on your machine's hard drive.Figures 15.3 and 15.4 show a sample presentation file for the News Article template. Note that you could improve it (and there definitely is enough scope for improvement!) as per your specific business requirements.
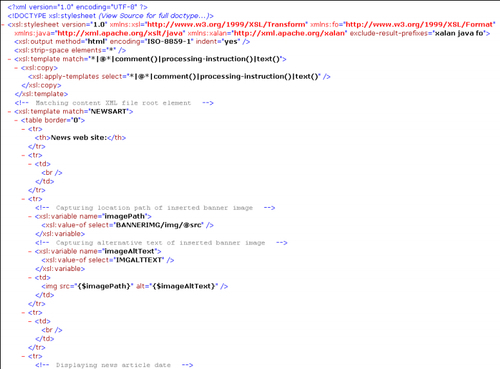
Figure 15.3: Sample News Article Presentation file
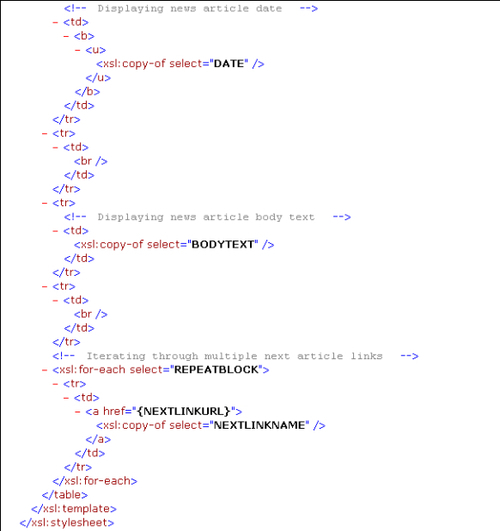
Figure 15.4: Sample News Article Presentation file—continued
Note carefully how the various template file XML elements have been formatted in the XSL stylesheet. It may be worthwhile to flip over to Chapter 13 and keep the template XML file beside you while studying the above Presentation file.
- Go within the Custom_Presentations folder created in step 1 and choose File | Import. The file import selection screen comes up as shown in figure 15.5. Click on the Add Files button; browse your machine's folder paths to select the newly created presentation file. Once you have selected the presentation file, click on Next.
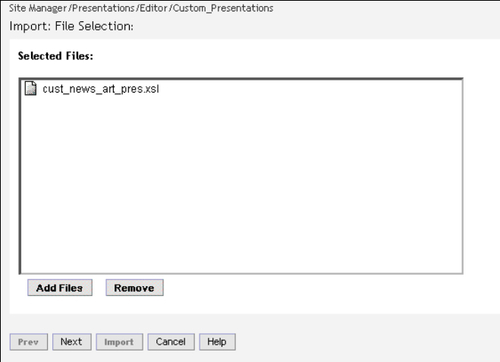
Figure 15.5: Importing a newly created Presentation file
- The File Name field is shown (refer to figure 15.6) for you to provide some valid name for the selected file. Keep the Presentation file name as it is without altering it and click on Import.
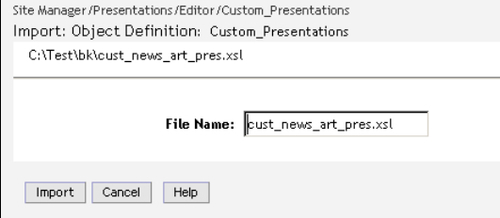
Figure 15.6: Final step in importing Presentation file
- The Presentation file is imported into the Docbase within the prescribed folder path
/Site Manager/Presentations/Editor/Custom_Presentations.Now that you have created and imported the Presentation file in Docbase, you need to associate it with the news article Template file we created in chapter 13. However, understand that associating a Presentation file with a Template file requires specifying a rendition format for the output of Web Publisher.
Rendition formats could be default Documentum recognized formats such as
html(standard HTML format) orcrtext(text format), or custom formats identified for one's business needs. If you require that our Presentation file should style the News Article content file and create a rendition format of the MIME typehtmlbut with some customfile extension (say.cshtml), then this is what you need to do:Log in to Documentum Administrator as an administrator user and go to Administration | Formats.
Choose the menu option File | New | Format and provide the details of the new format as shown in figure 15.7. The details are:
Name:
custom_formatDefault File Extension:
cshtmlDescription:
Custom formatMime Type:
Text/html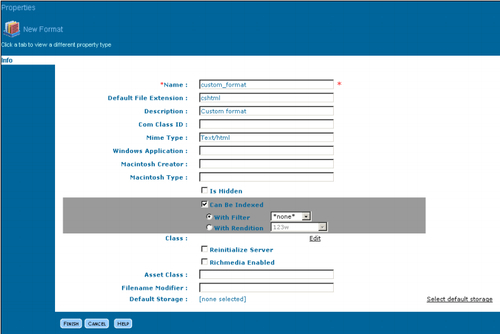
Figure 15.7: Creating a custom format in Docbase
Tip
Do not forget to include the custom format within your Site Publishing configuration against the Formats field in the Content Selection Settings section. This ensures that the renditions generated in custom formats are published out from Docbase during publishing operations. More about this in Chapter 21.
- This step requires associating the Presentation file with the existing News Article Template file. Log in to Web Publisher and go to Site Manager | Templates and select the News_Articles category. Select the checkbox against the cust_news_art_templ.xml template and select the menu option View | Associations | Presentations as shown in figure 15.8.

Figure 15.8: Associating Presentation file with Template file
- The Associations | Presentations screen is shown displaying no associated Presentation files. Note that you can associate a particular Template file with multiple Presentation files, each generating a different rendition format. Click on Add and browse through the custom presentation folder (Custom_Presentations) within the Site Manager | Presentations | Editor folder. Choose the Presentation file cust_news_art_pres.xsl and click on OK.
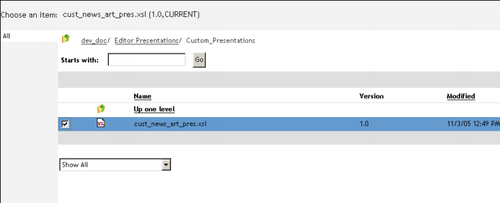
Figure 15.9: Choosing the Presentation file to be associated with the Template file
- Select a rendition format for transforming the content XML file via the Presentation file, as shown in figure 15.10. In our case, choose custom_format, which we created in step 5. Selecting custom_format from the dropdown automatically populates its description in the field next to the dropdown.
You have an option to specify the chosen rendition format for all content that will be created going forward from the template in question, as well as for content created from the template and already existing in Docbase.
Click on OK and finally Close to complete associating the Presentation file with the Template file.

Figure 15.10: Selecting rendition format for Presentation file
