The "Follow Up" feature, or "flagging" as it is known in some other mail applications, is a fantastic tool for managing our mail. Many times when we receive an e-mail that we can't respond to there and then, we typically leave it in our inbox so that we remember to get back to it; we might even mark it as unread to further prompt us. The problem is that our inbox is designed for incoming e-mails, so as new mails keep pouring in our inbox, the e-mail that we need to follow up gets pushed further down the list.
Marking an e-mail for follow up assists us in managing those e-mails that we need to respond to, as it flags the message with an icon so it stands out from the other messages; we can also set alarms and view the flagged messages in a special follow up views to make managing them easier.
Flagging messages is a great idea. We just need to select one or more messages in a folder or view and add a flag by performing any one of the following steps:
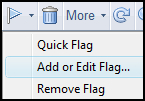
- Click the flag icon above the message list, select Add or Edit Flag.
- Enter flag priority, and follow up action, date, time, and alarm if required.
- Select a message or several messages and then drag to the Follow Up folder (this will move the message out of the Inbox). Then enter preferred options.
- Right-click and select Quick Flag (this will apply options that have been set in Mail Preferences).
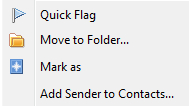
- The Quick Flag option is like a shortcut to flagging messages. Before we learn about the Quick Flag option, let's look at the several options that can be selected when we select the option to Add or Edit Flag.
When we add or edit a flag, we will see an array of choices as to how we want to manage the flag depending on the importance and how we want to be notified. I will often use this area as a place to leave notes and set alarms for those messages that need more detail. If we have already added a flag and we want to change some of the options, we can select the same menu that we use to add a flag—Add or Edit Flag.
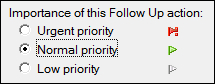
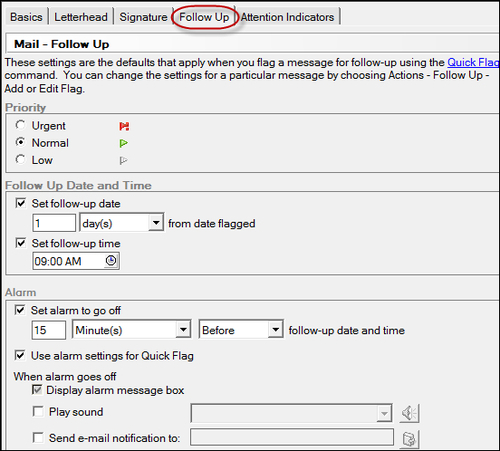
The first option we have is to select the flag priority icon that will be displayed next to the message or messages we have selected for follow up. There are three priorities to select from:
- Urgent
- Normal
- Low
As shown in the next screenshot, just click the priority that is relevant for what we have flagged for follow up; in the following screenshot Normal priority has been selected:
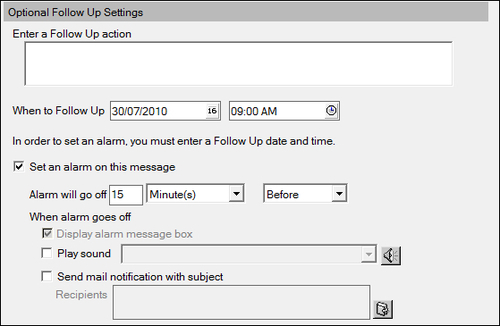
In the Enter a Follow Up Action, we can add comments relevant to the follow up required for the message. I use this area in the same way I would add a Post-it note to add some comments or actions to something I am working on. It is great when we are going on leave and we can't finish off all of the messages. Just add comments in the Enter a Follow Up Action and, when we get back after a well-earned break, we will be able to look at the comments to refresh our memory as to the status or action required. If we have to share our job with someone or manage an individual's mail, we can add comments so that the person knows the status of the follow up and we can let them know what they need to do without having to send them a separate message about it. In our busy lives, adding comments to a message that we can't deal with there and then is a great advantage.
Other follow up settings available to us are:
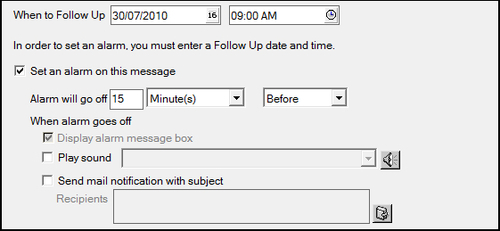
- When to Follow Up: This option helps us to specify a follow up date and, optionally, a follow up time—I love alarms and I use this option often. I also like to see the due date for each follow up so that I can manage my time. It is like a "To Do" list or "Priority" list of messages I need to deal with.
- Play sound: This option is for those who set an alarm. Using this option, we can select a sound to play when the alarm goes off. Click the speaker icon to test the selected sound. We might want to select a separate sound for different priorities or have a sound dedicated just for follow ups.
- Send e-mail notification with subject: This option will send an e-mail when the alarm goes off. It is a great option if we want to remind someone else that something needs to be followed up. Make sure to type the addresses of those we want to receive the notification in the Recipients field. Click the address book icon to select names from a directory. I know lots of people who send a message to themselves to remind them that they have to follow up a message!
Tip
At any time, we can edit the flag options. I sometimes do this to change the due by date or to add additional comments in the Enter Follow Up Action field. For example, I might have rung the person and been told they are on leave. I would change the due date to be a couple of days after they return and add comments noting the date I rang and that they are currently on leave.
The Quick Flag option allows us to quickly add a flag with preset options. To add a Quick Flag, we have the following options:
- Select a message(s) then click the flag icon above the message list as shown next:

- Select a message(s) and then click the flag icon above the message list and select Quick Flag:
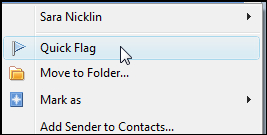
- Select a message(s), and then right-click and select Quick Flag:
- From within a message, click the flag icon in the row of buttons above the e-mail header.
The Quick Flag has similar options available that we have when we add a flag. We can follow the instructions given next to set this preference:
- If necessary, open mail.
- Click on More above the message list, select Preferences, and then the Follow Up tab.
- For Priority, select a priority to display when we flag a message.
- Check Set follow-up date, type a number, and select day(s), month(s), or year(s) to set a default follow up date. To add a follow up time, select Set follow-up time and select a time of day.
- Check Set an alarm to go off and then type a number. Select Day(s), Hour(s), or Minute(s), and select Before or After to set the amount of time before or after the follow up date or time to trigger the alarm. Then do any of the following:
- To apply the default alarm settings when we use the Quick Flag feature, check Use alarm settings for Quick Flag.
- To play a sound when the alarm goes off, check Play sound and select a sound to play from the drop-down list. Click the speaker icon to test the selected sound.
- To send an e-mail when the alarm goes off, check Send e-mail notification to and type the addresses of those who should receive the notification. Click the address book icon to select names from a directory.
- Click OK.
Tip
For alarms to work with follow up flags, we must first enable them in our preferences. Go to File | Preferences | Calendar and To Do, select the Alarms tab and check Display alarm notifications, and then click OK.
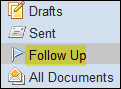
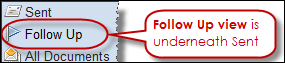
The Follow Up view is positioned under Sent. We can drag messages to this folder to add a follow up flag or we can open this view to manage our follow ups. From within this area, we can sort our columns, open or preview the message(s) that have been flagged, edit the flag, and remove the flag.
The Follow Up Mini view is always in the line of sight as it displays in the bottom of the navigator on the left-hand side of our mail file, which is an invaluable feature.
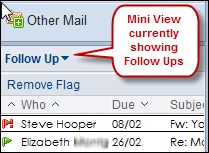
From within this area, we can sort our columns, open the message that has been flagged, edit the flag, and remove the flag:
- We can display all of the columns for a message by moving the cursor over the message. Alternatively, we can resize this window.

- We can open the message by double-clicking it.
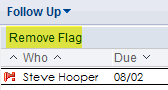
- We can remove the message from the Mini View and Follow Up view (once you have completed the action) by clicking Remove Flag. The message stays in other mail views or folders, but no longer has a follow up flag.
- In the Mini View we can resize the view and columns:
Note
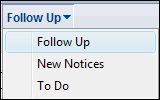
With the mini view we can choose to display meeting notices and To Dos, and not display Follow Up messages if we prefer. We can switch to the display New Notices (Calendar notices such as invites or acceptance and so on) or To Do by clicking the down arrow beside the words Follow Up.
In the mini view, there is a column dedicated to the priority flag icon. We will see this column in our Inbox and other views in our mail, as well where we can see the priority icon. We can then click on the column header to group all our priorities together; this will group all our high priority follow ups to the top of the list.
We can give delegates (typically personal assistants) the ability to add follow up flags on our behalf within our mail. This option is enabled within Access & Delegation | Mail Preferences. Delegates must be given Read, edit, and create any document, send mail, enable Out-of-Office access or higher.
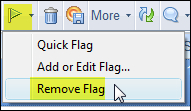
There are several ways to remove a flag from an e-mail. The obvious action, if one has completed the follow up action and no longer requires the e-mail, is to simply delete it! In the Mini view, click the Remove Flag button.
Alternatively from any view or folder or from within the e-mail, select the Follow Up button and then select Remove Flag as shown next: