
The following types of resources can be assigned to your tasks:
People or equipment, or work resources
Consumable materials, or material resources
Cost items incurred in the performance of a task, or cost resources
To add resources to your project by simple data entry, follow these steps:
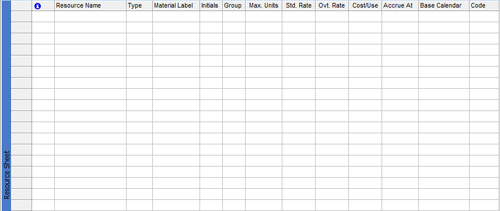
Click View, Resource Sheet to switch to the Resource Sheet view (see Figure 6-1).
Make sure the Entry table is applied. If necessary, click View, Table, Entry.
In the first Resource Name field, type the name of a resource and then press Enter.
Enter the names of other resources in the same way.
If a piece of equipment will be integral to the successful completion of a task, enter its name as a work resource, just as you would a human resource.
Work resources consist of people and equipment that use time as a measure of effort on a task. Add resources to your project simply by entering their names into your project plan as described in the previous section. To automate the process, you can select resource names from your company’s e-mail address book. If you have a resource list in a Microsoft Office Excel 2007 workbook, you can import it into your project plan. After your resources are in place, you can add information regarding their availability, costs, notes, and more.
Note
If you’re entering a significant number of work resources, or if you don’t expect to enter any material resources, apply the Entry – Work Resources table. This table has only those resource fields applicable to work resources.
With the Resource Sheet showing, click View, Table, More Tables. Click Entry – Work Resources and then click Apply.
Add Resources Using the Project Guide
You can use the Project Guide to help add resources to your project plan. It can walk you through the steps to enter resources manually to add them from your company address book or directory, or to add them from Office Project Server 2007. To add resources using the Project Guide:
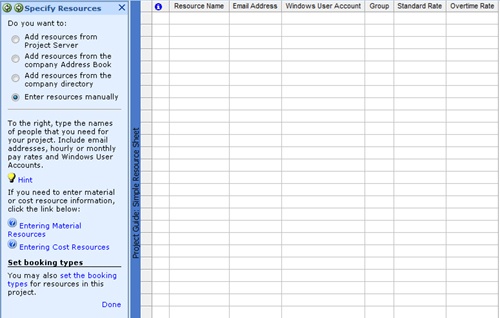
On the Project Guide toolbar, click Resources.
In the Project Guide pane, click the Specify People And Equipment For The Project link.
Read the succeeding panes and make choices as directed (see Figure 6-2).
If Microsoft Project is installed on the same computer as your organization’s MAPI e-mail connection (for example, Microsoft Exchange Server 2007 or Microsoft Office Outlook 2007), you can add resources to your project plan from the e-mail address book. To do this:
Click Insert, New Resource From, Address Book.
If the Choose Profile dialog box appears, click the profile name for your e-mail system.
The Select Resources dialog box appears.
Click the resources you want and then click the Add button to add the selected resources to your project plan.
You can add all resources contained in a group or distribution list. Add the name of the group to your list, just as you would add an individual resource. When you click OK, Microsoft Project asks whether you want to expand the group to list the individual resources in the project plan.
Note
If you’re connected to Project Server to use the enterprise features, you have access to all existing resources identified in the server. Click Insert, New Resource From, Microsoft Project Server. The Build Team dialog box appears. Under Enterprise Resource, select the team members you want to add to your project and then click Add. The names are added to the Team Resource table. When finished, click OK.
Suppose you have a list of resources in an Excel workbook. You can easily use it to populate your project’s Resource Sheet. You can copy information or you can import the file.
To copy a resource list from an Excel workbook, follow these steps:
Open the Microsoft Office Excel workbook that contains the resource list.
Select the resource names. On the Home tab, in the Clipboard group, click Copy.
Open the project plan. If necessary, click View, Resource Sheet.
In the Resource Name column, click the cell where you want to begin inserting the copied resources.
On the Standard toolbar in Microsoft Office Project 2007, click Paste.
You can also use the Microsoft Project Plan Import Export Template to import resources from Excel to Microsoft Project. The standard Excel importing process involves mapping the Excel columns to the corresponding Microsoft Project columns to ensure that the right information ends up in the right locations in your Resource Sheet. The Microsoft Project Plan Import Export Template is set up to enter more detailed resource information in the format needed by Microsoft Project. To do this, make sure that Excel and the Microsoft Project Plan Import Export Template are installed on the same computer as Microsoft Project and then follow these steps:
Start Microsoft Office Excel.
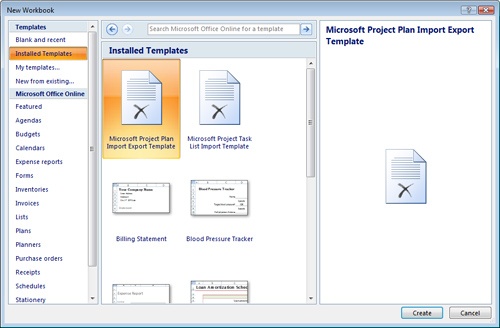
Click the Microsoft Office Button and then click New.
In the New Workbook dialog box, under Templates, click Installed Templates (see Figure 6-3).
Double-click the Microsoft Project Plan Import Export Template.
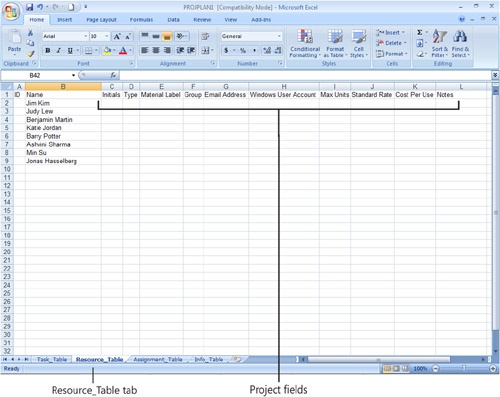
The template creates a new file with columns that correspond to the most commonly used fields in Microsoft Project.
At the bottom of the workbook window, click the Resource_Table tab.
Enter resources and any other resource information in the columns provided (see Figure 6-4).
Click the Microsoft Office Button, point to Save As, and then click Excel 97-2003 Workbook. Browse to the location on your computer where you want to save the file, change the name from PROJPLAN1.xls if you like, and then click Save.
You need to save the workbook as an .xls rather than an .xlsx file because Microsoft Office Project 2007 does not recognize the new Microsoft Office Excel 2007 format of .xlsx.
Note
The xlsx file format was not finalized by the time the development work on Project 2007 was completed. It is expected that the xlsx file format will be a recognized file format in a future release of Microsoft Project.
Note
If you’re working with a version of Microsoft Office Excel 2003 or earlier, you can still use the Microsoft Project Plan Import Export Template. Open Microsoft Office Excel 2003 and then click File, New. In the task pane, click the On My Computer link. Click the Spreadsheet Solutions tab. Double-click the Microsoft Project Plan Import Export Template.
When you’re ready to import the resource list into your project plan, follow these steps:
If necessary, open the project plan.
On the Standard toolbar, click Open.
Go to the location on your computer or network where the Excel workbook is saved.
Next to the File Name box, click the Microsoft Project Files (*.mp*) button.
This button is the new incarnation of the Files Of Type list seen in previous versions of Microsoft Project.
In the list, click Microsoft Excel Workbooks (*.xls).
The workbook appears in the list of folders and files.
Click the name of the workbook and then click the Open button.
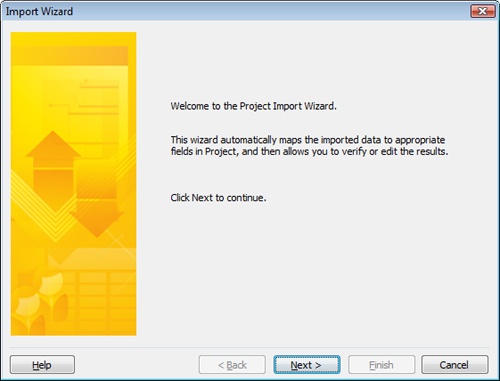
The Import Wizard appears (see Figure 6-5).
Click Project Excel Template and then click Next.
Specify whether you want to import the file as a new project, append the resources to the currently active project, or merge the data into the active project.
Click Finish.
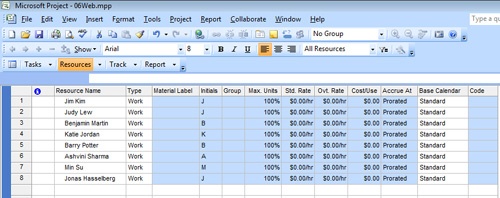
The resource information is imported (see Figure 6-6).
Troubleshooting
Microsoft Office Project 2007 will not let you import the older .xls file format
When you finish with the Import Wizard, you might see the following error message:
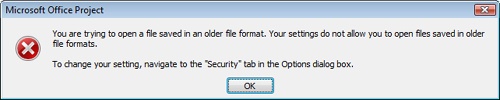
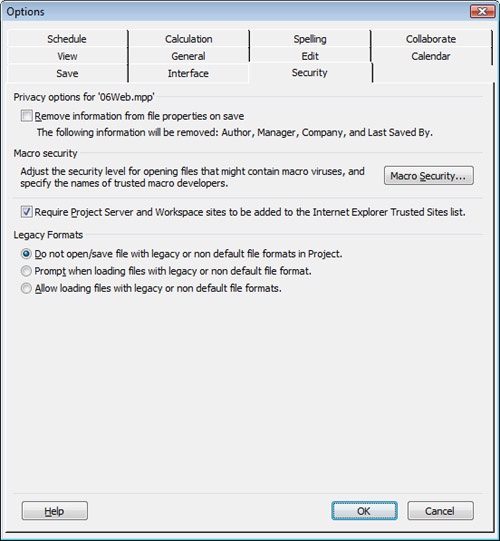
If you see this message, click OK. Click Tools, Options, and then click the Security tab. Under Legacy Formats, select either the Prompt When Loading Files With Legacy Or Non Default File Format or the Allow Loading Files With Legacy Or Non Default File Formats option. Click OK.
Run through the Import Wizard process again. If you selected the Prompt When Loading Files With Legacy Or Non Default File Format option, you’ll see the following prompt:
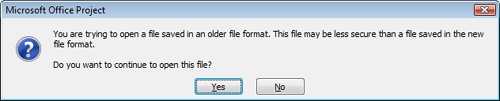
Click Yes. The information from the Excel Project template appears in your project file.
Note
For more information about using Microsoft Office Project 2007 with other applications, see the section titled Importing and Exporting Information in Chapter 16, and Chapter 17.
Note
For more information about adding resources to your project plan from a shared resource pool file, see the section titled Sharing Resources by Using a Resource Pool in Chapter 14.
Note
For more information about adding resources from the enterprise resource pool, see the section titled Building Your Enterprise Project Team in Chapter 22.
Material resources are consumable supplies that use quantity as a measure of effort on a task. Any supplies that are integral to completing tasks can be added to your project plan as material resources. Examples of such material resources might be steel for a building structure, roofing material for a home, and bricks for a landscaping project. You might have a task "Lay brick sidewalk," to which a bricklayer is assigned for a certain amount of time. You can also assign a quantity of bricks to the task. The bricklayer and the bricks are both essential resources to the completion of the task.
To enter a material resource:
Display the Resource Sheet with the Entry table applied.
In the next available Resource Name field, type the name of the material resource (for example, Bricks) and then press Tab.
In the Type field, click Material.
In the Material Label field, enter the unit of measurement for the material.
This measurement will differ depending on the nature of the material. It might be tons, yards, feet, cartons, and so on.
When you specify that a resource is a material rather than a work resource, be aware of the following points:
Maximum units (or resource units) and the associated variable availability are not applicable to material resources. You’ll specify units (for example, 50 yards or 100 feet per day) when you assign the material resource to a task. With these assignment units, you can track the usage of materials and possibly the depletion rate of materials.
Note
For more information about material resource assignments, see the section titled Assigning Material Resources to Tasks in Chapter 7.
Resource calendars are not available for material resources.
Workgroup fields such as Workgroup and Windows Account are not available for material resources. The Overtime field is also disabled.
If you’re entering a significant number of material resources, apply the Entry – Material Resources table. This table has only those resource fields applicable to material resources. With the Resource Sheet showing, click View, Table, More Tables. Click Entry – Material Resources and then click Apply.
In previous versions of Microsoft Project, you had work resources and material resources. A third resource type is new in Microsoft Office Project 2007—the cost resource. If you rely on Microsoft Project for tracking costs and adhering to your project budget throughout the life of the project, you’ll find cost resources a most convenient tool.
A cost resource is a cost item that contributes to the completion of a task but does not affect the duration or work of a task. When you include a cost resource with a task, or a set of tasks, you can be assured that not only are you tracking the cost of human resources or equipment resources with their cost per hour or per use, but you are also tracking any cost items incurred as a result of carrying out the task.
Suppose you have several tasks, such as "Hold user meetings," "Staff conference booth," or "Train trainers at client site." These might be at different locations and handled by different team members. However, they will all involve cost items such as airfare and lodging. They might also involve room rentals or equipment fees. You can create cost resources named Airfare, Lodging, Booth Rental, Conference Fees, Printing, and so on.
Unlike work or material resources, you do not enter a cost amount in the Resource Sheet or Resource Information dialog box. You only create the resource and identify it as a cost resource.
Only when you have assigned a cost resource to a task do you deal with the cost. At that point, you can enter the cost for the airfare, for example, as associated with the task to which the airfare cost resource is assigned.
For example, you might have the Airfare cost resource assigned to the "Hold user meetings" and the "Staff conference booth" tasks. The "Hold user meetings" task needs one person to travel from Portland to Chicago in the spring and costs $330. The "Staff conference booth" task needs three persons to travel from Raleigh to Las Vegas in the fall and costs $720 total. You’re using the same cost resource, but entering different cost amounts on the different task assignments.
To set up a cost resource, do the following:
Display the Resource Sheet.
In the next available Resource Name field, type the name of the cost resource. Good examples include Car Rental, Client Entertainment, Software Purchase, Airfare, Lodging, and so on.
Note
Make the cost resource name specific enough so that you can know what the resource is for when you get ready to assign it to a particular task. But make it general enough so that you can use it for multiple tasks. You might find it helpful to use your organization’s budget category names. Later you can view information on how much you’re spending throughout the project on all car rentals, for example.
In the Type field, click Cost.
Because cost resources do not rely on working time to accomplish their tasks, they are not associated with max units, base calendars, or availability dates. Also, because specific costs are entered on the task to which the cost resource is assigned, costs are not entered on the cost resource itself. Therefore, these fields in the Resource Sheet and Resource Information dialog box are not available for cost resources.