
Creating Your First XAML for Windows Phone App
This section walks through the creation of a simple XAML app using Visual Studio and looks at using the Windows Phone emulator to debug applications on the desktop.
To create an XAML-based project for Windows Phone, follow these steps:
1. From within Visual Studio 2012, select New Project from the File menu.
2. Select the Windows Phone node in the Installed Templates pane of the Add New Project dialog (see Figure 1.1).
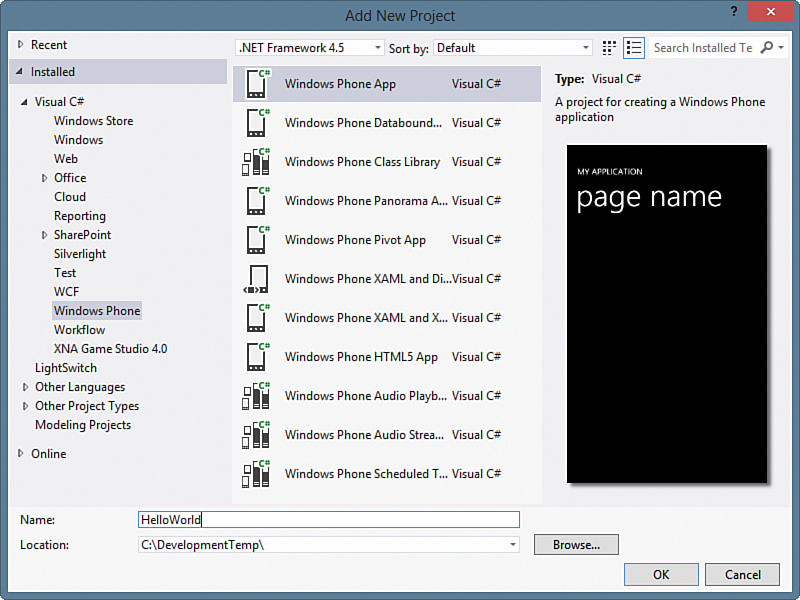
4. Provide the project with a name and location.
5. Click OK.
6. A dialog is presented allowing you to select either the 7.1 (Mango) or 8.0 (Apollo) platform. Select Windows Phone OS 8.0 and click OK.
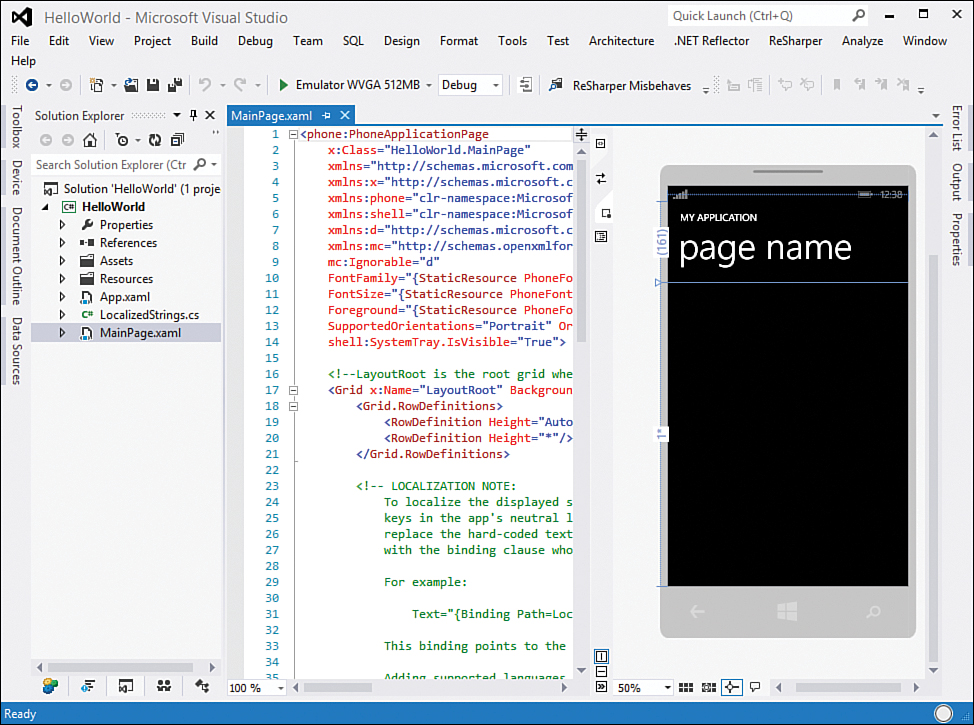
The Windows Phone App template produces a project containing an App.xaml file, a MainPage.xaml, and their respective code-beside1 files (see Figure 1.2).
1. The term code-beside is analogous to code-behind, except that rather than the code-behind class being a subclass of the class generated from the markup file, the code-beside and the markup file are partial classes of the same class type.
Note
I prefer the Solution Explorer to be on the left in Visual Studio. This is different from the default layout, which positions the Solution Explorer on the right. You are free to configure the layout as you wish.
The XAML design view within Visual Studio can take a few moments to render a page or control. To prevent the designer from automatically loading the design view, select Options from the Tools menu, locate the Text Editor/XAML/Miscellaneous node, and check the option Always Open Documents in Full XAML View.
After the project has been created, it is ready to be run inside the emulator. Select Start Debugging from the Debug menu in Visual Studio or press F5 to launch the emulator and then the debugger. The first time the emulator starts, it presents a loading message and may take several seconds to initialize.
Tip
The Windows Phone emulator is a virtual machine containing the actual Windows Phone operating system (OS). Launching the emulator incurs a delay because the OS takes time to load. Leaving the emulator open between debugging sessions minimizes the initial startup delay.
The emulator contains a floating menu that allows you to close or minimize the emulator, change the orientation of the display, change the display size of the emulated device, and open the Additional Tools window (see Figure 1.3).
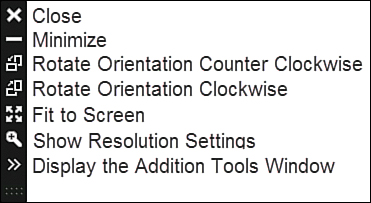
The Close button shuts down the Windows Phone emulator. It is best to avoid using the Close button to end a debugging session for reasons set out in the previous tip.
The Minimize button works in the same manner as the Minimize button on a Windows desktop application. The emulator continues to run but is not visible on the desktop.
Rotate Orientation (Clockwise and Counter Clockwise) changes the display orientation from landscape to portrait or portrait to landscape. In Chapter 4, “Controlling Page Orientation,” you see how to programmatically monitor and control the orientation of a page.
Fit to Screen scales the emulator display to fit about 80% of your smallest screen dimension.
Use the Show Resolution Settings item to display the Resolution Settings dialog, which is used to scale the display from 33% to 100%. The phone’s screen has a pixel density of 262 DPI, which is more than twice as great as the default 96 DPI that Windows uses. This is why, at 100%, the emulator looks so large on the desktop.
When the emulator finishes loading, the newly created application launches, and the MainPage is displayed (see Figure 1.4).
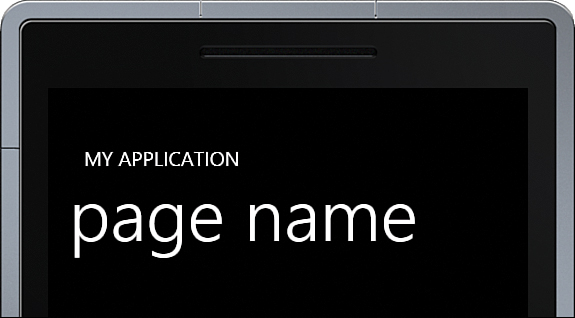
A new Windows Phone App project starts out with a PhoneApplicationPage called MainPage, set to a Portrait orientation. MainPage is the default starting page for the application.
Note
You can change the display name of your app and other properties by modifying your app’s WMAppManifest.xaml file, which is located in the Properties directory of the project (see Figure 1.5). You explore the various other tabs within the WMAppManifest.xml editor in subsequent chapters.
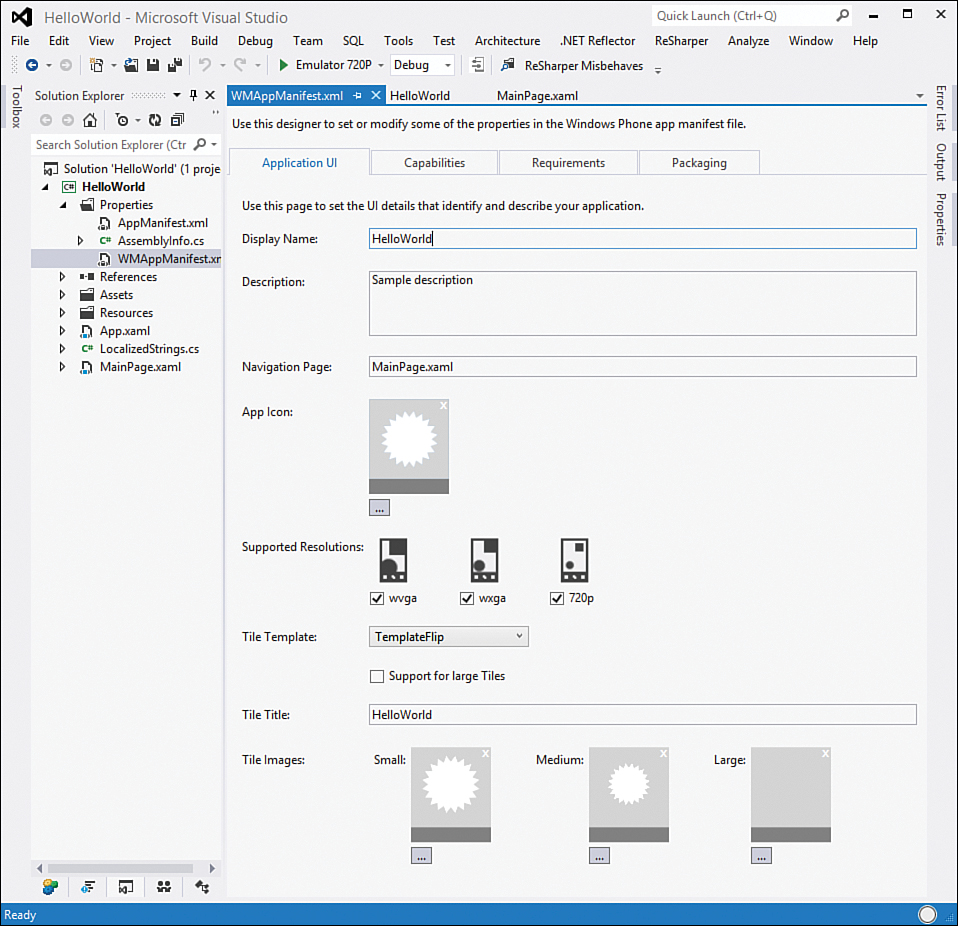
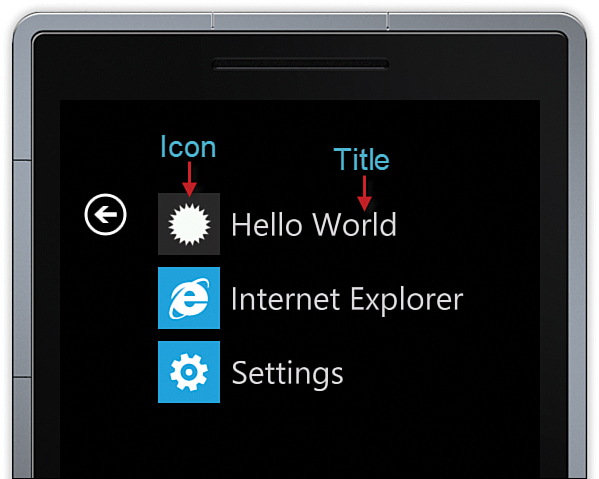
The display name and icon fields are used to distinguish the application from others on the phone’s App List (see Figure 1.6). You can reach the App List from the phone’s start page, known as the Start Experience.
The Tile options, including the Title and Background Image fields, are applied when the app is pinned to the Start Experience.
You explore tiles in greater detail in Chapter 13, “Portraying Your App with Live Tiles.”
Despite the debugger being detached from the emulator after a debugging session has ended, the app is still deployed to the emulator and can be relaunched from the App List. Closing the emulator, however, removes the app from the App List and, in fact, resets the state of the emulator. Therefore, customization of an app within the emulator persists only while the emulator is running and is lost when the emulator is closed.