
An Edge-Tracing Extras Application
,This section looks at building an Extras application that converts an image to a line drawing by tracing its edges, and then allows the user to save the image to the Saved Pictures folder in the Pictures Hub. The example app for this section is located in the WPUnleashed.ExtrasExample project in the downloadable sample code.
When your app is selected from the Extras menu, your app is launched, and the main page of your app has its query string populated with a string identifier named token. The token value is then used to retrieve the image from the phone’s image library, as shown later in this section.
To hasten the pace of development and to enable testing of your app without deploying to a Windows Phone device, it is useful to feed your app with a dummy image so that it does not have to rely on the Pictures Hub.
In the following excerpt from MainPage.xaml.cs, you see how to detect whether the app is executing on the emulator using the Microsoft.Devices.Environment.DeviceType property. If so, substitute the image, which would otherwise be supplied by the picture viewer, with a sample image stored as an embedded resource.
Conversely, if not executing within the emulator, attempt to extract the token from the page’s query string, as shown:
protected override void OnNavigatedTo(NavigationEventArgs e)
{
base.OnNavigatedTo(e);
/* Equivalent to: Environment.DeviceType == DeviceType.Emulator */
if (EnvironmentValues.UsingEmulator)
{
ProcessTestImage();
}
else
{
string token;
if (NavigationContext.QueryString.TryGetValue("token", out token))
{
ProcessImageUsingToken(token);
}
else
{
if (image.Source == null)
{
photoChooserTask.Show();
}
}
}
}
When the query string does not contain a token, it indicates that the app has been launched from either the Start Experience (if the app has been pinned there), or from the Application List.
Note
It is a Windows Phone Marketplace certification requirement that if your Extras application is launched from the application list (not from the Extras menu) it must invoke the PhotoChooser task to allow the user to select an image or take a photo. Conversely, it is also a requirement that if your app is launched from the Extras menu, it should not require further image selection steps.
To retrieve an image from the phone’s image library, we leverage the XNA framework—in particular, the Microsoft.Xna.Framework.Media.MediaLibrary class located in the Microsoft.Xna.Framework assembly.
The XNA MediaLibrary class is used to retrieve the image with the specified token. The MediaLibrary class implements IDisposable, and hence it is wrapped in a using statement, as shown in the following excerpt:
void ProcessImageUsingToken(string token)
{
imageName = token;
Picture picture;
using (MediaLibrary mediaLibrary = new MediaLibrary())
{
picture = mediaLibrary.GetPictureFromToken(token);
}
Stream imageStream = picture.GetImage();
ProcessImage(imageStream);
}
When the image Stream has been retrieved, the ProcessImage method is called, which creates a BitmapImage object. The BitmapImage is assigned to an Image control on the page (see Figure 20.3).
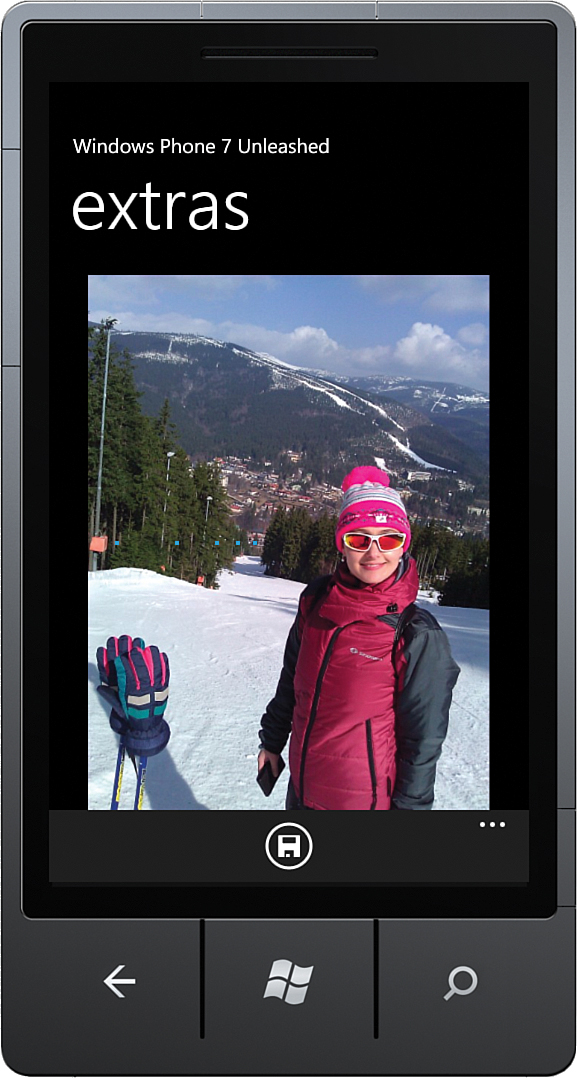
The image is displayed until processing has completed. Then the Image control’s Source property is assigned to the processed image in the HandleEdgesFound method.
The ProcessImage method creates a new BitmapImage object and passes it to the BitmapUtility.FindEdgesUsingSobel method (see Listing 20.2).
Note
The CreateOptions property of the BitmapImage class allows you to specify when the image is to be created. By default, the value is BitmapCreationOptions.BackgroundCreation, which causes the image to be created on a background thread and frees the UI thread from processing the image.
Because we require the BitmapImage immediately, the CreateOptions property is explicitly set to BitmapCreateOptions.None.
The saveCommand is disabled by setting the canSave flag to false.
LISTING 20.2. MainPage.ProcessImage Method
void ProcessImage(Stream imageStream)
{
BitmapImage sourceImage = new BitmapImage();
sourceImage.CreateOptions = BitmapCreateOptions.None;
sourceImage.SetSource(imageStream);
image.Source = sourceImage;
canSave = false;
saveCommand.RaiseCanExecuteChanged();
progressBar.Visibility = Visibility.Visible;
BitmapUtility.FindEdgesUsingSobel(sourceImage, HandleEdgesFound);
}
The custom BitmapUtility class contains a FindEdgesUsingSobel method, which attempts to reduce an image to a line drawing by locating the distinct edges within the image. Unlike Silverlight for the browser, Windows Phone does not support UIElement pixel shader effects. You therefore must either switch to Direct3D, which supports pixel shaders, or resort to processing the image in code, which is unfortunately much slower than using a custom pixel shader.
To allow the app to remain responsive during processing, the image is processed asynchronously using a thread from the thread pool. When processing completes, the resultAction is invoked on the UI thread using the default Dispatcher, as shown:
public static void FindEdgesUsingSobel(BitmapSource bitmapSource,
Action<ResultEventArgs<WriteableBitmap>> resultAction)
{
ArgumentValidator.AssertNotNull(bitmapSource, "bitmapSource");
ArgumentValidator.AssertNotNull(resultAction, "resultAction");
WriteableBitmap sourceBitmap = new WriteableBitmap(bitmapSource);
int[] sourcePixels = sourceBitmap.Pixels;
int imageWidth = bitmapSource.PixelWidth;
int imageHeight = bitmapSource.PixelHeight;
ThreadPool.QueueUserWorkItem(
delegate
{
try
{
int[] resultPixels = FindEdgesUsingSobelCore(
sourcePixels,
imageWidth,
imageHeight);
Deployment.Current.Dispatcher.BeginInvoke(
delegate
{
WriteableBitmap resultBitmap
= new WriteableBitmap(bitmapSource);
for (int i = 0; i < resultPixels.Length; i++)
{
resultBitmap.Pixels[i] = resultPixels[i];
}
resultAction(new ResultEventArgs<WriteableBitmap>(
resultBitmap));
});
}
catch (Exception ex)
{
resultAction(new ResultEventArgs<WriteableBitmap>(null, ex));
}
});
}
The FindEdgesUsingSobelCore method is where the main processing takes place. FindEdgesUsingSobelCore produces an int array representing the image pixels of the traced image. On completion, these pixels are copied to a new WriteableBitmap and returned to the caller via the resultAction.
A Sobel filter is implemented within the FindEdgesUsingSobelCore method. The method produces either white or black pixels, depending on a pixel’s intensity and that of its neighbors. See the following excerpt:
static int[] FindEdgesUsingSobelCore(
int[] sourcePixels, int imageWidth, int imageHeight)
{
/* Sobel Matrices */
int[,] gx = new[,] { { -1, 0, 1 }, { -2, 0, 2 }, { -1, 0, 1 } };
int[,] gy = new[,] { { 1, 2, 1 }, { 0, 0, 0 }, { -1, -2, -1 } };
int[] resultPixels = new int[sourcePixels.Length];
for (int i = 1; i < imageHeight - 1; i++)
{
for (int j = 1; j < imageWidth - 1; j++)
{
float newX = 0;
float newY = 0;
float c;
for (int hw = -1; hw < 2; hw++)
{
for (int wi = -1; wi < 2; wi++)
{
int row = j + wi;
int column = i + hw;
int position = column * imageWidth + row;
int pixel = sourcePixels[position];
var bytes = BitConverter.GetBytes(pixel);
c = (bytes[0] + bytes[1] + bytes[2]) / 3;
int index0 = hw + 1;
int index1 = wi + 1;
newX += gx[index0, index1] * c;
newY += gy[index0, index1] * c;
}
}
int resultPosition = i * imageWidth + j;
int colorIntValue;
if (newX * newX + newY * newY > 16384 /* 128 * 128 */)
{
colorIntValue = ToInt(Color.White);
}
else
{
colorIntValue = ToInt(Color.Black);
}
resultPixels[resultPosition] = colorIntValue;
}
}
return resultPixels;
}
To produce either a black or white pixel, convert a Microsoft.Xna.Framework.Color value to an integer value by combining the A,R,G, and B byte color components, as shown:
static int ToInt(Color color)
{
return (color.A << 24) | (color.R << 16)
| (color.G << 8) | (color.B << 0);
}
When the asynchronous portion of the FindEdgesUsingSobel method completes, the resulting WriteableBitmap is passed back to the caller within an instance of the ResultEventArgs. The ResultEventArgs contains a generic Result property, which, in this case, holds the resulting WriteableBitmap and an Error property if something goes awry:
public class ResultEventArgs<T> : EventArgs
{
public T Result { get; private set; }
public Exception Error { get; private set; }
public ResultEventArgs(T result, Exception error = null)
{
Result = result;
Error = error;
}
}
The HandleEdgesFound method within the MainPage class handles the result of the FindEdgesUsingSobel method. If no errors occurred during processing, the WriteableBitmap is assigned to the Source property of the Image control:
void HandleEdgesFound(ResultEventArgs<WriteableBitmap> obj)
{
progressBar.Visibility = Visibility.Collapsed;
if (obj.Error != null)
{
MessageBox.Show("Unable to find edges.");
return;
}
image.Source = obj.Result;
canSave = true;
saveCommand.RaiseCanExecuteChanged();
}
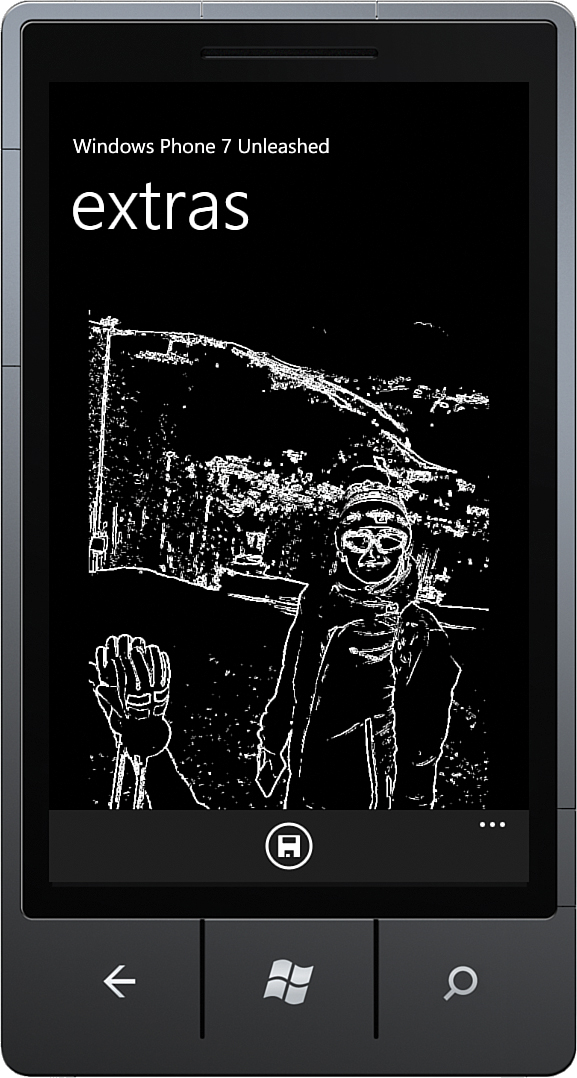
When processing completes, the image is displayed (see Figure 20.4).
As mentioned earlier in this section, when debugging using the emulator, a dummy image is used. The location of this image is defined as a constant within the ProcessTestImage method, as shown:
void ProcessTestImage()
{
const string testImageUrl = @"/DanielVaughan.WPUnleashed"
+ ".ExtrasExample;component/Images/TestImage.jpg";
var imageUri = new Uri(testImageUrl, UriKind.Relative);
using (Stream stream = Application.GetResourceStream(imageUri).Stream)
{
BitmapSource bitmapSource = new BitmapImage();
bitmapSource.SetSource(stream);
image.Source = bitmapSource;
progressBar.Visibility = Visibility.Visible;
BitmapUtility.FindEdgesUsingSobel(bitmapSource, HandleEdgesFound);
}
}
When the app is launched from the Application List, rather than from the Extras menu, the app must use the PhotoChooserTask to allow the user to select an image. Accordingly, a PhotoChooserTask is defined as a field, and its Completed event is subscribed to in the page constructor, as shown:
readonly PhotoChooserTask photoChooserTask = new PhotoChooserTask();
public MainPage()
{
InitializeComponent();
...
photoChooserTask.Completed += HandlePhotoChooserTaskCompleted;
}
For more information on the PhotoChooserTask see Chapter 14, “Leveraging Built-In Apps via Launchers and Choosers.”
The HandlePhotoChooserTaskCompleted method takes the resulting image Stream and, like the ProcessImageUsingToken method shown earlier, calls the ProcessImage method, as shown:
void HandlePhotoChooserTaskCompleted(object sender, PhotoResult e)
{
if (e.TaskResult != TaskResult.OK)
{
return;
}
imageName = e.OriginalFileName;
if (!string.IsNullOrWhiteSpace(imageName))
{
int index = imageName.LastIndexOf(@"");
if (index >= 0)
{
imageName = "Unleashed_" + imageName.Substring(index + 1);
}
}
else
{
imageName = string.Format(
"Unleashed_{0:yyyy-MM-dd-HH-mm-ss}.jpg", DateTime.Now);
}
Stream imageStream = e.ChosenPhoto;
ProcessImage(imageStream);
}
The imageName field is constructed using the original filename of the image.