Creating the Water Texture
The only file that we are going to create from scratch is that of the water. Using Corel PHOTO-PAINT, we’ll create a texture that looks like water. One problem with the textures that we’ve created so far is that they weren’t seamless. We need to create textures that look identical where they start and end so that there are no “seams.” I’ll show you a technique you can use in PHOTO-PAINT so that your textures are seamless.
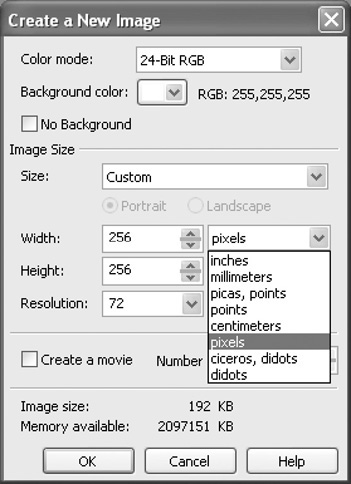
Launch PHOTO-PAINT and click the New button in the Welcome screen that appears. In the dialog box that appears (see Figure 14.1), change the units of measurement to pixels. Make the height and width of the document 256 pixels, and change the resolution to 72 dpi. Also change the Color mode to 24-bit RGB and click OK.
Figure 14.1. Enter the dimensions in this dialog box to create a texture document.
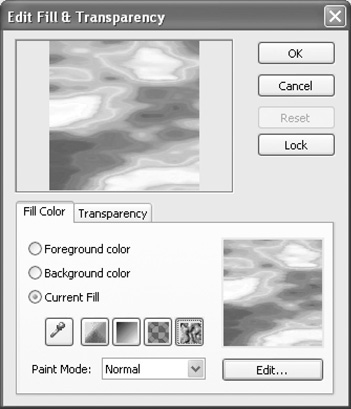
Click Edit > Fill to bring up the Fill dialog box (see Figure 14.2). Click the Texture Fill button (the last large colored button) and then click the Edit button. You can now select and modify the fill.
Figure 14.2. Click the Texture Fill button and then the Edit button.
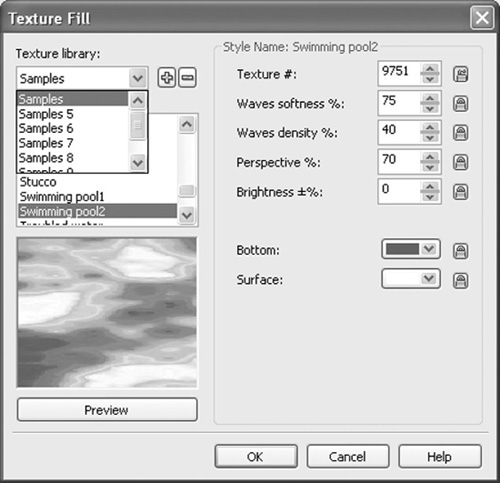
Click on the Texture Library drop-down menu and select Samples from the list (see Figure 14.3). Now scroll through the list of different textures and choose Swimming pool2. Click OK, and you will be returned to the main dialog box. Click OK to close the dialog box. The fill will now be applied to your document, and you should see an image of some clouds.
Figure 14.3. Choose the Swimming pool2 fill to create a water-like texture.
We are now going to make the texture “seamless” by making sure that when copies of the texture are placed side by side, the player won’t be able to tell where the texture begins or ends. Click Effects > Distort > Offset.
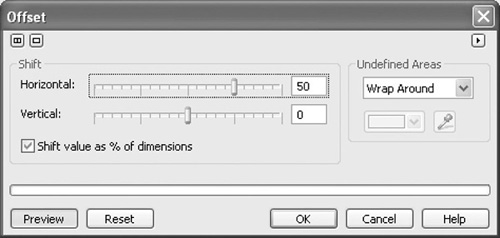
This will bring up a dialog box (see Figure 14.4), from which we can shift texture horizontally or vertically. Enter 50 in the horizontal box and 0 in the vertical box and then click OK. This will shift the texture over by 50% so that you can see the “seam” that will be created when the textures are placed side by side. To remove this, we will use the Clone tool.
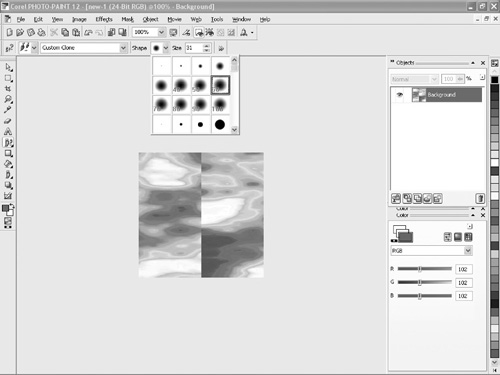
Click and hold the tool right under the letter A in the toolbox. A flyout of tools will appear. From that flyout (see Figure 14.5), click the Clone tool (which is the button with two little brushes).
Click on the Shape drop-down button from the toolbar. From the menu that appears, select the feathered option with a 60 on it (see Figure 14.6).
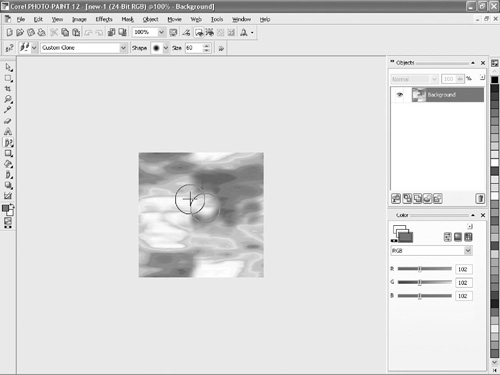
Right-click on an area beside the stitch but not including the stitch. This area will now be the source. Now click on the stitch and you’ll see the stitch area disappear. Repeat this step for other areas until the stitch is completely removed, as shown in Figure 14.7.
Figure 14.7. Clone the area beside the stitch onto the stitch so that it will disappear.

Click Effects > Distort > Offset. This will bring up a dialog box from which we can shift texture horizontally or vertically. This time we will change the vertical offset. Enter 0 in the horizontal box and 50 in the vertical box and then click OK. You will now see a preview of how the texture will appear when the segments are lined up one on top of the other.
Repeat Step 7 to remove the vertical stitch (see Figure 14.8). You will now have a seamless texture.
Click Effects > Distort > Offset. Enter a 0 in both the horizontal and vertical boxes and then click OK. You’ll be left with your final texture, which is now seamless.
Click File > Save As to bring up the Save As dialog box. Click the drop-down menu, choose the file type called JPG, and give the file the name water.jpg. Save the file into the folder where you saved the other game files.