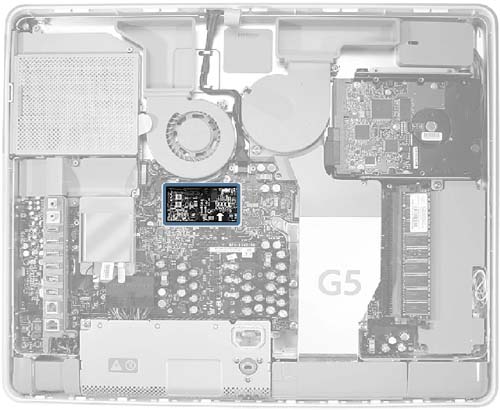
Locate the large white arrow in the middle of the board.
Above this arrow, you'll see four LEDs.
LED 1 indicates that trickle voltage from the power supply has been detected. This LED will be on when the computer is turned off and the power supply is working correctly.

LED 2 indicates that the main logic board has detected proper power from the power supply when the computer is turned on. This LED will be on when the computer is turned on and the power supply is working correctly.
LED 3 indicates that the computer and the LCD panel are communicating. This LED will be on when the computer is turned on and video signal is being generated.
LED 4 lights only if the computer detects an over-temperature condition. This LED will be off when the computer is turned on and running at the correct temperature.
To the left of the LEDs are two buttons. The top button is the internal power button (see the following section, “
Internal Power Button”). The lower button is the System Management Unit (SMU) button, which is similar to the Power Management Unit (PMU) button on previous iMac computers (see “
SMU Reset Button”).


