
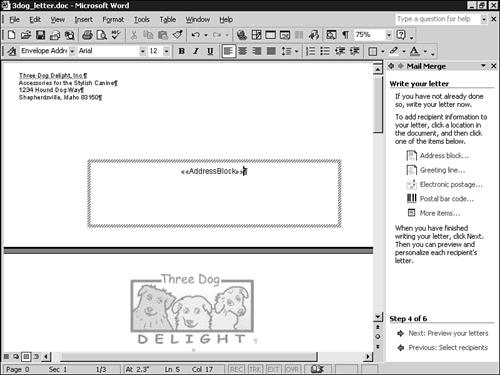
Advanced Mail Merge Techniques
Mail merge works by using Word fields specially designed for implementing a merge. To see those fields, open a main merge document and press Alt+F9, or choose Tools, Options; click the View tab; and check the Field Codes box (see Figure 20.9).
Figure 20.9. Main merge documents contain fields that dictate how the merge should happen.

In many cases, you'll be able to get satisfactory results with a merge by using the Mail Merge toolbar to manipulate these fields. In some more advanced cases, however, you might find yourself operating on the fields directly.
→ To learn how to manually manipulate fields, see "Some Useful Custom Fields".
Merge Envelopes
Running a merge to generate envelopes that match one-for-one with a form letter run isn't difficult, as long as you go to great pains to ensure that the data source doesn't change between the time you run the form letters and the time you print the envelopes, and that the filters you specify are identical.
Tip from 
Beware of paper jams, because one missing or one extra letter or envelope can throw off the entire sequence. If a jam should occur, mark that point in the run—with a paper clip, for example. After you've finished running both letters and envelopes, go back to the marked points and ensure you have one—and only one—letter for each envelope.
To start an envelope run, use the Mail Merge Wizard and select Envelopes as the document type in the first step. If you use the Envelope Wizard and tell it you want to create envelopes for a mailing list, it launches the Mail Merge Wizard automatically. To start this wizard, choose File, New. On the New Document task pane, choose General Templates, and then on the Letters & Faxes tab, double-click Envelope Wizard.
Note
There's a much more powerful and flexible envelope mail merge routine built into Enveloper, one of the WOPR (see Appendix B, "What's on Que's WOPR XP/2002 Pack."
There's an alternative (and undocumented) method for generating envelopes at the same time you do the main form letter run. This method creates envelopes interleaved with the form letters—you get an envelope and its letter, the next record's envelope and its letter, and so on. As long as you have a printer with separate feeders for the form letter paper and the envelopes—most laser printers pull envelopes from a different location than the standard paper trays anyway—the technique works, and it could save you a great deal of frustration with mismatched envelopes and form letters. Here's how to do it:
Create your form letter, following the instructions in the preceding sections.
At the end of the Wizard's Step 2, before you select recipients, choose Tools, Letters and Mailings, Envelopes and Labels. On the Envelopes tab (see Figure 20.10), set up the return address the way you want it. Then click Options and make sure the correct paper tray has been set up for your envelopes. Do not click Print. Instead, click Add to Document. The envelope appears above your form letter on the Word screen.
Figure 20.10. If you "add" an envelope to your form letter, merged envelopes and letters will print interleaved.

Attach the data source and place fields in your form letter as usual. When you're finished with the letter, move up to the envelope and insert merge fields in the envelope, wherever you want them to appear (see Figure 20.11).
Figure 20.11. Merge data fields go into the envelope, just as they would in the form letter itself.
Adding e-Stamps to Envelopes
Word has automatic hooks to several major vendors of electronic postage. If you sign up with one of these vendors, you can automatically generate electronic "stamps" for mail in general, and merged envelopes in particular. The electronic postage business is changing quickly, with companies altering their fees and payment structures almost as quickly as they can change their Web sites.
The simplest way to get the latest information about electronic postage firms that work with Word is to click the Electronic Postage option in Step 4 of the Mail Merge Wizard. You will be transported to the Microsoft Office Update page, which includes full details. Look for a heading that says "Print postage online" or some such; Microsoft places the topic in a general area called "eServices."
Tip from 
Electronic postage is still in its infancy, and companies come and go. Make sure you don't pay for more postage than you can use in a reasonably short amount of time. And keep your ear to the ground to make sure the company you choose doesn't unexpectedly fold up shop.
Merge Labels
Word's features for creating mailing labels work well enough for small labels—that is, labels that are big enough to hold only the name and address. But if you're using preprinted labels, or if you have larger labels and want to print your return address or logo on them, or if you want to change the default font, you'll have nothing but problems (unless you know these tricks, of course).
To run a mail merge and generate labels the usual way:
Start the Mail Merge Wizard by choosing Tools, Letters and Mailings, Mail Merge Wizard, and then selecting Labels as the document type
or
choose File, New, on the New Document task pane, and click General Templates. Then, on the Letters & Faxes tab, select Mailing Label Wizard, and tell the Paper Clip that you want to create labels for a mailing list.
In Step 2 of the wizard, when you select Label options, you are prompted to supply the details for your mailing labels in the Label Options dialog box. In most cases, you can select a manufacturer and product number; most common preprinted labels, including those from Avery, the 800-pound gorilla of the industry, include built-in formats here.
Follow Word's prompts to select a recipient list. Place the data merge fields in the first label position, as shown in Figure 20.12.
Figure 20.12. Set up the first label with recipient information from the merge file.

Note
Word automatically causes text in the label to "float up and down"—to be centered vertically. If you want the printing on your labels to always appear at the same location, choose Table, Properties, click the Cell tab, and choose Top or Bottom.
Tip from 
Because the label form is just a table, you can divide the existing cells to better position text, graphics, or anything else on the label.
See "Secrets of the Office Masters: Professional Labels, Big Time" at the end of this chapter for an example of how Word's mail merge features can be used to create professional mailing labels.
Customizing Form Letters with Fields
Like so many other features in Word, merging occurs compliments of Word fields. All the various merge fields discussed in this chapter are just special types of Word fields—a small subset of all the fields available in Word. The Mail Merge Wizard simply puts a pretty face on the underlying fields: You get to use the merge fields without getting your hands dirty working with field codes, formatting switches, and the like. The fields themselves control all the nuances of merging. You can use any of Word's extensive collection of fields in mail merge documents.
Two fields come in handy if you want Word to pause the merge at each record, and let you type in custom data. Both { Ask} and { Fillin} request data for each merged record. The former places whatever you typed in a bookmarked location on the form letter; the latter replaces the field with what was typed.
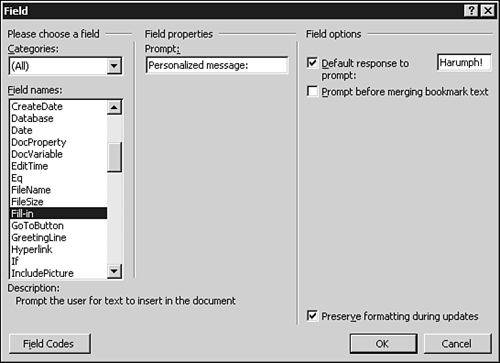
To use the { Fillin} field:
Place the insertion point wherever you want the custom text to appear in the form letter.
Click Insert, Field, and then select Fill-in from the Field Name box (see Figure 20.13). Type in a suitable prompt and default text. (You can also use the Insert Word Field button on the Merge toolbar.)
Figure 20.13.
Note
Although the input box in the Field dialog box is small, you can type in lengthy default responses, providing they don't include carriage returns. There's a longer input box available if you use the Insert Word Field button on the Merge toolbar.
For additional information on fields that apply specifically to mail merge, see the Help topic "Word fields for use in mail merge."