
Outside of the three layers of RPD development, there are also other sections of functionality that help to support the report and dashboard creation. The most important of these are the ability to create variables that end users can use in their reports. There are two types of variable:
Repository: Set for the system as a whole and is refreshed at set periods.Session: Individual to the user or session when they login. To create either of these, we need to create what is called an initialization block in order to instantiate these variables. Create a repository variable. The first step is to click on Manage | Variables:

This brings us to the Variable Manager screen. Here, create a new Init Block by navigating through Action | New | Repository | Initialization Block... :

This brings us to the main initialization block screen, where you can set up the data source and actual variables. Provide a name for the block. In our example, the name is initTimeComparison. You can also set up how often you want the variable values to be refreshed:

In this screen, first click on Edit Data Source.... This opens up the data source screen:

In this area, we need to inform OBIEE about the following:
- Data Source Type: It gives the location from where we are getting the data for our variables. In our case, this is a normal database.
- Default Initialization String: It is the query that we will run on our data source in order to populate variable values.
- Connection Pool: It is the connection pool in the physical layer against which we will run our query. As you can see in the preceding screenshot, we have already set our Data Source Type.
Let's go ahead and choose one of our connection pools by clicking on the Browse... button:

This provides us with a list of our physical layer connection pools. It is best to create a separate connection pool solely for variables. This reduces contention with your main connection pools. So, for our purpose, we will select a new pool called DW Init Blocks that we created especially for variables:
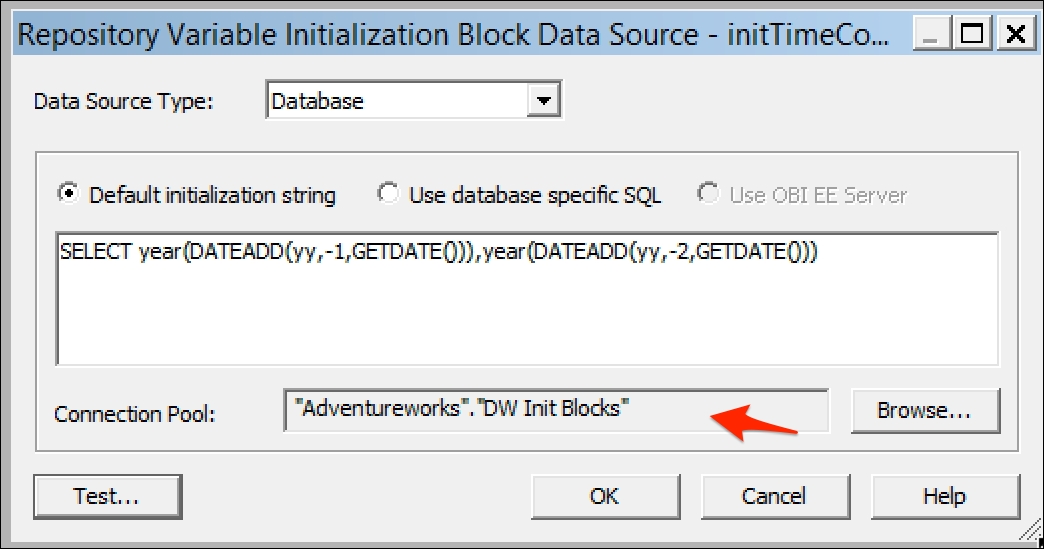
Note that our connection pool has been recorded. We can now write a statement to populate our variables. As you can see in the preceding screenshot, we have written a simple example for an SQL Server database. This returns two values retrieving the last two years. We can test that our query and Init Block are working by clicking on Test...:

Our values have returned successfully, but we now need to assign them variable names. We do this by returning to the block's main screen and clicking on Edit Data Target...:

This brings up the Repository Variable Initialization Block Variable Target screen. Here, click on New and you can proceed to define our variable names. These names will be used as references to the variable in reports and analyses when we come to making the:

We can also set a temporary default value if we require. Once we have created both variables, make sure that they appear in the same order as the values are returned within our SQL query:

Clicking on OK, we can return to a fully completed Repository Variable Initialization Block Variable Target screen. We can click on Test...here to check whether the whole block works:

As you can see in the preceding screenshot, our whole block works and the returned values have associated variables.Returning to the Variable Manager screen, you can see our new objects:

We will see an example of a variable in use when we come to create reports in Chapter 8, Creating Dashboards and Analysis.