One of the main applications of k-means clustering is vector quantization. Simply speaking, vector quantization is the N-dimensional version of "rounding off". When we deal with 1D data, such as numbers, we use the rounding-off technique to reduce the memory needed to store that value. For example, instead of storing 23.73473572, we just store 23.73 if we want to be accurate up to the second decimal place. Or, we can just store 24 if we don't care about decimal places. It depends on our needs and the trade-off that we are willing to make.
Similarly, when we extend this concept to N-dimensional data, it becomes vector quantization. Of course there are more nuances to it! You can learn more about it at http://www.data-compression.com/vq.shtml. Vector quantization is popularly used in image compression where we store each pixel using fewer bits than the original image to achieve compression.
- The full code for this recipe is given in the
vector_quantization.pyfile already provided to you. Let's look at how it's built. We'll start by importing the required packages. Create a new Python file, and add the following lines:import argparse import numpy as np from scipy import misc from sklearn import cluster import matplotlib.pyplot as plt
- Let's create a function to parse the input arguments. We will be able to pass the image and the number of bits per pixel as input arguments:
def build_arg_parser(): parser = argparse.ArgumentParser(description='Compress the input image using clustering') parser.add_argument("--input-file", dest="input_file", required=True, help="Input image") parser.add_argument("--num-bits", dest="num_bits", required=False, type=int, help="Number of bits used to represent each pixel") return parser - Let's create a function to compress the input image:
def compress_image(img, num_clusters): # Convert input image into (num_samples, num_features) # array to run kmeans clustering algorithm X = img.reshape((-1, 1)) # Run kmeans on input data kmeans = cluster.KMeans(n_clusters=num_clusters, n_init=4, random_state=5) kmeans.fit(X) centroids = kmeans.cluster_centers_.squeeze() labels = kmeans.labels_ # Assign each value to the nearest centroid and # reshape it to the original image shape input_image_compressed = np.choose(labels, centroids).reshape(img.shape) return input_image_compressed - Once we compress the image, we need to see how it affects the quality. Let's define a function to plot the output image:
def plot_image(img, title): vmin = img.min() vmax = img.max() plt.figure() plt.title(title) plt.imshow(img, cmap=plt.cm.gray, vmin=vmin, vmax=vmax) - We are now ready to use all these functions. Let's define the
mainfunction that takes the input arguments, processes them, and extracts the output image:if __name__=='__main__': args = build_arg_parser().parse_args() input_file = args.input_file num_bits = args.num_bits if not 1 <= num_bits <= 8: raise TypeError('Number of bits should be between 1 and 8') num_clusters = np.power(2, num_bits) # Print compression rate compression_rate = round(100 * (8.0 - args.num_bits) / 8.0, 2) print " The size of the image will be reduced by a factor of", 8.0/args.num_bits print " Compression rate = " + str(compression_rate) + "%" - Let's load the input image:
# Load input image input_image = misc.imread(input_file, True).astype(np.uint8) # original image plot_image(input_image, 'Original image') - Let's compress this image using the input argument:
# compressed image input_image_compressed = compress_image(input_image, num_clusters) plot_image(input_image_compressed, 'Compressed image; compression rate = ' + str(compression_rate) + '%') plt.show() - We are now ready to run the code. Run the following command on your Terminal:
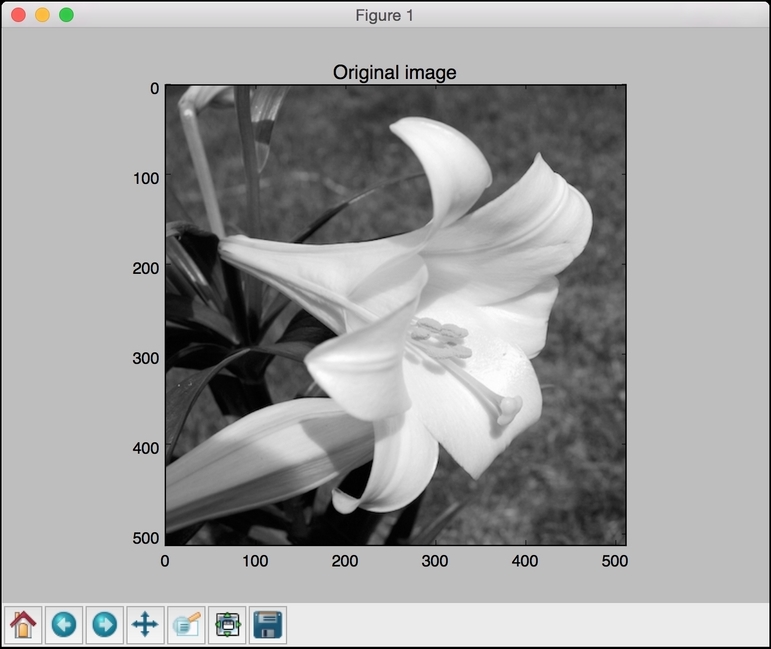
$ python vector_quantization.py --input-file flower_image.jpg --num-bits 4The input image looks like the following:
You should get the following compressed image as the output:

- Let's compress the image further by reducing the number of bits to 2. Run the following command on your Terminal:
$ python vector_quantization.py --input-file flower_image.jpg --num-bits 2You should get the following compressed image as the output:

- If you reduce the number of bits to 1, you can see that it will become a binary image with black and white as the only two colors. Run the following command:
$ python vector_quantization.py --input-file flower_image.jpg --num-bits 1You will get the following output:
