
Some Useful Custom Fields
Word includes a wasp's nest of fields, many of which have become outdated over the years and remain available only so documents created in older versions of Word will still work in Word 2002. These fields and their switches and settings comprise an entire programming language unto itself, buried inside Word, and completely separate from the language used in macros: Visual Basic for Applications.
Tip from 
Don't let the profusion of fields sway you. In general, if there's a way to accomplish your goal without using fields, that alternative is preferable. Many Word field codes are poorly documented, and you can expect to lose precious time trying to make them work properly.
Although you can use the Field properties and Field options lists in the Field dialog box to assemble a field, some options aren't listed at all, and interactions among options are complex and confusing. And because error messages are few and far between, debugging field codes is usually a tedious, repeated trial-and-error process.
Showing Dates and Times
If you want to insert the current date and/or time in a document, choose Insert, Date and Time; if the choices in the Date and Time dialog box include the formatting you need, use the menu. Forget the field.
Tip from 
The date and time formats that appear when you choose Insert, Date and Time are identical to the formats offered when you choose Insert, Field, and choose the Date field. If one of the formats listed in the Date and Time menu dialog box is close to the one you want, use the Date and Time entry, and check the Update Automatically box to insert the field code in your document. Then press Alt+F9 to show field codes and edit the field manually. It's much easier than constructing a field from scratch.
Word's date and time fields are listed in Table 19.4. They're all formatted by using the @ date-time format switches, discussed earlier in this chapter.
So, for example, the field
{PrintDate @ "d-MMM-yy h:mm A/P"}
in a document last printed on October 20, 2001 might have a field result that looks like this:
001 001 20-Oct-01 10:45 AM
002 002
The only significant difference between {Date} and {Time} is in the default formatting—that is, the format of the field result if no @ date-time format switch is used:
For the {Date} field, if you've set a default date format using the Default button on the Date and Time dialog box, Word uses that format. Otherwise, Word looks to the Windows Short Date style; to adjust this format, open the Windows Control Panel's Regional Settings option and click the Date tab.
For the {Time} field, if you've set a default time format in the Date and Time dialog box, Word uses that format. Otherwise, Word uses the Windows Time style setting; open Control Panel's Regional Settings option and click the Time tab to adjust this format.
The {Date} field also takes an l switch that isn't used in the {Time} field. When Word updates a {Date l} field, it checks to see which date or time format you last used in the Date and Time dialog box and then applies that format to the field.
 If you enter a time field in your document, but when you update the field it displays a date, see
"Time and Date Discrepancies"
in the
"Troubleshooting"
section at the end of this chapter.
If you enter a time field in your document, but when you update the field it displays a date, see
"Time and Date Discrepancies"
in the
"Troubleshooting"
section at the end of this chapter.
If there is no @ date-time switch in the {CreateDate} , {PrintDate} , or {SaveDate} fields, they will show the date and time, formatted according to Date and Time defaults, as described previously, or the Control Panel's Regional Settings option.
Caution
Be careful using {Date} fields in templates. When you create a new letter based on the template, Word puts the {Date} field in the document, and then updates the field so it shows the current day. A week later, when you discover that you need an extra copy of the letter, you open the saved file and Word dutifully updates the {Date} field—leaving you no idea when you actually created the letter.
To avoid allowing Word to insert the current date in a document each time you open it, you should use the {CreateDate} field in templates, and explicitly supply the @ date-time format switch for it. That way, the date won't change if you open or print a letter sometime after it was originally created.
For example, this field
{CreateDate @ "MMMM d,yyyy"}
produces a result reflecting the day the document was created, with formatting like this:
July 17, 2002
Caution
Don't use the {PrintDate} field in a template. Word always updates this field immediately prior to printing, regardless of the setting you specify on the Print tab of the Options dialog box.
Page Numbering
To show the current page number or the total number of pages in a document's header or footer, don't bother entering the {Page} and {NumPages} fields manually. The Header and Footer toolbar has buttons for each.
If you aren't in a header or footer, however—or you need to use the {SectionPages} field, which displays the total number of pages in the current section—you should start by choosing Insert, Field. You'll find {Page} , {SectionPages} , and {NumPages} in the Field Names box.
Referring to Document Contents
Certain fields allow you to pluck text out of a document and use it someplace else, or refer to its location—for example
You can create cross-references to bookmarked pieces of text. In a catalog of pet products, for example, using {Ref} and {PageRef} fields lets you automatically insert this text: "See Retractable Dog Chains on page 77." The simplest and most reliable way to create these fields is to choose Insert, Cross-reference and use that dialog box.
→ To use Word's built-in cross-reference support, see "Inserting Cross-References".
Similarly, you can refer to paragraph numbers—for example, "as defined in paragraph IV.B.7.a"—by using the {Ref} field, preferably by using the Cross-reference dialog box.
Use the {StyleRef} field to put the first and last entries on a page in the header or footer, just as you would in a dictionary or telephone book. The {StyleRef} field also allows you to put the name of a chapter (or section, or anything else that's formatted with a style) in a header or footer.
The {Ref Bookmark} field retrieves bookmarked text from elsewhere inside the document. For example, if you have a bookmark called TotalSales and it currently covers the text 123.45, a {Ref TotalSales} field in the document displays the field result 123.45.
{Ref} has a half-dozen switches, but for most situations, the switches are obsolete: You can control every nuance of every switch more easily by using the Cross-reference dialog box or the Insert Hyperlink dialog box. There's one obscure exception: If you need to remove the alphabetic text from a paragraph number, consult online Help about the switch.
The {StyleRef} field, on the other hand, has many applications in Word. In the simplest situation, a field code such as:
{StyleRef "Heading 1"}
causes Word to look backward in the document, to find the most recent use of the style Heading 1. If, for example, the nearest paragraph formatted with the Heading 1 style contains the text "Executive Summary," the field code result shows that text.
Note
The {StyleRef} field works with both character and paragraph styles.
Although you can use {StyleRef} in the body of a document to repeat the last text formatted with a particular style, it's most useful in headers and footers, where these rules apply:
When Word encounters a {StyleRef} field in a header or footer, it finds the first occurrence of that particular style on the page, and the field result is the text in that paragraph.
When Word encounters a {StyleRef l} field in a header or footer (which you can create by checking the Search from Bottom of Page to Top box in the Field dialog box), it uses the last paragraph formatted with the particular style.
Say you have a corporate telephone book with phone extensions that looks something like this:
| Aaron, Ron 3319 | Ambray, Jill 9937 | Astron, Deb 3826 |
| Able, Janey 1766 | Antone, Phil 7635 | Autry, Gene 5311 |
| Actor, John 4113 | Appley, Anne 5539 | Azure, Irene 7631 |
To construct a header that uses the format "Aaron, Ron to Azure, Irene," you need to set up the telephone book carefully, because each employee's name must be formatted with its own style. In this case, if you create and apply a character style called EmpName to all the employee names, you could use fields in the header like this:
{StyleRef "EmpName"} to {StyleRef "EmpName" l}
to produce the correct header format.
On each subsequent page, Word will update the header to include the first and last occurrence of the EmpName style on that particular page.
Likewise, to place chapter (or section) names in headers and footers, use the {StyleRef} field:
Ensure that the text you want to go in the headers (or footers) is all formatted with the same style. For example, if all the chapter names in your document are formatted with the "Heading 1" style, you're set.
Choose View, Header and Footer to display the header or footer. Place the insertion point where you want the chapter name to appear.
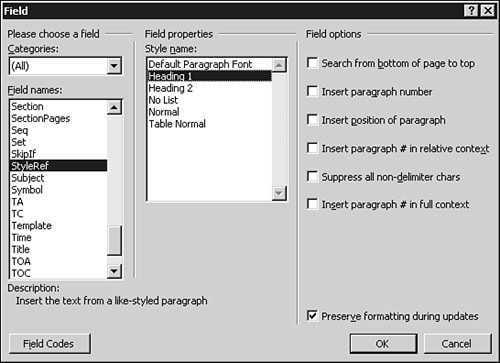
Choose Insert, Field. In the Field Names box, select StyleRef.
In the Style Name box, choose the name of the style that you want to link into the header. In this case, that's Heading 1 (see Figure 19.3). Click OK.
Figure 19.3. The StyleRef field can refer to any of the styles in the document.
Word inserts a {STYLEREF "Heading 1"} field in the header (or footer). Every time Word encounters the field, it finds the first "Heading 1" paragraph on the page, and turns the text from the paragraph into the field result. If there is no "Heading 1" paragraph on the current page, Word scans backward through the document toward the beginning until it encounters that style, and uses that text as the field result.
Displaying Document Properties
Word provides dozens of additional fields that retrieve data associated with a document. You've already seen these fields:
{CreateDate} , {SaveDate} , and {PrintDate} , all discussed in the "Showing Dates and Times" section earlier in this chapter.
{Page} , {NumPages} , and {SectionPages} , all discussed in "Page Numbering" earlier in this chapter.
The {Ref} and {StyleRef} fields, which retrieve bookmarked text and words or paragraphs formatted with specific styles, as described in the preceding section.
In addition, Word lets you retrieve all the information from the Properties dialog box that appears when you choose File, Properties (see Table 19.5).
Caution
The first time Word updates the NumChars field, it will be low by the number of characters in the NumChars field's result! To see a number identical to the one on the Statistics tab, you must update the field twice.
Fields that appear in Table 19.6 with an asterisk can be set, as well as referenced. For example, the field
{Author}
yields a field result that's identical to the contents of the Author box on the Summary tab of the File Properties dialog box. However, the field
{Author "Mark Twain"}
sets the Author value on the Summary tab to Mark Twain, and displays that result in the document.
Tip from 
There's a tricky, effective, and thoroughly undocumented (until now anyway) method for prompting the user to fill in any of these modifiable file properties. For details, skip ahead to "Prompting for Input" later in this chapter.
Several of the values that appear in the File Properties dialog box don't have fields associated with them directly. Most of them can be accessed through the DocProperty field. For example, this field
{DocProperty "Paragraphs"}
shows the number of paragraphs in the current document, as it appears on the Statistics tab. (Like the NumChars field, this field must also be updated twice to get an accurate value.) To get to all the DocProperty settings, choose Insert, Field, and choose DocProperty in the Field Names box.
Performing Mathematical Calculations
Word has dozens of operators and functions that let you perform (almost) any kind of mathematical calculation. But just because the capability exists, doesn't mean you should use it. In all but the most elementary cases, you're much better off working with a tool more suited to calculations, such as Excel 2002 or your trusty calculator. There are three general areas in which using fields to perform calculations makes sense:
When you have a Word table that requires extremely simple mathematics, such as adding up a row or column of numbers. If you need anything more complex, use Excel.
Inside simple data-entry forms, as discussed in "Creating a Data-Entry Form" later in this chapter. Note, however, that VBA/Word provides much more powerful and reliable calculation capabilities with its custom dialog boxes (UserForms).
→ For more information about creating custom dialog boxes with VBA and Word, see "Creating Custom Dialog Boxes".
When you need to retrieve data that has been bookmarked in Word, to perform straightforward calculations.
The Word "Formula" field is indicated by an equal sign. When Word sees a field like this
{= ….}
it knows to calculate the value inside the field.
Say you have a Word document that lists medical insurance reimbursements. The document prints on a preprinted form with a perforated check at the bottom. You want Word to generate the check amounts automatically, reflecting the total amount due, minus a $50 deductible. If the total amount due is covered by a bookmark called TotDue, this field could appear on the check, to print the amount due with a leading dollar sign
{= TotDue – 50 # $,0.00}
and then this field could go on the next line, to print the amount due in words:
{= TotDue – 50 * dollartext *caps}
To perform calculations, you can mix bookmark names with all the common mathematical symbols. All these are valid calculation fields, providing the referenced bookmarks exist, and will produce the results you expect:
{= (3*Book1) + Book2} {= Book79 ^ 2} {= - Book15 + Book27}
Tip from 
If the bookmark covers a series of numbers, Word adds them together before applying the calculations in the field. If the bookmark covers characters, it's assigned a value of zero.
The most useful Word field operators are listed in Table 19.6.
When you're working inside a table, you can use the special "bookmarks" listed in Table 19.7.
So, for example, if this field appears in a table:
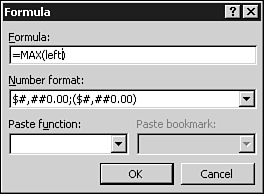
{= Sum(Left)}
the field result is the sum of all the cells immediately to its left.
By far the easiest way to put formulas into tables is to choose Table, Formula and use the Formula dialog box (see Figure 19.4). This is the same box you'll see if you choose Insert, Field; bring up "= (Formula)" in the Field Names box; and then click Formula.
Although the dialog box helps keep you from misspelling the built-in functions and offers a little support for number formatting, it doesn't hold a candle to Excel's capabilities. You should rely on Excel for anything but the simplest calculations.
→ For detailed instructions on inserting an Excel worksheet range into a Word document, see "Combining Two or More Data Types in One Document".
Managing Custom Numeric Sequences
Word supports a variety of built-in paragraph numbering schemes via the Bullets and Numbering dialog box. For custom numbering tasks, there are two fields you can use to create your own numbering schemes and maintain them throughout a document. If you work in a legal office, these capabilities might be the single most important feature in Word:
The {ListNum} field works wonders in custom-generated paragraph numbering schemes, particularly the type of numbering schemes you'll find in legal documents.
The {Seq} field, on the other hand, helps you maintain sequences of numbers that are (typically) independent of paragraph numbering.
Using {ListNum} To Create Sophisticated Numbering Schemes
{ListNum} fields can adhere to one of three numbering schemes, per Table 19.8.
| Level | Number | Outline | Legal |
|---|---|---|---|
| 1 | 1) | I. | 1. |
| 2 | a) | A. | 1.1. |
| 3 | i) | 1. | 1.1.1. |
| 4 | (1) | a) | 1.1.1.1. |
| 5 | (a) | (1) | 1.1.1.1.1. |
| 6 | (i) | (a) | 1.1.1.1.1.1. |
| 7 | 1. | (i) | 1.1.1.1.1.1.1. |
| 8 | a. | (a) | 1.1.1.1.1.1.1.1. |
| 9 | i. | (i) | 1.1.1.1.1.1.1.1.1. |
The {ListNum} field allows you to build complex and sophisticated numbering sequences, which are sensitive to both other {ListNum} fields and to the position of the {ListNum} field in a sentence. Detailing {ListNum}'s capabilities could take a chapter by itself, but to get a glimpse of its power, try these experiments:
Put a {ListNum} field at the beginning of a blank paragraph. Select the field, and use the Increase Indent or Decrease Indent buttons to change the level of the field—and thus the format of the number.
Insert several {ListNum} fields in a paragraph, interspersed with text. Click and drag the text with its associated {ListNum} field. All the fields will be renumbered automatically.
Put a bookmark on a {ListNum} field, and use a {Ref} field (or Insert, Cross-Reference) to refer to the field. Then move the {ListNum} field and update the document. The reference will be updated as well. This is the kind of approach you can use to keep references such as "see paragraph III (173) A (3) iii" in sync. If you set up the reference to use a {Ref} field, and the {Ref} field points to a bookmark over a (potentially quite complex) {ListNum} or series of {ListNum} fields, if you move the fields, the reference changes automatically. So if the previously mentioned paragraph is moved and suddenly becomes paragraph III (172) A (3) iii, the reference will be automatically updated to say "see paragraph III (172) A (3) iii."
The {ListNum} field has two switches. The s switch tells Word what number to start at (so you can being numbering at any point). Usually, {ListNum} senses its level in the list by its position within a paragraph, and the presence of {ListNum} fields before it. The l switch allows you to manually override {ListNum} 's level auto-sensing capabilities.
Note
To see more information about {ListNum} (but, tragically, only a small glimpse of its power), refer to Microsoft Knowledge Base article Q162895.
Using {Seq} to Count Automatically
By contrast, {Seq} fields are straightforward. You have to make up an "identifier" (or use one of the built-in identifiers provided by Word) to keep the various sequences in a document straight. For example, you might add this text with field codes at the of a document:
Refer to folders {Seq FolderNumber} and {Seq FolderNumber}
The field results will look like this:
Refer to folders 1 and 2
Note
You cannot use {Seq} fields in headers or footers.
The next time Word encounters a {Seq FolderNumber} field, it will produce the value 3, then 4, and so on. This technique can be extremely useful if, for example, you want to number illustrations in a manuscript sequentially. If you use a field such as
Illustration Number {Seq IllustrationNo} - Monet
in the caption above or below each illustration, Word numbers the illustrations sequentially:
Illustration Number 77 - Monet
Then if you reorder the illustrations—move a few around, delete some, and add some others throughout the document—all you have to do is press Ctrl+A to select the entire document, and then press F9 to update the fields. Word renumbers the illustrations, starting at 1 and continuing sequentially throughout the document.
Moreover, if you use one of the three identifiers that Word recognizes—Figure, Table, or Equation—your {Seq Figure} , {Seq Table} , and {Seq Equation} fields can dovetail into Word's built-in features for generating cross-references, such as (See Figure 17 on page 22), and tables of figures.
Tip from 
If you choose Insert, Field, and pick Seq from the list of Field names, you'll have to click the Field Codes button in the lower-left corner of the Field dialog box to get at the extensive {Seq} Options. Clicking the Caption button merely moves you to the Caption dialog box, which you would normally see if you chose Insert, Reference, Caption.
{Seq} fields recognize five switches; the three you'll commonly use are shown in Table 19.9.
| Switch | Meaning |
|---|---|
| c | Repeat the previous sequence number; don't increment the counter |
| h | Hide the field and its results |
| val | Reset the sequence number to val |
So, for example, this series of {Seq} fields starting at the beginning of a document:
{Seq MyId} {Seq MyId c} {Seq MyId} {Seq MyId
 8} {Seq MyId}
produces this as the field result:
001 001 1 1 2 8 9
002 002
Tip from 
If you have a long document, with more than one chapter, and you want to reset the Figure sequence so it starts at Figure 1 at the beginning of each chapter, put a field that looks like this at the beginning of each chapter:
{Seq Figure h
 0}
To see an innovative use for the h switch, see the next section.
Note
There's extensive discussion of a Bookmark parameter for the {Seq} field in older versions of the online Help (and in most Office books, for that matter). The old online help is totally wrong, and any lazy author who parrots those help files deserves to be horsewhipped. If you want to refer to bookmarked information, use the {Ref} field, as described earlier in this chapter.
Prompting for Input
Word supports two fields that prompt for user input. Typically, you would use the {Ask} and {Fillin} fields in a template or a mail-merge master document to ask the person creating a new document or performing the merge for additional information:
A {Fillin} field in a template, for example, can prompt the user to type in keywords or other data that can be placed in the File Properties dialog box. Each time a new document is created based on the template, the {Fillin} field is updated, and the user sees the prompt.
An {Ask} field in a mail merge can pause the merge on every record, prompting the user to type in information specific to the record—say, a past-due amount, or a personalized message in a greeting card—and have that information repeated several places in the merged document.
→ To put {Fillin} and {Ask} fields to work, see "Customizing Form Letters with Fields".
When you update an {Ask} field, it stores the results in a bookmark in the document. When you update a {Fillin} field, Word uses the typed text as the field result. So the field
{Ask DueDate "Enter the due date:"}
replaces whatever was in the DueDate bookmark with what the user typed. And the field
{Fillin "Enter account number"}
displays whatever the user types as the field code's result.
The {Fillin} field, in particular, can be manipulated in many useful ways. For example, the
{KeyWords "new key words"}
field can set the value of the Keywords box in the Properties dialog box. Say you have a template that your company uses all the time, but people forget to fill out the Keywords box most of the time—making it difficult to search for documents. Put this field at the beginning of the template:
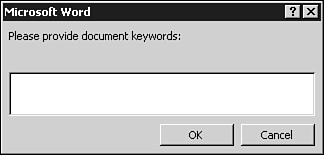
{Keywords {Fillin "Please provide document keywords:"}}
Every time a new document is created based on the template, Word first updates the {Fillin} field by prompting the user (see Figure 19.5).
Figure 19.5. When Word updates a {Fillin} field, it prompts the user for input.
Then Word updates the {Keywords} field, inserting the keywords typed by the user into the Keywords box in File Properties. Unfortunately, the result of the {Fillin} field will show in the new document. Fortunately, you can use the {Seq} field to hide it. To prompt the user for keywords in a new document, all you need is this nested field in the template:
{Seq h {Keywords {Fillin "Please provide document keywords:"}}}
You can do the same for any of the file properties listed with an asterisk in Table 19.5 earlier in this chapter.
Table of Contents and Index Fields
Word creates Tables of Contents and Indexes using fields, as well. There's a wealth of information about those fields—{tc} , {toc} , {ie} , {xe} , and the like—in the online help.
In general, the Table of Contents options are handled so well with the built-in TOC tools (choose Insert, Reference, Index and Tables, and click the Table of Contents tab) that dealing with individual fields is time-consuming and won't buy you much.
By contrast, Word's indexing tools (Insert, Reference, Index and Tables, and click the Index tab) are so woefully inadequate that all the field codes in the world won't accomplish much. Avoid them if you possibly can. If you're serious about indexing, buy an add-on package that can read Word files.