
Some of the most basic and frequently used operations are opening a new document, creating a new folder, and creating a duplicate (making a copy) of a document. Yet, many of us often still perform them through the File menu instead of using shortcuts.
Let's see what remembering to use keyboard shortcuts instead of menus can give us in terms of efficiency.
Starting a new project by opening a new document may seem obvious. We are not in a hurry and can build or write a document at our own pace. But consider, for example, a situation when you are in the middle of your work and suddenly, as often happens, a bright new idea hits you, something not connected with your current work but that you want to develop later. Before it flies away, you want to scribble it down quickly. How can you do that? Left thumb on Command, right index finger on N, and without looking at menus, you have a new page where you can jot down a few keywords. Save and leave for later.
Or take these other situations when quickly opening a new document saves time and avoids distraction.
Instead of editing a photo, designing a graphic image, or building a chart within your document, you can open a new document, copy-paste the graphic into it, work on it, and then copy-paste it back into the main document and adjust.
If a boxed piece of text—a list, a tip, a datasheet, or questions and answers—doesn't fit in with the page layout, you may want to remove it temporarily and decide what to do with it later. Select the box and cut it (the shortcut key is Command + X). The box goes onto the clipboard, but if you copy or cut something else it will be deleted. Press Command + N and paste the box into the new document. When you decide what to do with the box, you can copy-paste it back into the main document, throw it away by closing the temporary document without saving, or save it for future use.
Cut and paste a graphic image or several images into the new document to edit or modify them separately. This way, you can enlarge the graphics to work on the finer details. When the work is finished, copy-paste the image back into the main document. Afterwards, you can discard the file or keep it separately for repeated use. This is a good way to build a set of repeating graphic elements, as you go. Very soon, you will have a graphic images library.
Tip
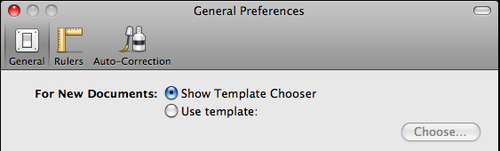
By default, when you open a new document, iWork opens the Template Chooser with a blank document highlighted in it. Hit Return (Enter) or click on the Choose button, or double-click the template icon to open the document.
If you don't want to see the Template Chooser every time you start a new document, go to the application menu (Pages, Numbers, or Keynote), choose Preferences, and click on the button next to For New Documents to deactivate this option. Click again to activate. If you have a favorite template, perhaps one that you have created yourself, check the Use Template checkbox.
When Template Chooser is disabled, you can still open a new document via the Chooser. Under the File menu, after New there is the New from Template Chooser option. On the keyboard, simply add Shift to the shortcut—Shift + Command + N.
A very long time ago, in a computer class, we were learning Mac basics, including opening new documents and folders—the instructors were saying creating instead of opening. For someone who was just learning about computers, it was incredibly hard to understand the difference between the Finder or desktop, and the active application. Many of us were going to the File menu, choosing New, and getting endless New Folders on the desktop.
When you see Finder in the top left corner of the screen, it means you are on the desktop. On a Mac computer, Desktop is actually one of the many folders of your computer. When you are in a program, the name of that program is at the top left of the screen. iWork is a suite of applications, so you see Pages, Keynote, or Numbers.
Next to the name of the program, there is the same File menu, where New is for new documents in that application.
We can click on Desktop and then choose New Folder from File or we can use the shortcut key Command + Shift + N.
Quickly opening a new folder can be very useful in the following situations:
- When planning a complex project, you may have created several folders for each stage, for example, Draft, Proof, 2nd Draft, and Finished. While working, you may discover that an additional stage should be added, so quickly create a new folder—for example, 3rd Draft—and drop the relevant documents in it.
- When researching a project, save links, articles, images, and clippings to Desktop, then open a new folder, give it a name, and scoop up all the files from your research work and drag them to the folder. To select the files, click on the Desktop, click again and, while pressing the mouse button drag the cursor over the file icons.
- After finishing work on a project, you may have notes, links, images, and so on, left lying on the desktop and cluttering it. Open a new folder and name it, say, myprojectnotes, scoop up the files, and drop them in the folder.
Tip
To zap between active applications, press Command and hit the Tab key. When you press Tab once, a semi-opaque strip of all currently active applications opens on the screen. Keep pressing Command and hit Tab again—a dark-gray rectangle will highlight the application that you can jump to. Using the Command + Tab shortcut key is very useful when you use several applications alternately, for example, one of the iWork programs and Preview.
In Finder, and in all other folder windows, this command is under the File menu. To duplicate a file, click on its icon, press Command, and type D to get a copy. The word "copy" is added to the name of the file. In iWork applications, it is under Edit. Click on an object—a shape, a photo, or a text box—and duplicate it.
What's the point in multiplying files or objects?
With files, duplicating is an essential operation when you work on a periodic publication, a magazine, or a newsletter. Having finished with the current issue, select all files containing pages, sections, or inserts, duplicate them, to get a ready template for the next issue. Change the issue number, date, and a few other items that need updating and you can start filling the publication with new content by pasting over the old one and by removing and fitting new graphics.
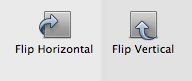
In graphic design, the "duplicate" function helps when we have a project that uses many similar objects, for example arrows. Design one arrow with curves, colors, and shadows, and then, duplicate it— now it is ready to use in several different places. Move into place, rotate, resize, or edit, if needed. When an arrow has to point in the opposite direction, just flip it horizontally or vertically to make the arrow point left or right, up or down. The Flip function is in the Metrics Inspector or under the Arrange menu. If you use flip often, you can add it to the toolbar. Under the View menu, go to Customize Toolbar..., drag the Flip icons to the toolbar, and click on Done.
Tip
When you need to select several files in a folder, press Shift while clicking on them. Then, you can move them all together. When the folder is set to show files as a list or in columns, you can select adjacent files by pressing Shift. But if you click on files separated by other files, the whole range in between will also be selected. To select only the files you want, press Command while clicking on the file.
When you've mastered touch-typing, you can type without looking at the keyboard—your fingers find the necessary keys all on their own. Much like you push pedals in the car without looking down.

Why is it important to learn touch-typing (blind typing)? With so much around us operated through keyboards, it may be considered a basic life skill. At first, you may find that touch-typing slows you down, but the more you practice, the more you find it liberating to see the text as it is appearing on screen.
To learn touch typing, there are numerous courses and resources available on the web. Have a look at the BBC site, designed primarily for youngsters but content-wise good for anyone—bbc.co.uk/schools/typing/levels/level1.shtml.
But it is not at all difficult to learn touch-typing just by practicing.
Here is how to start. First, learn the home position of your hands. The F and J keys in both QWERTY and AZERTY layouts usually have little knobs or bumps—that's where your index fingers should rest in the basic position. Thumbs should rest on the Space bar. Move the left index finger to the right to type G and right finger to the left to type H. On QWERTY, put the little finger of your left hand on A and the little finger of your right hand on the ; key. The remaining fingers will find their position on the same row. If a word finishes with a letter in the left-hand segment of the keyboard, hit space with your right thumb, if it's on the right, use your left thumb.
From here, learn where all the other keys are, relative to the basic position. Start with the basic position and progress to all fingers touch-typing.
The rest is practice.