This is a cutout from a photo of my dog, Strelka the Golden Retriever.
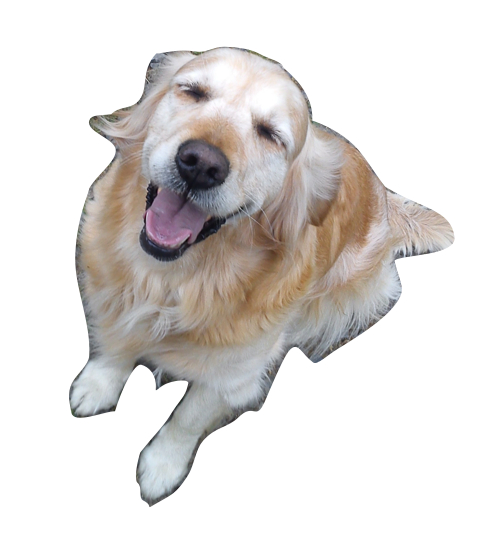
You must have seen large, life-size cutouts of human figures used for advertising purposes. Such cutouts can also be used as logos, topical markers in brochures, or on websites, as elements of larger designs, for example in an ad for a dog kennel, a vet practice, or a pet food supplier, or as a stand-alone illustration on a page where text flows around an irregular shape/image. Newspapers and magazines love using cutouts on their fashion pages. A model walking down the catwalk is shown without the audience or podium—the background is removed completely.
The cutout of this dog was made with iWork tools. This recipe describes how to use them.
Make sure that the photo shows all of the object that you will be cutting out. There shouldn't be any other objects that go over or obscure it, such as the dog's bowl or someone's hand.
Another step worth taking before starting a cutout is to deactivate the "snap to grid" function in iWork. When you move or edit objects, "snap to grid" makes them "jump" to cling to the layout grid or to align with other objects on the page. It is very useful when you want to place photos or other objects quickly within a layout. But when you are doing a complex graphic task, it may start driving you crazy.

To deactivate "snap to grid", under the application menu, say for Pages, open Preferences, click on Rulers, and then click in the checkboxes next to Alignment Guides to deactivate them. The text here says Show guides... but in fact the function is for activating or deactivating the guides, and with them the "snap to grid" function. To recap, here is the
path:
Pages
|
Preferences
|
Rulers
|
Alignment Guides.
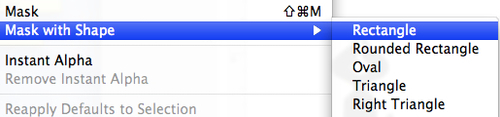
Now, select the photo and mask it with a shape.
- Under the Format menu, go to Mask with Shape, and choose a shape from the drop-down menu.
- We can start with any shape, rectangle or oval; it doesn't matter at this point. Move and resize the mask so that the dog (or the object of your choice) is fully within the mask.
- Under the Format menu, make the mask editable: Format|Shape|Make Editable.
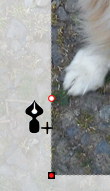
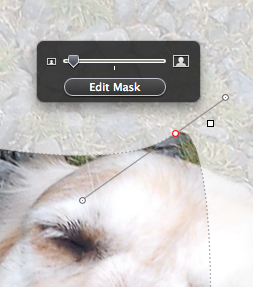
- Now the key point: add as many editing points as needed to make the mask "cling" to the contours of the cutout. Editing points are the little red dots that appear when you've made the shape editable. To add an editing point, press the Option (⌥) key as you move the cursor over the outline of the mask. When the little pen with a plus sign appears—click—and get an additional editing point.
- Move each new editing point as close to the dog as possible, just barely touching it. To move an editing point, click to select; when the red dot turns white inside, you can move it by dragging with the mouse or hitting the keyboard arrow keys.
- To avoid having to deal with a multitude of dots, you can use the curving function. To activate it go to the Format menu, slide to Shape, and choose Smooth Path. Click on curving handles and drag them to make the mask cling to the outline of the cutout.
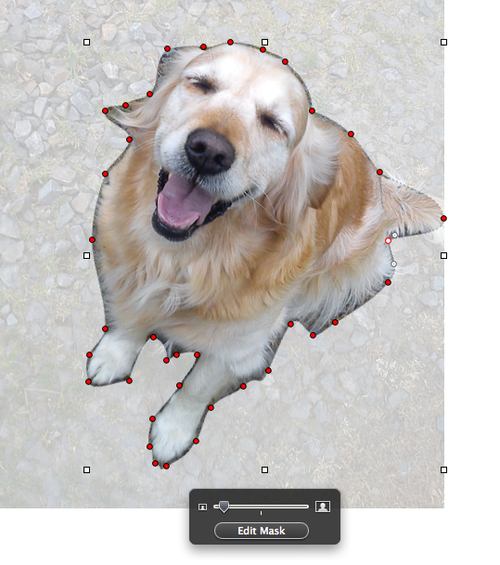
- When you have finished moving dots and curving the shape, click on the Edit Maskbutton in the masking control panel to get the cutout.
In this recipe, we discussed the following operations.
Under the Format menu, make the mask editable—Format | Shape | Make Editable.
All shapes in iWork, predesigned and drawn with the Draw tool, can be edited with Format | Shape | Make Editable. A triangle can be given the shape of a heart and a quote bubble can be turned into a thought bubble. What iWork users often overlook is that masks behave in the same way as shapes—the Make Editable function works with them too.
Move each new editing point as close to the dog as possible, just touching it. To move an editing point, click to select; when the red dot turns white inside, you can move it by dragging with the mouse or hitting the keyboard arrow keys. If we hadn't deactivated Alignment Guides at the beginning, the dots would have been jumping to align themselves with other dots, driving us to despair!
We can add dozens of editing points and move them to the cutout. If you feel you've added one too many, you can always delete them. To delete, click on the editing point to select it and hit Delete or Backspace.
If the dark masking control panel gets in your way, click on it and drag it aside.
In the Format menu, select Shape and then Smooth Path. This will give the mask flowing, curving lines and each dot, when you click on it, will show two "propellers"—the handles that control the way the shape curves. Click on an editing point, click on one of the points at the end of the propeller, and drag them to make the mask cling to the outline of the cutout. Pull the propellers out or push them in, until you achieve the perfect "cling".
If you drag one "blade" of the propeller, another one also moves. To move them independently from one another, press Command while dragging. This trick allows us to make a really tight "cling" in awkward bits of the cutout, for example, near the ears or around the tail.
Another useful trick is to change a smooth curve into a sharp corner, for example, to make the outline go around the locks sticking out of the dog's fur. To change the editing point from curving to cornered, double-click it.
Depending on your project, the work should take about 15 to 30 minutes for a simple cutout or up to two hours for a more sophisticated design (not including photo research).
You can use Alpha images in iWork projects or elsewhere, for example in Word. In OS 10.7 Lion, Preview has the Alpha tool to remove background. If you need your cutout as a separate alpha image, save it as a PDF, open it in Preview, and remove the white background.
Using masking with a shape may sound like tricky business. It takes some time to master it. One alternative technique is the Alpha tool. It will only work, however, if the background is of a consistent solid color that is different from the color of the object, a black dog sitting on a white sheet for example. When using ordinary snapshots, Alpha may not achieve a cutout effect.
Here is what happens with this photo when Alpha is applied to it:
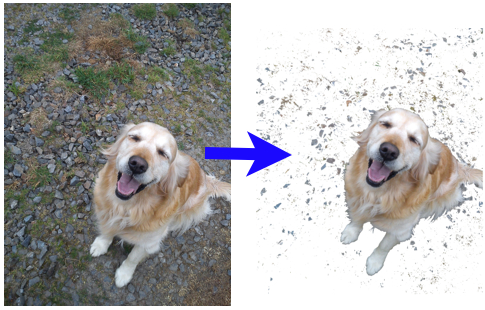
There are simply too many bits to rub out, and when you do try to rub them out, Alpha also tears out bits of the dog's coat. Just see which method suits you best.
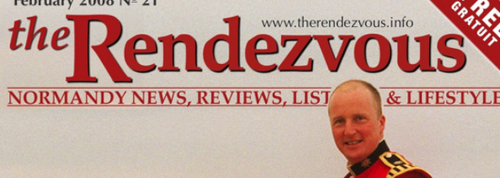
This masking with shape technique can be used to "separate" people or objects from the background in the photo and put them in front of the text. It allows us to achieve a dramatic effect, for example on magazine covers or posters. In this magazine cover, the man's head is in front of the coverlines.