
We can import photos to Numbers documents in the same way as into other iWork applications. The tools for editing photos and other graphic images are also the same.
In this recipe, we will see how to add pictures to cells in tables. Photos in cells not only enliven Numbers documents, they also serve practical purposes. You may want to include portraits of your team members when you put together a document with their addresses and phone numbers, for example. If you compile a home inventory, you can dedicate a column to photos of the items in your house, including valuable paintings and antiques, or even book covers and disc jackets. In fact, insurance and art agents often insist that photos should be included in such documents, to help identify the items in case of loss, accident, or theft.
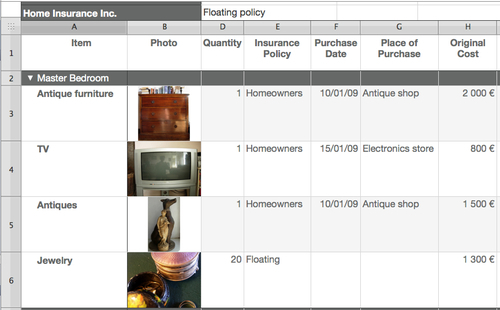
Open the Home Inventory template in Numbers and go to the Insurance Inventory sheet (click on it in the side pane of the Numbers document). We will be using the Inventory table in this demonstration.
To add photos to cells in a Numbers table, follow these steps:
- Click on the photo you want to add to the table and hold.
- Drag it to the Numbers document and slide it over the cell where you want to place it.
- When the cell shows a blue outline, let go; the photo will be placed inside the cell.
- To switch from Finder (desktop) or iPhoto, or from wherever your photo is, to Numbers, click in the Numbers document, and then go to Graphic Inspector.
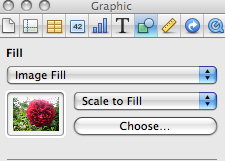
- In Graphic Inspector, set how you want the photo to be displayed in the cell. Under Image Fill, choose Scale to Fill, if you want the whole of the cell to be filled (but with parts of the photo cropped) or Scale to Fit to display all of the photo, in which case parts of the cell may be left blank.
When you drag the photo over the Numbers document, the cursor will show a green button with a white cross. This means that the document is ready to import the photo. Drag the photo to the table and over the target cell. When the cell shows a blue outline, it is ready to import the photo.
To change the photo in a cell, simply drag the new one onto it. The new photo will replace the existing one.

To scale your image, you can also select Image Fill in the Cell Background drop-down menu under Table Inspector and select Scale to Fill or Scale to Fit under the drop-down menu below Image Fill.
There are several ways in which a photo can be imported to iWork documents and placed within the document. You can navigate to Media Browser | Photos. This shows images in iPhoto and Photo Booth. Photos inside any folder, including desktop, can be added to Media Browser.
If you want one, several, or all of your photos to be displayed larger, increase the size of one or more cells.
To increase the size of one cell, click in the table so that it shows the reference tabs. Slide the cursor over the line separating the tabs. When the cursor turns from an arrow into a horizontal bar crossed with a double-headed arrow (see the following screenshot), click, hold, and drag it down. The cell will grow vertically when you click between the row tabs and horizontally when you drag on the column tabs.

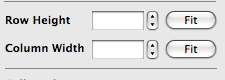
To increase the size of all cells, go to Cells Inspector and increase the value in the Row Height and Column Width fields by clicking on the arrows:
- The Placing, cropping, editing, moving, and resizing photos recipe in Chapter 5, Working with Photos: Tips and tricks