
What is more catchy than an animal shape? Stylized shapes of cats, dogs, parrots, roosters, horses, and cows are often used as logos.
When the famous artist Picasso was going through a period of experimentation with minimalist drawings, he drew a shape of his dog, a Dachshund.
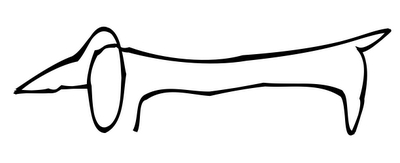
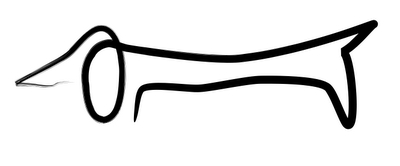
This is a copy of Picasso's drawing, The Dog. It is not a copy as in copy-paste, but as in a re-drawing of someone else's drawing, by hand. In other words, it is an original artwork. As such, it can serve as your own original logo.
The draw tool works by connecting dots created by clicking with a small pen-like cursor.
In the Shapes menu, choose the last option (or go to Insert | Shape | Draw a Shape). When the cursor turns into a pen tip, click in an iWork document and click again. The two dots will be connected by a line. Several dots will create a shape that takes the color fill and line style preset for the template you are using. We can change it as the work progresses. When you make a full circuit, and after several clicks with the pen, click on the first dot again, the shape closes. It can then be edited further. If you double-click on the last dot instead of, clicking once on the first, the first, the shape remains open. Remove the color fill, and only a line will remain.
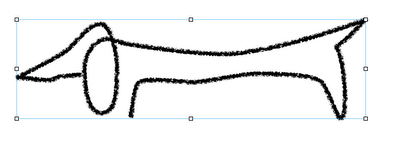
Let's draw Picasso's dog using this tool.
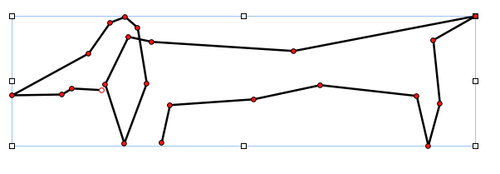
- Draw the rough outline with connecting dots.
- Remove the Color Fill effect by choosing None under Fill in the Graphic Inspector.
- Make the shape rounded by going to Format|Shape|Smooth Path.
- Double-click on the two editing points at the top of the front and back paw to make them angled.
- Add thickness to the body. In the Graphic Inspector, click on the up arrow under the Stroke and Line options.
- Click on each editing point and rotate curved handles to adjust the curves of the body.
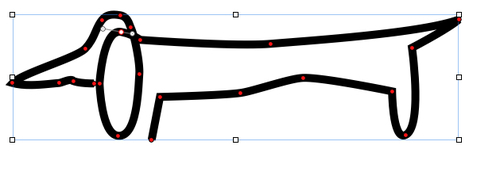
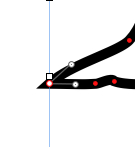
- Move the editing points by dragging or pressing on the keyboard left, right, up, and down arrows to make final adjustments to the shape of the body, for example, to extend the tail or make the ear bigger. The shape should look similar to the following image. Here, it shows the (red) editing points and a "propeller" at the top of the ear.
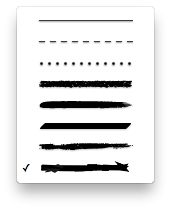
- Change line styles to create different looks for the dog. Click away from the shape and then click on it again to select it. Go to the Graphic Inspector, and under Stroke, click on the line styles drop-down menu to choose one. There is a choice of lines.
- Add color to the image (optional). With the image selected, go to Graphic Inspector and choose Color Fill from the Fill drop-down menu. Click in the color well and choose a color when the Colors Viewer opens.
Changing line styles changes the picture dramatically. Here is what the dog looks like if we choose the fourth from top, fluffy line style:
And here's a Chinese calligraphy-style image:
The last line style in the drop-down menu turns the Dachshund from short-haired to wire-haired. Add color fill to "flesh" its body. In this example, the color is Mocha from the Crayon box.

The drawing, when you look at it closely, is one continuous line representing the contours of the dog. We can start with the lower right-hand side of the dog's muzzle or with the front paw. Click once to start the shape, and then keep clicking, putting dots where you see that the line changes direction. We don't need too many dots. And anyway, if we see that an additional one is needed, we can always add it later.
When designing a custom shape, if we simply click with the pen, the shape will turn out angular. The lines coming to each new point form an angle. If we slightly drag the mouse around after clicking, the line becomes curved and the dot shows two curved handles that look like propellers.
When you begin creating an image with the draw tool, more often than not you can immediately see where you will need curves and where there should be angles. With the dog shape, however, it's probably easier to make the rough outline first and then tackle curves and angles, because there are so many points. After the rough outline is finished, make it rounded—Format | Shape | Smooth Path—or go through each red dot (editing point) and double-click where you want it to curve.
By default, propellers point in opposite directions. When we drag one, the other also moves. For more difficult curves, you may need to move the propellers independently of each other. Press Command while dragging, and the propeller blades will move separately. The nose, for example, even though it looks pointed, is in fact a curved point. So is the end of the tail. The sharp angle is created by rotating the propellers back towards the body.
This logo uses an image of the Dachshund. Of course, if we are fans of Spaniels or Setters, we can edit the shape further. We can shorten the body or make the legs longer and the muzzle shorter, to make it look like our favorite breed. If you like Huskies, edit the ear from droopy to pointed upwards, and get a different original shape.