
electrical energy as it travels over wires. The NEC requires use
of wires and cables big enough to minimize this loss.
Storing and Managing Batteries
Some PV system use batteries. A battery is two or more
electrochemical cells that provide power. Many types of bat-
teries are used in PV systems, but lead-acid batteries are used
most often.
Lead-acid batteries require adequate exposure to airflow.
Batteries give off hydrogen and other gases during normal
operation. So areas that contain batteries require means of
ventilation such as fans, roof ridges, or louvered areas. Bat-
teries also require secure dedicated operating space. In addi-
tion, you must plan to contain any spilled battery liquids.
Meeting Local Utility Interconnection Requirements
In order to interconnect a PV system with the utility grid, or the poles and wires
forming a jurisdiction’s electrical network, the customer must enter into an intercon-
nection agreement with the local utility company. The customer must also agree to
meet various utility requirements. An interconnection agreement spells out the
terms and conditions under which the PV system will be connected to the utility grid.
The customer does not necessarily need to know about standards intercon-
necting PV systems with utilities. But the PV designer, the PV installer, and utility
company should understand and stay current with all code and interconnection
changes and details.
Basic Stages in Installing a PV System
A PV system’s performance depends on its design and installation. But studies
show significant installation problems in large numbers of PV systems. A recent
German study of more than 1,000 systems, for instance, indicated that 24 percent
had connectivity issues on the direct current (DC) side of the system. All those
problems should have been resolved during installation and burn-in. These prob-
lems result in significantly lower performance. In many of these cases, the installer
could have avoided underperformance with closer attention to the installation’s
details and better quality-assurance processes.
Here is an overview of the many steps in the installation process. You will
read about each of these steps in detail as you progress through this text.
1. Start with an integrated systems approach and process.
2. Conduct a comprehensive quality-assurance program during installation.
3. Perform a project “walk-through” with the owner or the owner’s
representative, and secure an approval signature.
TECH TIPS
Place components and conduit
in the coolest locations available.
Also provide plenty of airflow
around conduit and other PV system
components.
TECH TIPS
All batteries require maintenance.
Inspect lead-acid batteries monthly. Add
water to batteries during the summer
and in arid (dry) conditions.
CHAPTER 1
Introduction to Advanced Photovoltaic System Installation 5
4. Confirm that the drawings are consistent with the site and all site conditions.
5. Confirm that the installation site can accommodate the required PV system size.
6. Inspect the roof or other structure to confirm that it can support the
additional weight of the PV system.
7. Have the customer repair or replace the roof and enhance the structure if
necessary.
8. Properly seal any roof penetrations with appropriate roofing industry–
approved sealing methods.
9. Install equipment according to manufacturers’ specifications and manuals.
10. Ground the system parts to reduce the threat of shock hazards and surges
induced by lightning.
11. Check for proper PV system operation by following the checkout procedures
on the PV system.
12. Test all circuits, strings, arrays, and combiner box input and output for
system inefficiencies. (The combiner box is the enclosure where PV strings
are electrically connected and where protection devices can be located.)
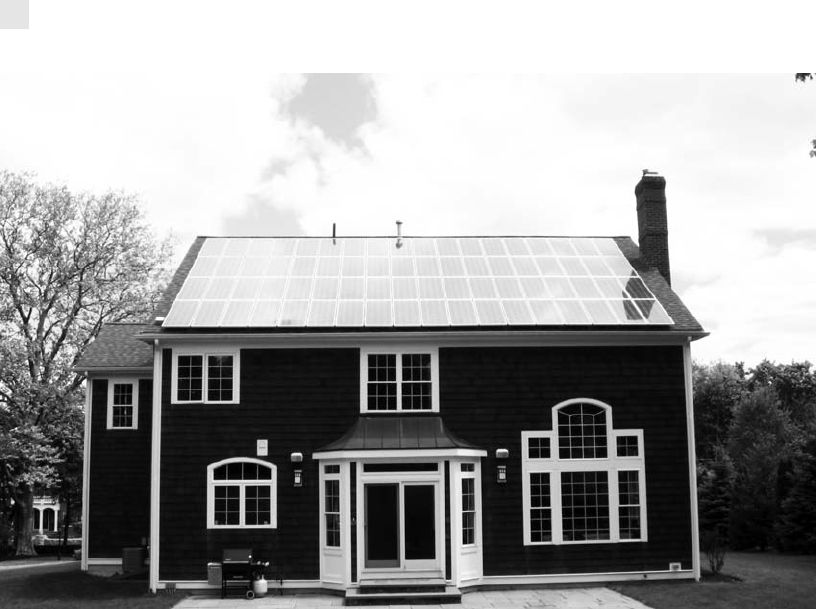
This home in Milton, Mass., sports an 8.4-kilowatt PV system manufactured by Evergreen Solar of Marlborough, Mass.,
and installed by groSolar of White River Junction, Vt.
Courtesy of US Department of Energy/National Renewable Energy Laboratory (DOE/NREL)
6 ADVANCED PHOTOVOLTAIC INSTALLATIONS
13. Meet local utility interconnection requirements.
14. Prepare for final inspections by the AHJ and the utility (as required).
Now to examine this list in a little more detail.
Take a true systems approach. This means designing and installing the PV
system as an integrated whole, and not just a bunch of parts. For example: Use a
single PV company to design and install the system. Make certain that the parts
you choose for the PV system can function together to provide a top-performing
system. Use only components and equipment that are “listed”—certified by
Underwriters Laboratory (UL), an independent product safety certification
organization.
Conduct a comprehensive quality-assurance program. You want to have
someone checking for errors and oversight during installation. The project man-
ager for the installation should perform routine inspections of all the equipment
as it is going in. Use the PV System Inspection Checklist (which you will read
about later in this chapter) as one part of a good quality-assurance program. Also,
invite the AHJ and the utility company to inspect your work as it progresses.
Building a productive relationship with those entities can help identify problems
early on, when they are easier to correct.
Perform a project walk-through with the owner or his or her representative.
You must get an approval signature from this person before the PV system can go
through the final inspection process and begin operation.
Confirm that drawings are consistent. During the PV system design, drawings
are done of the PV site. They include the location of the arrays and any trees or
obstructions that may shade the site. These drawings also show the placement of
all the PV system components and wiring, and list their important dimensions.
These drawings need to be reality based. They must correspond with the actual
placement of equipment and components on the PV site. There is some leeway on
accuracy, but if there are huge discrepancies, they will be noticed. The AHJ may
deny a PV system permission to operate if the system is very different from the
initial plan.
Confirm that the installation site can accommodate the system. You have
to be sure the building is suitable for installing a PV system. A site assessment
involves determining that the installation site can accommodate the array and
the balance-of-system (BOS) while generating power in a meaningful manner.
A thorough site visit and analysis will eliminate planning errors and miscalcu-
lations; this will save money and lead to more profits for you and your
company.
CHAPTER 1 Introduction to Advanced Photovoltaic System Installation 7
Make sure the roof can support the weight of the PV system. Whether
you’re mounting your system on a roof or on some other structure, you’ll need to
inspect it to make sure it can support the PV system’s additional weight and
uplift—the force of the wind on the solar array. PV systems can be ground-
mounted, façade-mounted, or roof-mounted. Roofs are common locations for
array installations. Roof-mounted arrays provide protection from many forms of
physical damage. Often they have better and less obstructed sun exposure. In
addition, roof-mounted installations do not take up valuable yard space.
Have the customer repair or replace the roof if necessary. If the roof on
which you want to install a PV system comes up short, the customer will have to
repair or replace it before you can proceed. Pay particular attention to any roof
that looks unnaturally bowed, is poorly constructed, or is not built to code. Go
into the attic and inspect the roof construction. Consult an engineer if the roof
structure looks questionable, or you have any concern that it is not able to sup-
port the PV array.
Properly seal any roof penetrations. Seal roofs properly to guarantee that the
PV system installation does not cause leaks. Use roofing-industry–approved
sealing methods appropriate for the roofing type and location. Sealing provides a
waterproof barrier over the entire roof surface, and it is essential for roofs with
less than a 5-degree slope. Approved roof sealants include bitumen roofing felt,
plastic roof sheeting, tri-polymers that do not set rapidly unless exposed to the air
and allow for resealing or settling, and special approved silicone or plastics that
harden after application. Work with a roofing professional to determine which is
the right sealant and set of procedures for the project and location. There is never
an excuse for a roof leak.
Install equipment according to manufacturer specifications. Setup, use, and
proper maintenance are key to long life for any equipment. The same is true for
PV systems. Throughout this chapter, there will be notes and specific details about
manufacturer’s requirements for proper installation. Be sure to give these points
additional care and attention, and you should experience better system success
and performance.
Ground the system. PV arrays should be grounded using the proper lugs or
grounding screws to reduce the threat of shock hazards and induced surges.
Secure every array and mounting rail with the code-specified grounding method.
Grounding materials should be stainless steel or bimetallic. That way the
grounding materials properly bond the array frames to roof-mounted rails and
mounting hardware. Then attach the arrays and rails to the grounding wire.
8 ADVANCED PHOTOVOLTAIC INSTALLATIONS
..................Content has been hidden....................
You can't read the all page of ebook, please click here login for view all page.