You already know my pros and cons, I have a con that is, my classification accuracy is relatively low. However, if you tune me up, I can perform much better. Well, should we trust Naive Bayes? If so, shouldn't we look at how to increase the prediction performance of this guy? Let's say using the WebSpam dataset. At first, we should observe the performance of the NB model, and after that we will see how to increase the performance using the cross-validation technique.
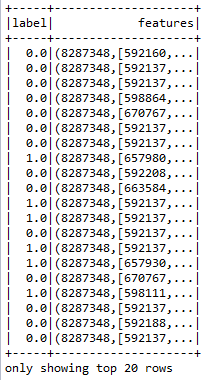
The WebSpam dataset that downloaded from http://www.csie.ntu.edu.tw/~cjlin/libsvmtools/datasets/binary/webspam_wc_normalized_trigram.svm.bz2 contains features and corresponding labels, that is, spam or ham. Therefore, this is a supervised machine learning problem, and the task here is to predict whether a given message is spam or ham (that is, not spam). The original dataset size is 23.5 GB, where the classes are labeled as +1 or -1 (that is, a binary classification problem). Later on, we replaced -1 with 0.0 and +1 with 1.0 since Naive Bayes does not permit using signed integers. The modified dataset is shown in the following figure:
At first, we need to import necessary packages as follows:
import org.apache.spark.ml.classification.NaiveBayes
import org.apache.spark.ml.evaluation.MulticlassClassificationEvaluator
import org.apache.spark.sql.SparkSession
import org.apache.spark.ml.Pipeline;
import org.apache.spark.ml.PipelineStage;
import org.apache.spark.ml.classification.LogisticRegression
import org.apache.spark.ml.evaluation.BinaryClassificationEvaluator
import org.apache.spark.ml.feature.{HashingTF, Tokenizer}
import org.apache.spark.ml.linalg.Vector
import org.apache.spark.ml.tuning.{CrossValidator, ParamGridBuilder}
Now create the Spark Session as the entry point to the code as follows:
val spark = SparkSession
      .builder
      .master("local[*]")
      .config("spark.sql.warehouse.dir", "/home/exp/")
      .appName("Tuned NaiveBayes")
      .getOrCreate()
Let's load the WebSpam dataset and prepare the training set to train the Naive Bayes model as follows:
// Load the data stored in LIBSVM format as a DataFrame.
 val data = spark.read.format("libsvm").load("hdfs://data/ webspam_wc_normalized_trigram.svm")
 // Split the data into training and test sets (30% held out for testing)
 val Array(trainingData, testData) = data.randomSplit(Array(0.75, 0.25), seed = 12345L)
 // Train a NaiveBayes model with using the training set
 val nb = new NaiveBayes().setSmoothing(0.00001)
 val model = nb.fit(trainingData)
In the preceding code, setting the seed is required for reproducibility. Now let's make the prediction on the validation set as follows:
val predictions = model.transform(testData)
predictions.show()
Now let's obtain evaluator and compute the classification performance metrics like accuracy, precision, recall, and f1 measure as follows:
val evaluator = new MulticlassClassificationEvaluator()
                    .setLabelCol("label")
                    .setPredictionCol("prediction")
val evaluator1 = evaluator.setMetricName("accuracy")
val evaluator2 = evaluator.setMetricName("weightedPrecision")
val evaluator3 = evaluator.setMetricName("weightedRecall")
val evaluator4 = evaluator.setMetricName("f1")
Now let's compute and print the performance metrics:
val accuracy = evaluator1.evaluate(predictions)
val precision = evaluator2.evaluate(predictions)
val recall = evaluator3.evaluate(predictions)
val f1 = evaluator4.evaluate(predictions)
// Print the performance metrics
println("Accuracy = " + accuracy)
println("Precision = " + precision)
println("Recall = " + recall)
println("F1 = " + f1)
println(s"Test Error = ${1 - accuracy}")
You should receive the following output:
Accuracy = 0.8839357429715676
Precision = 0.86393574297188752
Recall = 0.8739357429718876
F1 = 0.8739357429718876
Test Error = 0.11606425702843237
Although the accuracy is at a satisfactory level, we can further improve it by applying the cross-validation technique. The technique goes as follows:
- Create a pipeline by chaining an NB estimator as the only stage of the pipeline
- Now prepare the param grid for tuning
- Perform the 10-fold cross-validation
- Now fit the model using the training set
- Compute the prediction on the validation set
The first step in model tuning techniques such as cross-validation is pipeline creation. A pipeline can be created by chaining a transformer, an estimator, and related parameters.
Step 1. Pipeline creation - Let's create a Naive Bayes estimator (nb is an estimator in the following case) and create a pipeline by chaining the estimator as follows:
val nb = new NaiveBayes().setSmoothing(00001)
val pipeline = new Pipeline().setStages(Array(nb))
In the earlier case, the only stage in our pipeline is an estimator that is an algorithm for fitting on a DataFrame to produce a transformer to make sure the training is carried out successfully.
Step 2. Creating grid parameters - Let's use ParamGridBuilder to construct a grid of parameters to search over:
val paramGrid = new ParamGridBuilder()
              .addGrid(nb.smoothing, Array(0.001, 0.0001))
              .build()
Step 3. Performing 10-fold cross-validation - We now treat the pipeline as an estimator, wrapping it in a cross-validator instance. This will allow us to jointly choose parameters for all Pipeline stages. A CrossValidator requires an estimator, a set of estimator ParamMaps, and an evaluator. Note that the evaluator here is a BinaryClassificationEvaluator, and its default metric is areaUnderROC. However, if you use the evaluator as MultiClassClassificationEvaluator, you will be able to use the other performance metrics as well:
val cv = new CrossValidator()
            .setEstimator(pipeline)
            .setEvaluator(new BinaryClassificationEvaluator)
            .setEstimatorParamMaps(paramGrid)
            .setNumFolds(10)  // Use 3+ in practice
Step 4. Fit the cross-validation model with the training set as follows:
val model = cv.fit(trainingData)
Step 5. Compute performance as follows:
val predictions = model.transform(validationData)
predictions.show()
Step 6. Obtain the evaluator, compute the performance metrics, and display the results. Now let's obtain evaluator and compute the classification performance metrics such as accuracy, precision, recall, and f1 measure. Here MultiClassClassificationEvaluator will be used for accuracy, precision, recall, and f1 measure:
val evaluator = new MulticlassClassificationEvaluator()
                            .setLabelCol("label")
                            .setPredictionCol("prediction")
val evaluator1 = evaluator.setMetricName("accuracy")
val evaluator2 = evaluator.setMetricName("weightedPrecision")
val evaluator3 = evaluator.setMetricName("weightedRecall")
val evaluator4 = evaluator.setMetricName("f1")
Now compute the classification accuracy, precision, recall, f1 measure, and error on test data as follows:
val accuracy = evaluator1.evaluate(predictions)
val precision = evaluator2.evaluate(predictions)
val recall = evaluator3.evaluate(predictions)
val f1 = evaluator4.evaluate(predictions)
Now let's print the performance metrics:
println("Accuracy = " + accuracy)
println("Precision = " + precision)
println("Recall = " + recall)
println("F1 = " + f1)
println(s"Test Error = ${1 - accuracy}")
You should now receive the results as follows:
Accuracy = 0.9678714859437751
Precision = 0.9686742518830365
Recall = 0.9678714859437751
F1 = 0.9676697179934564
Test Error = 0.032128514056224855
Now this is much better compared to the previous one, right? Please note that you might receive a slightly different result due to the random split of the dataset and your platform.