
SAVING TIME WITH THE DATA ACCESS PAGE WIZARDS
As when you create other Access objects, the Access team has created a wizard to help you get going quickly and easily with a new DAP. One method that allows you to start off quickly and easily is the AutoPage: Columnar feature.
Using AutoPage: Columnar
While in Northwind.mdb's Database window, follow these steps:
1. | |
2. |
Select AutoPage: Columnar. |
3. |
Select the table or query to base the page on—in this case, Customers (see Figure 12.5). Figure 12.5. Notice the choices displayed as listed in step 1.
|
4. |
Click OK. |
5. |

Note
Because the Save As Data Access Page dialog is the Office Save As dialog, it will default to saving your documents to the My Documents folder, unless you change the default folder in Explorer, or on the General tab of the Options dialog, found on the Tools menu.
You're now presented with a data-editable, if somewhat boring, DAP (see Figure 12.6).
Figure 12.6. This Data Access Page was created by using the AutoPage: Columnar feature.

One way to create a quick DAP that gives you more control over the look of the DAP is using the Page Wizard.
Taking Off with the Page Wizard
To use the Data Access Page Wizard, you will create a page that lets you modify customer information. This page will be created by using the Chap12.mdb database located in ExamplesChap12 on the accompanying CD-ROM.
In Chap12.mdb, in the Database window using the Pages tab, follow these steps:
1. |
Choose Create data access page by using wizard from the object list displayed. This will take you directly into the wizard. |
2. |
From the Tables/Queries choices, pick Table:Customers. Click the >> button, moving all the fields over to the Selected Fields column (see Figure 12.7). Figure 12.7. First page of the Data Access Page Wizard.
|
3. |
Click the Next button. The second dialog of the wizard allows you to choose some grouping levels. This dialog warns you that as soon as you pick a group level, the page will then be read-only (see Figure 12.8). For the purpose of this example, don't add any groups. Figure 12.8. Second page of the Data Access Page Wizard. If you choose any groups, a read-only page is created.
|


Note
At this point, let me tell you that other than creating a base for an editable page, using the wizard for displaying other views of the data is, in my experience, a frustrating task. Unlike other wizards, which leave you with something close to the completed object, the Page Wizard leaves you with an object that needs quite a bit of tweaking to be user friendly. This is probably because this technology is version 1.
4. |
Click Next. The next dialog asks which sort order you want for the default on the page. Leave this blank (see Figure 12.9). Figure 12.9. You can set the default sort order on the page.
|
5. |
Click Next. The last dialog of the wizard is pretty standard in that it lets you specify the name for the page and whether you want to open the page in Form or Design view. Besides asking whether you want help modifying the page, the wizard also asks whether you want to use a theme with your DAP. To make this interesting, select the option Do you want to apply a theme to your page? (see Figure 12.10) and click Finish. Figure 12.10. Finishing up with the Page Wizard.
|


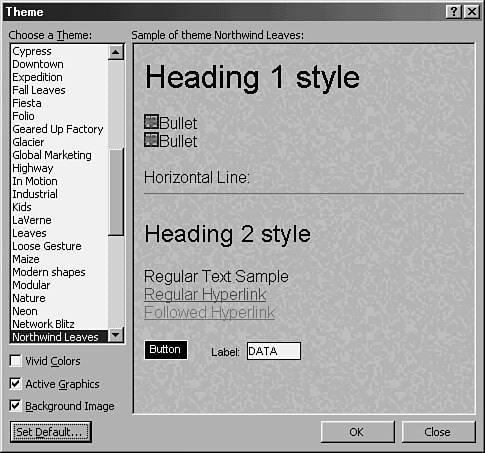
You then see the Theme dialog, which allows you to choose a FrontPage theme to apply to the page. For this example, pick Northwind Leaves (see Figure 12.11). Click OK.
Figure 12.11. Picking the theme for the Data Access Page.
Note
If you plan to select a theme, make sure you have your Office 2000 CD handy. Some themes require you to install them even if you want to look at them.
Tip
As a rule, pick a theme and stick with it for all your applications. I can't tell you how many times I've gone into an application someone has sent me and found that various themes and colors are used on different forms and reports.
The Theme dialog has a Set Default button. Click this button. A dialog will appear, asking whether you in fact want to set the default for all pages from there on out. Click Yes.
You then see the final page created. Figure 12.12 shows the finished page in Design view.
Figure 12.12. The final product of the Page Wizard.

Note
Although you specified that you wanted the title of the page to be Customers, you will still get a label that says Click and Type the Title Text Here. Type Customers in the (Heading Text) label at the top of the page.
You can see the Field List dialog in Figure 12.12—I discuss how to take advantage of this box in the next section. Save the page you just created as dapCustomers. You will use it in the next section.