
We started in step 5 to step 7 by creating our CRM connection simply by specifying our credentials. The connection manager automatically identifies the instances we have access to. Don't forget to replace <your Dynamics 365 username> and <your Dynamics 365 password> with your actual Dynamics 365 username and password.
In step 8, we created our file import. More specifically, in step 8.2, we uploaded a file to be mapped to a specific entity. Note that the data load can include more than one file. In step 8.3, the data loader will try to match the column names automatically to the correct destination attributes.
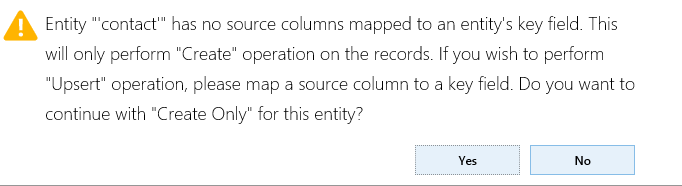
If we try to load data without using the primary key combinations, we will be prompted with a warning message stating that all the records will be created and not upserted (update or inset if the record is not found):
For more details about the upsert functionality, read the Duplicate detection using primary keys recipe of Chapter 1, No Code Extensions.
By the end of step 8, our data is not loaded into Dynamics 365 yet; it is staged for validation.
In step 10, we performed a data validation to ensure that all attributes are compatible with the schema and all lookups can be resolved.
We finally loaded the data into Dynamics 365 in step 11.
The advantage of using the data loader over the conventional CSV import is its simple configuration and its staging validation capabilities that allow you to revisit incorrect records and fix them and, most importantly, the speed with which the data is loaded using batch requests in the background.