
In order to get your Azure AD authentication working, you will first need to set up your web application in Azure AD. The process is similar to what we described in Chapter 5, External Integration, Connecting to Dynamics 365 from other systems OData (Java) except for the following steps:
- When creating the application, Application Type has to be Web app / API:

- Once created, you will have to update the application manifest. From the same page where you can view your newly created application details, there is a Manifest edit button at the top:

- Click on Manifest and update the content to state:
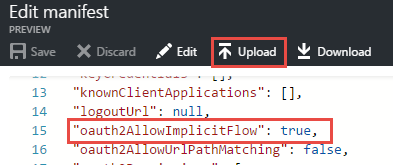
"oauth2AllowImplicitFlow": true
- Then, upload Manifest back by clicking on the Upload button at the top:
Don't forget to set the correct permissions and optionally, click on the Grant Permission button at the top of the Required Permissions summary screen in order to avoid having the users accept the delegated permissions. In this scenario, however, it is preferable to omit this step.
From the preceding step, you will need to retrieve the generated Application ID. You can get it from your registered application essentials summary page, as highlighted in the previous picture.
From the Dynamics 365 side, the user that you will use to get access to your instance needs read access to account records.
Finally, you will need a location to host your HTML, such as an instance of IIS.