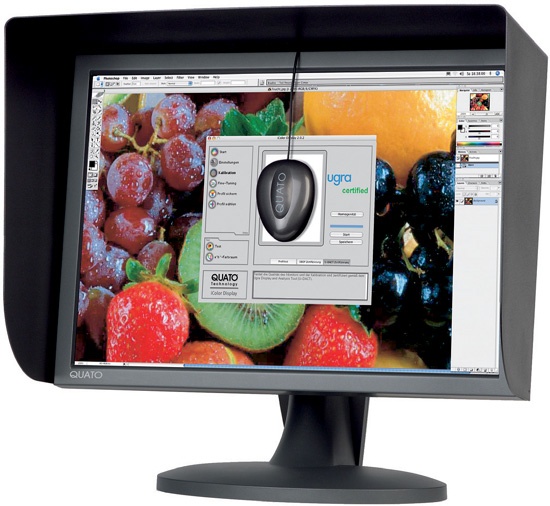
Without a calibrated monitor, image editing is rather difficult or almost impossible. It is difficult to judge whether you are trying to correct a flaw in the image file or whether you are being misled by an erroneous display on the monitor. There are various hardware and software tools for monitor calibration. Hardware-based tools consist of a measuring device and special software. In the case of software tools, the human eye serves as the measuring device.
Truly accurate results are only possible with a hardware tool. Such a tool measures screen colors, compares them with nominal values, and calculates the ICC profile from the differences. For consistent quality, calibration and profiling should be repeated monthly. Software solutions rely on your eye.
Software calibration methods are far less accurate than hardware calibration methods, since the color adaptation of eye and brain depends on the ambient lighting conditions. Color and contrast adjustments are done directly on the monitor’s controls without generating the ICC profile. If you do not want to spend money for a hardware-based calibration tool, with software you can at least improve some settings.
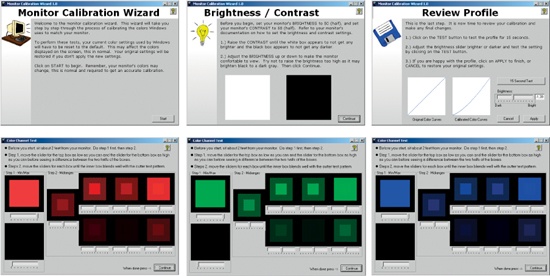
There are numerous calibration tools on the market. None of them are as good as hardware calibration, but all of them are better than no calibration at all. QuickGamma is a well known freeware application, but it is very basic and does not really adjust colors, only their gamma. You can download it at http://quickgamma.de. There you will find another freeware program that is called QuickMonitorProfile. You can use it to create monitor profiles, it supplements QuickGamma.
DisplayMate is a more sophisticated program, but it is not freeware. The website www.displaymate.com no longer offers a demo download. This tool costs $69 – it is strong on diagnostics but weak on calibration. Before you pay this, check out Calibration Wizard at www.hex2bit.com. It is free, although a commercial, more sophisticated version of Calibration is planned for the future.
Applications & Color Spaces
No matter what picture application you use, whether an editor or just a viewer, in most cases it will have its own color space, too. You can configure it in the properties section. All applications you use should be configured the same way; otherwise, you will have differences in color reproduction on the screen despite calibration.
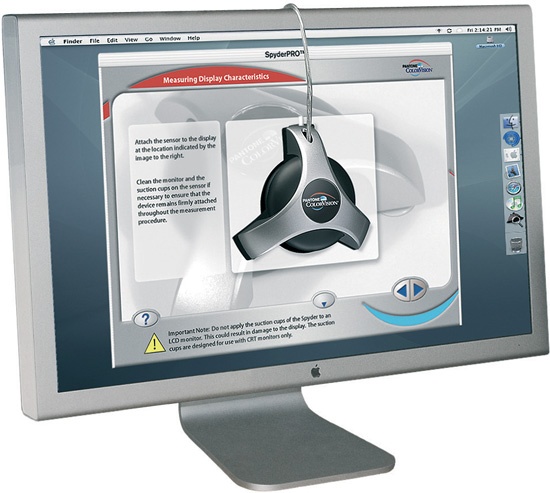
ColorVision offers solutions running under Windows and Mac OS that work for CRT monitors as well as for LCD monitors. They range from the ColorVision Spyder 2express to the more expensive Spyder 2PRO, which comes with additional adjustment options. Each version contains the same colorimeter but uses different software. The colorimeter plugs into a USB socket, which is where it also draws its power. The basic calibration functions are the same for both versions. The software generates test patterns on the screen, and the colorimeter takes readings off them. The software then generates the ICC profile based on these measurements. Once this profile is assigned to the display card, the monitor is successfully calibrated.
ColorVision provided me with a Spyder 2PRO for testing. The following section refers to the Spyder 2PRO for calibrating a CRT monitor. The less expensive Spyder 2PRO model from ColorVision offers fewer adjustment options than the tested version. You should first install the software before plugging the colorimeter into the USB port of your PC, and reset any of the changes you may have made to the display card driver’s default settings. Also, the monitor should be reset to its original factory setting via the on-screen display. To use the colorimeter on CRTs, you need to remove the LCD baffle (see image below). For LCD monitors you leave this baffle on. Software installation is simple; just make sure the colorimeter is not plugged in when the software is installed. After restarting the computer, you can plug the colorimeter into the USB port and start the software. The software offers detailed help for each adjustment. Once you select monitor type, you are prompted for the desired gamma and white point. The default calibration is set for a gamma of 2.2 and a white point with a color temperature of 6500 Kelvin. Spyder 2PRO also offers the possibility of setting luminance values freely, although it is not necessary for adjusting the Visual Luminance.
High-Bright, SuperBright, UltraBright, etc.
Some CRT monitors offer several modes to optimize the display for best results with either text, video, or images. These modes affect the White Luminance. Pick one mode and stay with it when calibrating the monitor.
Note
Avoiding Software Conflicts To avoid software conflicts, disable other manufacturers’ software for calibrating monitors, such as Adobe Gamma. If you have installed Photoshop, you should disable it in the Startup tab of Windows System Configuration Utility (run msconfig).
Next, adjust the White Luminance of the monitor. This is done in hardware with the monitor’s contrast control, which varies from model to model. In most cases, it is done with the on-screen display (OSD) of the monitor (consult the monitor’s user manual for that). Under no circumstances should you use the display driver to adjust White Luminance, even if there is a provision to do so. The contrast needs to be set so that the four patches of the test image can still be separated.
Next, adjust the Black Luminance with the monitor’s brightness control. This is also done via the monitor OSD. The adjustment is perfect if you can barely distinguish between the four patches of the black test image. Now the actual measurements can begin. Place the colorimeter on the screen - the software generates a sequence of test patterns in different colors for the colorimeter to read. The measured values are compared with the nominal color values and an ICC monitor profile is generated. You can name this profile whatever you like. It will be saved as an ICM file under C:WINDOWSsystem32spooldriverscolor. You may have to modify that pathname if your installation path for Windows is different.

Selecting ColorVision Monitor Profiles under Windows
You can select the monitor profiles either with the ProfileChooser supplied by ColorVision or directly in Windows. For the latter, right-click on a blank area of the XP desktop and select Properties > Settings > Advanced > ColorManagement. In Windows Vista, right click a blank area of the desktop and select Personalize > Display Settings > Advanced Settings > Color Management > Color Management. It is not really necessary to install the Profile-Chooser. In either case, the ICC profiles will be available to all Windows applications.
Once the monitor is properly calibrated, you can assume that your images will be displayed correctly on the device. The same applies to any other monitors calibrated with the same gamma and color temperature. However, it does not mean that images optimized on your monitor will be printed with identical colors by your inkjet or your photo lab. Monitor calibration affects only the image display on your monitor and helps you produce correct colors and tones only during editing.