Set Crop Size to maximum, deactivate all filters, and for Output select the option RAW File in 64-bit RGBI mode. Save settings with Save Options.
Through Auto Scan in Preview, a preview will automatically be generated when a slide is inserted. Roughly set Black Point and White Point. For warped originals, manually set the focus point on a key detail in the image. In case of severe underexposure or overexposure, set analog gain with Red/Green/Blue Analog Gain.
Switch Source to File and open RAW files from disk. In Batch Mode, with sufficient memory, an entire folder can be opened and placed in a cache. Film profiles should only be set for Kodak; otherwise, use Generic.
Treat RAW data like a scan from film: Set Infrared Clean and other required filters, such as Grain Reduction. The Preview window provides feedback. Cropping is most convenient with Crop Size: Auto. Keep the option Auto Rotate active. Save as 48-bit RGB. Save the defaults to simplify switching between modes.
Set Crop Size to maximum, deactivate all filters, and for Output select the option RAW File in 64-bit RGBI mode. Save settings with Save Options. Leave Batch Scan set to Off.
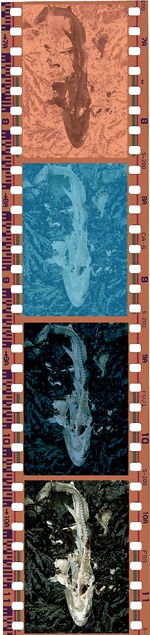
Manually generate a Preview for the second image, and manually correct the filmstrip offset. It makes no sense to generate all previews and set the black and white points at this stage, since the current setting always overwrites the values of all the other images. With VueScan, the same default settings apply to the entire filmstrip.
Change Batch Scan to All. Use Scan to start the batch scan. VueScan automatically saves to hard disk if Auto Save is set to Scan.
Set Source to File and open RAW files from the hard disk. Select a suitable film profile.
Working with scans from the hard disk is fast. Therefore, process and save each image individually for best quality. To do that, set Batch Scan to Off. Set the black and white points. Preferably use manual crop. Set Infrared Clean and other required filters, such as Grain Reduction. The Preview window provides feedback. Save as 48-bit RGB. Save the defaults to simplify switching between modes. Batch process the scan.