Capture NX 2 does not support the conventional image layer system that Photoshop uses. Instead it uses U Point technology licensed from Nik Software. U Point-based tools are very powerful and much easier to use than layer techniques. While the Nikon approach is simpler to use, Adobe users still have more choice in the range of fine-tuning options.
U Point technology enables you to apply many basic changes to RAW scan files that were previously only available for use with other data formats. Here, the basic tool is the Color Control Point rather than the Wand/Mask combination used in Photoshop. You can also choose from Black, White, Neutral, and Selection Control Points when making your adjustments.
Control Points recognize the position, color, saturation, and (according to the manufacturer) texture of the selected image area. If, for example, you wish to color a yellow part of your image red, all you have to do is set a color Control Point in the yellow area and use the Color Picker to display the current color and to select the desired new color.
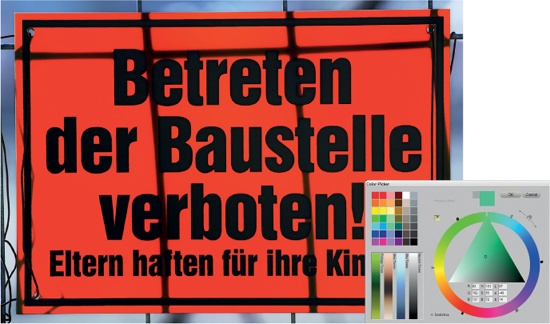
It is not easy to apply color effects accurately using a single Control Point. The more Control Points you set, the more accurately you can delimit the area you apply your effect to. The manufacturer recommends using as many Control Points as possible. This may sound complicated, but our example demonstrates the opposite. For this example, I set 11 Control Points, and I was done with the recoloring within five minutes. Control Points really are easy to use, and especially useful for hobbyists and others who don’t process images professionally.
U Point technology makes complex layer and masking techniques obsolete. It also includes special Selection Control Points and the Show Selection option, allowing you to check and adjust your selection precisely for every Control Point you set.
Color Control Points can be set to run in various modes, including BCS (the default mode), RGB, HSB, and All. These modes control exactly which aspects of your image are affected by the Control Point you have set. BCS mode adjusts the brightness, contrast, and saturation parameters, while RGB mode simply adjusts the red, green, and blue color channels according to your settings. HSB mode adjusts hue, saturation, and brightness; and All mode does exactly what it says, adjusting all of the above-mentioned parameters during processing.