
There are a vast number of driver applications for scanners available, each with its own user interface. Nikon Scan is a quasi-standard in this category, so it will be used here to introduce some important tools and options in scanning programs. In SilverFast and VueScan, the buttons look slightly different, but for the most part, the basic functionality is the same. Some settings, such as scan resolution, must be configured before scanning. Others, such as color and contrast adjustments, can be adjusted either immediately in the scanning software or later in Photoshop or other editors.
Contents
| Image Orientation |
| Image Properties |
| Color Balance |
| Unsharp Masking |
| Curves |
| LCH Editor |
| Analog Gain |

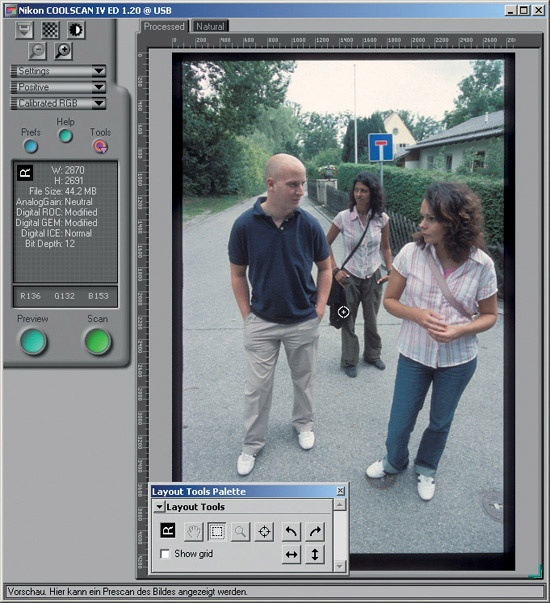
An image can be rotated and/or mirrored directly in the scanning software or later during image processing. For scanning, it is important to have the emulsion side of the image facing the correct way. wise, the image will have to be mirrored later. This is not a major concern for rotating an image. In most cases the image editor lets you perform a lossless rotation (90° clockwise and 80° counterclockwise) or mirroring.
Exceptions are JPEG files, which undergo lossy compression with each rotation in some viewers and editors. In some cases, there are problems manipulating the scanned file after scanning: Nikon NEF files, for instance, can no longer be opened in Nikon Scan after they have been rotated and saved in Nikon View or Capture Editor. These problems can be avoided if the film is inserted correctly into the scanner and any rotations are performed directly in the scanner software. At that point, the original is still available for reference for the right orientation.
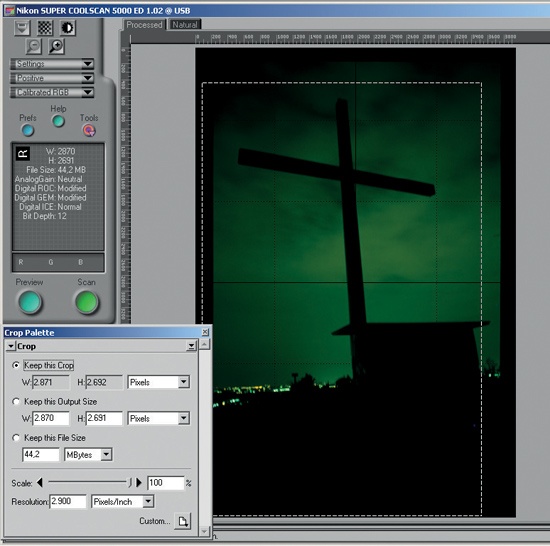
Frame gap and frame borders should be trimmed in the preview window before the scan, because the black borders interfere with auto exposure. The question remains as to how to determine the size of the scanning frame. In cropping, you don’t want to clip important image information, but you also don’t want to set the scanning frame individually for every image. Good scanning software lets you store frame sizes for convenience, especially in batch mode.
The nominal size of the 35 mm format is 24 mm × 36 mm. However, the actual size of the image on the film varies. For cameras with interchangeable lenses, the size may depend on the lens used. For slides, the aperture of the mount is important. Most slide mounts crop the image to slightly less than 24 mm × 36 mm. One exception is the Pro Scan mount from Gepe. The Pro Scan opening is exactly 24 mm × 36 mm.
A slight shift of the film in the mount can further reduce the usable image area. If the ideal scan frame is kept as a standard setting, it will only be necessary to move the position of the frame in the preview window. In Nikon Scan, the crop setting can be saved. This is faster than manually drawing the crop each time. Nikon Scan detects the ideal position of the crop and positions it in the preview. In most dark images, however, the position has to be corrected manually.
Every good film scanner has an autofocus that can also be set to manual. By default, the autofocus feature focuses on the center of the image, which is fine in most cases. For a flat film, the sharpness will extend across the entire image, provided the image itself is actually sharp.
On the other hand, warped film is not sharp across the entire image, because the scanner’s depth of field is usually not sufficient to maintain that sharpness. In this case, it is best not to rely on autofocus, but rather to manually focus on important parts of the image instead, such as on the eyes in the case of portraits.
In my tests, it didn’t matter whether there was a contrasty detail or a plain area at the focus point. Contrary to what I expected, the autofocus of Nikon scanners can focus correctly in both cases (unlike the autofocus of an SLR, which only works with contrasty details). I suspect that the film grain provides sufficient detail for the scanner to focus correctly in this mode.
Apart from that, it will always be best practice to ensure that the slide is as flat as possible. This is the only way to get maximum quality out of the source slide.
The filmstrip offset must be corrected manually every time a filmstrip is inserted or the automatic detection will not work properly. It is difficult for the automatic feature to separate the frame gap from the image, especially with dark and low-contrast images. This can be corrected by manual adjustment of the filmstrip offset.