This section deals with some of Capture NX 2’s features that go beyond the functionality of Nikon Scan software. These include a number of noteworthy features that are useful not only for RAW image processing.
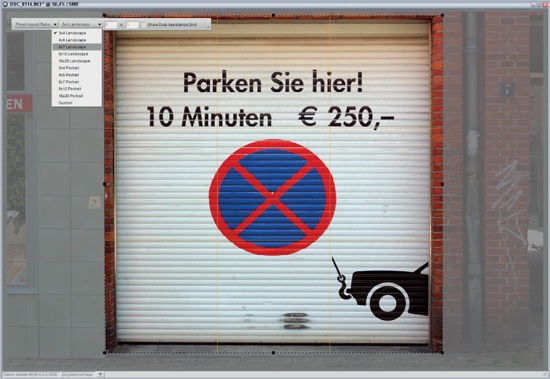
The Crop tool accessed via the toolbar, can be used to crop images manually or to preset sizes and proportions. This is, in itself, not particularly spectacular, as just about every freeware image browser these days includes a working crop tool.
What makes Capture NX 2’s crop tool special is that, instead of simply deleting the cropped areas, it lays a virtual frame over the original image and preserves the data from the cropped portions of the frame. This means that you can view the cropped image in the browser and revert to the original, uncropped image at any time. This feature can, however, only be applied to NEF-format images. Cropped JPEG or TIFF images however, stay cropped once the command has been applied and this can not be reversed.
This feature has proved its worth in Capture and Capture NX. It doesn’t yet work in my pre-release 2.0.0 version of Capture NX 2, but I am assuming that this is simply due to a bug that will be resolved by the time this book is published.
Nikon successfully implemented user-friendly, selective correction of highlights and shadows with the introduction of the Digital DEE feature in Nikon Scan 4.0. The disadvantage of this otherwise great feature is that you have to decide before scanning whether you want to apply it, as the corrections it makes are sampled directly into the RAW image data during scanning and cannot be undone. This approach can be very time-consuming, as you may need to make several scans on the way to achieve optimum results.
Opening Images using Drag-and-Drop
You can open images in Capture using drag-and-drop simply by dragging file names from Windows Explorer to the application icon.
Digital DEE has been implemented since Capture 4.1, but it was initially only usable for files created using digital cameras. As of version 4.3, the tool has been renamed D-Lighting and can now be applied to NEF scans too. Functionally, the tool has hardly changed, although the Threshold slider has disappeared and a Color Boost slider has been added. This allows you to make the color adjustments necessary, for example, after a shadow correction has been applied.
This improved integration of highlight and shadow correction into the RAW data processing workflow is a great improvement, and makes it possible to try out different effects on a finished scan without having to rescan your original. If you have a copy of Capture NX 2, you can simply ignore digital DEE while scanning.
Lost Shadows are the portions of an image where no detail is visible, even if image data is present. Lost Highlights occur where image detail is simply too bright to be recognizable. Such phenomena only become critical if you want to save your scan to a non-NEF format (JPEG, for example). In this case, the lost shadows and highlights will be lost forever. In order to keep this from happening, you can view the potential lost shadows and highlights via the corresponding commands in the View menu. You can then make tone value corrections before saving your image.
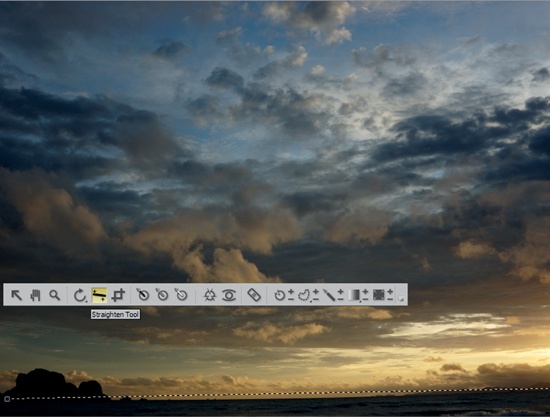
A useful feature since version 4.3 is the Straighten tool. This feature comes into its own if the camera was not held level during shooting, or if the slide was not precisely aligned during scanning. In Capture NX 2, the Straighten tool can be found in the toolbar. All you need to do is drag a line through the image using the mouse, you can also adjust the horizon by manually entering a degree value. The 10° correction limit in Capture has been removed, it can now correct any degree.
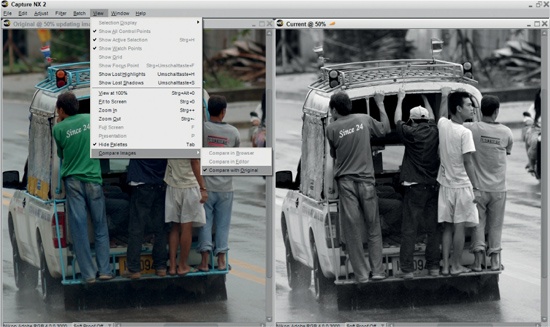
If you have been working on an image for a while, it is easy to lose sight of whether your changes are actually improving things. Capture NX 2’s Compare with Original tool (found in the View menu’s Compare command) displays your original and the current image in a single window.
Well-known Photoshop tools such as Lasso, Polygon Lasso, Rectangle Marquee and Oval Marquee are also available in Capture NX 2, which is unusual for a RAW editor. The application of these tools is, however, somewhat limited, as they are only good for marking portions of an image which are to be processed using Capture NX 2’s own tools. Even the simplest processing tools from other manufacturers’ image editors (such as cut, copy, or paste) are not supported by Capture.
In addition to the selection tools, Capture includes a Fill/Remove tool that can be used to apply or remove the current effect either for the currently selected area or for the entire image. The Selection Brush is another interesting tool that also allows selective removal of applied effects within the area marked by the brush.
Note
Testing Capture NX2 A test version of Capture NX 2 is available free of charge from the Nikon download portal, and can be installed alongside the older Capture NX version without causing any conflicts. The original Capture, however, is not compatible with newer versions of the software, and should be uninstalled before you install any NX variants.
A classic application of the Selection Brush is the apparently obligatory soft-focus effect applied around flower bouquets in wedding photos. The effect in question involves the flowers at the center of the image being in sharp focus while the entire background fades into romantic softness. Capture NX 2 can now achieve this kind of effect at a RAW data level. All you need to do is apply a Gaussian Blur to the whole image, and then selectively remove the soft-focus effect this produces using the Selection Brush.
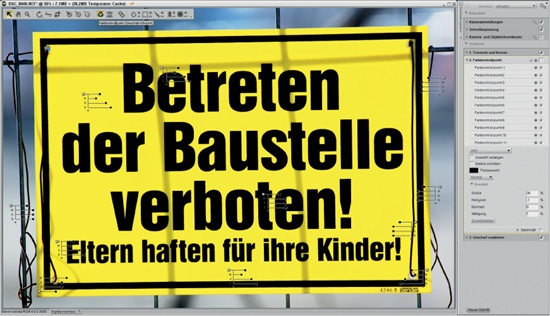
Nikon’s Control Points are not directly comparable with other, more conventional selection tools like Lasso and Ward from Photoshop. Instead the Control Points are based on the proprietary U Point Technology. Use of Control Points is an easy two-step process. The first step is to mark image areas with one or more Control Points, and the second step is to select the effect, filter, or other change to be applied to the selected areas. The process is much quicker and simpler than the time-consuming masking systems used by other image processing programs. The results of Control Point-based corrections are enough to convince even the critical minds.
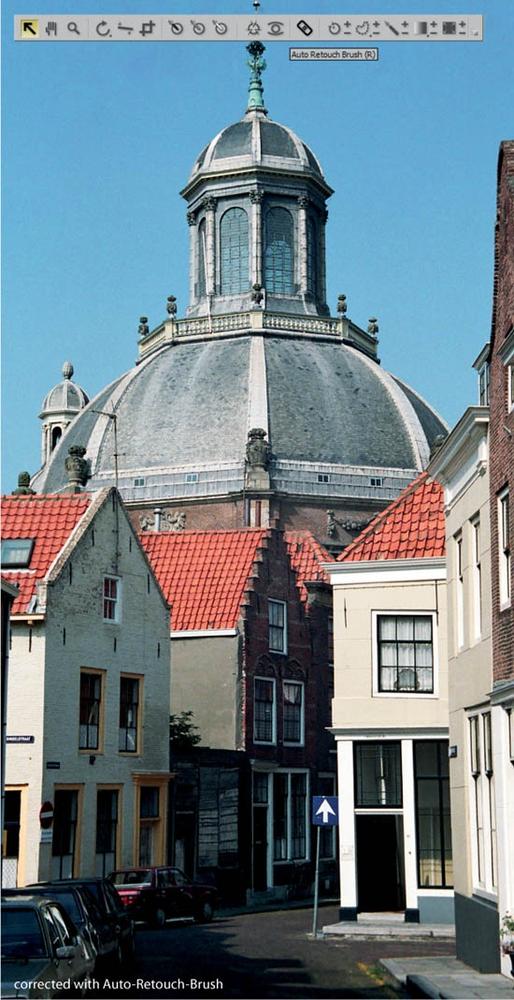
Although Photoshop has provided a whole range of stamp-type re-touching tools for a number of years, Capture NX 2 is the first Capture version to include a similar general tool. With Auto Retouch Brush you can remove dust spots, blemishes, or other distracting details now even at RAW level. The tool is relatively simple to apply and works pretty well automatically.
When using Auto Retouch Brush, the only adjustment you can make is to the diameter of the brush. Tests have shown that the tool is reliable if you want to remove objects from evenly colored backgrounds, such as an overhead cable in front of a blue sky. However, if the background has finer textures of its own, you can often end up with unwanted artifacts in your final image (in this respect too, the tool is directly comparable to Adobe’s Spot Healing Brush).
In spite of its limitations, the Auto Retouch Brush is important and can be useful in many different situations. The tool doesn’t require the time-consuming preparatory steps (new levels, safety copy, etc.) that Adobe’s tool necessitates, and you can remove all its effects from your NEF files at any time with a simple click.
Note
Scan File Metadata The metadata recorded with NEF scan files contain important information regarding the scanner model used and the settings (such as the film profile) that were active during the scan. The metadata also reveal whether ROC, GEM, ICE, or Analog Gain were activated during the scan, and if so, the levels they were set to.
NEF files that have been altered using the Auto Retouch Brush can be opened in the old Capture NX, but the effects of the tool itself are not visible in the earlier software version’s image browser. At least this does not spoil downward compatibility; you don’t have to worry about that when applying this correction.
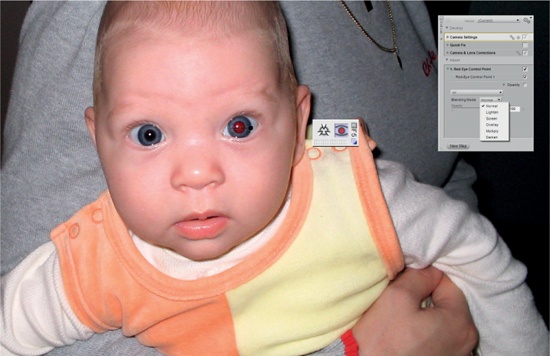
Red-eye is an especially common effect in flash portraits taken with compact digital cameras, due to the very close proximity of lens and flash. The light from the flash is reflected directly from the blood vessels in the subject’s retina into the camera’s lens, producing the well-known (and unwanted) effect.
Red-eye correction is, these days, a standard feature in most image processing programs, and is even included in freeware programs such as IrfanView and Nikon View NX. Scanner users with a preference for RAW files have so far not been able to enjoy the same freedom, and removing red-eye from NEF files has always involved editing files in a separate program, thus making it impossible to save treated images back to NEF format.
This situation has changed, and Capture NX and NX 2 have continually improved their built-in anti-red-eye functionality. The latest version of the tool lets the user set a manual Red-Eye Control Point, rather than relying on automatic red-eye detection like the older versions of the program. The changes thus made are reversible, and the original scan file is not altered when the effect is applied. Red-eye correction is one of the most important standard image processing tools, and its convenient inclusion in Capture NX 2 helps take another significant step towards life without Photoshop.
Color Boost is an easy tool to use and is available in Capture, but not in Nikon Scan. This tool’s effect is the same as making a Chroma adjustment in the LCH tool, but is simpler to apply. The intensity of the colors in your image can be increased simply by moving the slider in the tool’s dialog box, helping to make even the palest scan more vivid.
This tool is particularly effective when used with negatives. Slides are less prone to need such processing, especially if scanned using a high-quality device such as the Nikon Coolscan 5000. Using Color Boost can lead to the creation of color casts, and the tool’s Protect Skin Tones option helps to counteract this effect, preserving natural skin tones even if other colors are (relatively) heavily adjusted.
The Photo Effects palette includes tools for coloring RAW images in Black and White, Sepia, or Tinted tones. You can fine-tune your results using the Cyan–Red, Magenta–Green, and Yellow–Blue sliders.