Perspective distortions happen when the camera is tilted upwards or downwards during shooting. For architectural photography, this is difficult to avoid, since the photographer usually stands on the ground and points the camera upwards. The distortion that is generated gives the impression that the building is tapering off toward the top. In most cases, you do not want this effect; therefore, you have to fix the image on the computer.
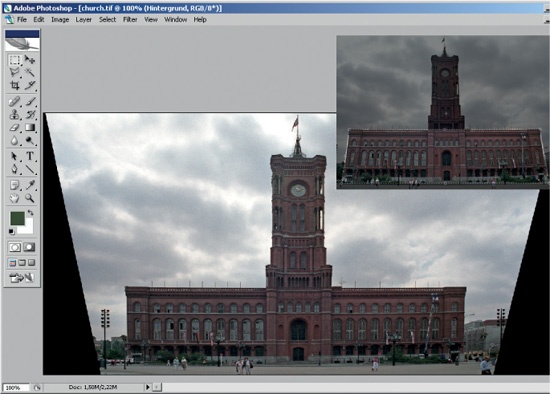
Nikon Capture does not allow perspective correction at RAW level, but in Photoshop it can be easily done with the Crop tool. For automatic correction, Photoshop needs the frontal view of a rectangular object that exhibits keystone distortion. The small inset in the following example shows a building with the walls becoming narrower toward the sky. Of course, in reality, walls and towers are rectangular.
First, draw a rectangular frame around the entire wall with the Crop tool. Then activate Perspective in the option bar. Now pull the corners of the rectangle to match the inclined walls. (To restrict the mouse movement to horizontal or vertical only, hold down the ![]() key.) When that is done, Photoshop knows which area is supposed to be rectangular and the actual shape of the area. Next, enlarge the crop to cover the entire image by pulling on the mid-points of the crop border. Finally, double-click in the crop area. This gives the corrected image a trapezoidal outline; simply crop again to get a rectangle.
key.) When that is done, Photoshop knows which area is supposed to be rectangular and the actual shape of the area. Next, enlarge the crop to cover the entire image by pulling on the mid-points of the crop border. Finally, double-click in the crop area. This gives the corrected image a trapezoidal outline; simply crop again to get a rectangle.
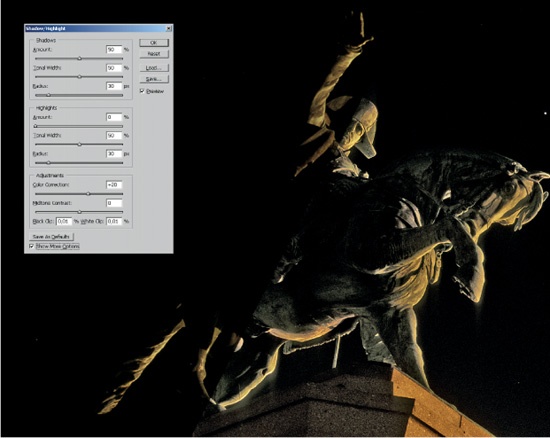
Under Image ▸ Adjustments ▸ Shadow/Highlight, Photoshop offers a tool for selectively improving shadow and highlight areas. This feature is functionally identical to AACO from SilverFast and DEE/D-Lighting from Nikon. In the extended options, any of the three basic parameters (Shadows, Highlights, and Adjustments) can be tuned separately. Photoshop goes well beyond the capabilities of Nikon Capture in this regard.
The above image shows a backlit shot with blown-out highlights and pronounced shadow areas. The corrected version on the right clearly shows more detail. As usual in Photoshop, the correction is permanent; it cannot be undone at a later session. This can be a bit awkward if you are still trying to find the best setting for the correction. Nikon Capture is more user-friendly in this regard.
With the tool Measure (under the Eyedropper pull-down menu) and the command Rotate Canvas, Photoshop offers a simple way to straighten inclined horizons. First, take the Measure tool and draw a line along the horizon. Next, go to Image ▸ Rotate Canvas and select the option Arbitrary. Photoshop takes the angle from the measuring line and enters it into the field for rotation. Click “OK”, and the image rotates. Unlike the older Capture software, Capture NX can rotate an image to any desired angle. The Crop tool offers another way to rotate the image. First, select the whole image or a smaller crop. Then, left-click outside the crop frame and rotate it freely with the mouse.