Histograms & Automatic Adjustments
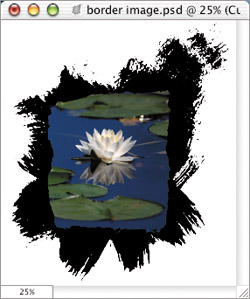
When you work with images that contain large areas of white/black (like ones with fancy borders—see Figure 11.64), the histogram can become less than useful because it will indicate that your image contains the full range of brightness levels (Figure 11.65) even though the image itself (minus the border) might be rather low contrast. To get around this, you'll need to take steps to limit what the histogram looks at when analyzing your image. That way you can optimize the contrast of the important areas of the image without having to look at the spikes at the ends of the histogram that would reflect the large areas of black or white that are in the border area. I also use this technique when I want to radically enhance the contrast of an image while retaining detail only in the most important areas.
Figure 11.64. The original image contains bright and dark areas that are not part of the actual photograph. (©2005 Ben Willmore)

Figure 11.65. The histogram is looking at the entire image, including its border and background.

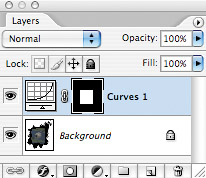
To limit what the histogram looks at, select the important areas of your image and then create a Curves Adjustment Layer by choosing Layer > New Adjustment Layer > Curves. When a selection is active, the Histogram palette will analyze only the selected area (Figure 11.66), but the moment you create an Adjustment Layer, it will start thinking about the entire image again because the selection is converted into a Layer Mask. To get the histogram to think about only the area you had selected a moment ago, click OK in the Curves dialog box without adjusting the image. Now, look in the Layers palette (Figure 11.67) and Command-click (Mac) or Ctrl-click (Windows) on the Layer Mask that is on the Adjustment Layer you just created (it's the black and white rectangle near the right side). That will bring your selection back and limit the area of the image that the histogram looks at. Then, to adjust the image, double-click on the Adjustment Layer thumbnail that's just to the left of that Layer Mask and adjust away.
Figure 11.66. This histogram is looking only at the selected area of the image.

Figure 11.67. The Layers palette includes an Adjustment Layer with a Layer Mask that is partially filled with black.
When you use this technique, the adjustment will apply only to that same selected area (Figure 11.68). But don't worry, as long as you used an Adjustment Layer, you'll be able to force the adjustment to apply to the entire image. Once you've finished your adjustment, click OK in the Curves dialog box and look in the Layers palette. The Layer Mask that is attached to the Adjustment Layer should contain some black. That's what's limiting which areas of the image your adjustments are applying to. All you have to do to get the adjustment to apply to the entire image is Select > Deselect, type D to reset your foreground color, and then type Option-Delete (Mac) or Alt-Backspace (Windows) to fill the Layer Mask that's attached to that layer with white. By doing that, you will have adjusted the whole image (Figure 11.69), while the histogram only looked at the selected area of the image—but in the end, the adjustment applies to the entire image.
Figure 11.68. The adjustment is affecting only the selected areas.
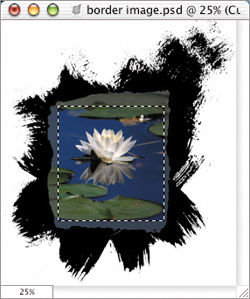
Figure 11.69. After filling the Layer Mask with white, the adjustment affects the entire image.