
Enhancing Skies
If you've ever looked at a lot of photographs that contain blue skies, you might have noticed that many of those skies are actually closer to a light shade of cyan than a shade of true blue (Figure 10.18). If you like your skies to look as genuinely blue as possible, start by creating a Hue/Saturation adjustment layer, and choose Blues from the Edit pop-up menu. Click somewhere within the sky to center the sliders and then make the following adjustment: Move the Lightness slider toward the left to darken the sky; move the Saturation slider toward the right to make the sky more colorful; and then experiment with the Hue slider until you get the best shade of blue (Figures 10.19 and 10.20).
Figure 10.18. This cyanish sky could use a tweak. (@2005 PhotoSpin, www.photospin.com)
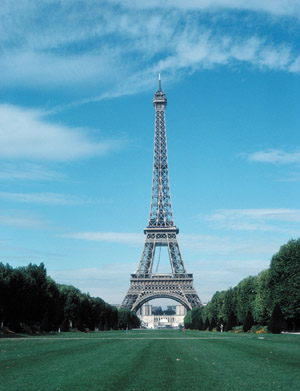
Figure 10.19. The Hue/Saturation adjustment used to produce Figure 10.20.

Figure 10.20. After adjusting the image with Hue/Saturation, the sky is true blue.

The only problem with this technique is that you might run into an image that contains blue areas that are not part of the sky (Figures 10.21 and 10.22). If those are areas that you don't want to shift, then you'll have to make changes after you're done creating the Hue/Saturation adjustment layer. If you look at an adjustment layer, you'll find that it contains a white rectangle just to the right of the adjustment layer icon for that layer. That rectangle is a layer mask, and it can be used to further limit the areas that your adjustment will apply to. All you have to do is grab the Paintbrush tool and paint with black at full opacity, and you'll prevent the adjustment from applying to the areas you paint over. As long as the Hue/Saturation adjustment layer is active in your Layer palette, then the paint you apply will affect where the adjustment applies. Painting with black will hide the adjustment; painting with white will bring it back. So, after enhancing a sky, you might want to grab a large, soft-edged brush and paint with black over any areas that you wish to preserve (Figure 10.23).
Figure 10.21. The original image. (©2005 PhotoSpin, www.photospin.com)

Figure 10.22. After adjusting the sky, areas of the foreground have shifted slightly.

Figure 10.23. Painting with black on the layer mask of the adjustment layer prevents the adjustment from applying to the bottom of the image.
