
Working with Thumbnails
Once you've navigated to the desired folder on your hard drive, you'll be presented with thumbnail images of the contents of that folder on the right side of the browser window. Click any thumbnail to select a single image, then either Command-click (Mac) or Ctrl-click (Windows) to select additional thumbnails, or Shift-click to select a range of thumbnails. When you have one or more thumbnails selected, you can do the following:
- Open the images in Photoshop by double-clicking on one of the selected thumbnail images, or type Command-O (Mac), or Ctrl-O (Windows).

The largest thumbnail you can view is 512 pixels on any side, even though behind the scenes, Bridge is creating thumbnail images that are 1,024×768 pixels for each image.
- Delete the selected images by pressing Delete (Mac), or Backspace (Windows).
- Rotate the thumbnails by clicking on one of the curved arrow icons that appear at the top of the Bridge window (the image will only be rotated after it has been opened in Photoshop).
- Move an image to a different location on your hard drive by dragging it to one of the folders in the Folders or Favorites tabs. You're not limited to dragging to folders shown in Bridge, you can also drag folders and files directly to your desktop or hard drive. To move a duplicate of the image, hold Option (Mac), or Alt (Win) when dragging a thumbnail.
You can control the size of the thumbnails by adjusting the slider that appears in the lower right of the Bridge window. Smaller thumbnails allow you to see more images at once, while larger thumbnails allow you to see more detail in each thumbnail image. You can control how much information appears below each thumbnail by choosing Preferences from the Bridge menu (Mac), or Edit menu (Windows) and changing the settings found in the Additional Lines of Thumbnail Metadata area (Figure 1.122). That's where you can choose to add up to three additional lines of information below each thumbnail image (such as dimensions or keywords).
Figure 1.122. The Bridge Preferences dialog box.

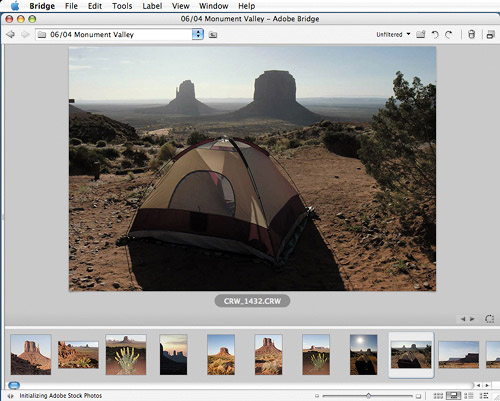
If you prefer to view your images as large as possible (to see which ones are in sharp focus), then click on the Filmstrip icon that appears immediately to the right of the Thumbnail Size slider in the lower right of the Bridge window. That will switch you to a special view where a large preview image will appear at the top of the window with thumbnail versions below (Figure 1.123). To get the most efficient use of this mode, consider hiding the panes that make up the left side of the Bridge window (by clicking the double arrow icon that appears in the lower left of the window), and hide the filenames and metadata that usually appear below the thumbnail images (by typing Command-T or Ctrl-T), and then resize the thumbnails to make more room for the preview image (via the slider in the lower right of the window). Once you've got everything set up to your liking, use the right arrow key on your keyboard to cycle through the images in that folder.
If you'd rather present your images full-screen without the distraction of thumbnail images and the rest of the Bridge interface, choose View > Slide Show. When in that mode, you can type H to access an on-screen guide that lists all the keyboard shortcuts necessary to control the slide show.