
Color to Grayscale
If you want to get much more control over your color-to-grayscale conversions, then you might want to think about using Hue/Saturation. A lot of people will suggest using the Channel Mixer or other techniques, but the problem with most approaches is that they force you to think like Photoshop instead of giving you an intuitive approach. To convert to black and white with Hue/Saturation, create an adjustment layer and then move the Saturation slider all the way to the left (Figures 10.24 and 10.25). Then, to control what happened to the colors in your image, turn the Preview check box off and then on again, and decide which color area needs to be tweaked (areas that used to be yellow might need to be brighter, for example). Next, make sure the Preview check box is turned on, pick the color that needs to be adjusted from the Edit pop-up menu, and then adjust the Lightness slider until it looks good (Figure 10.26). Repeat this process for any other colors that need tweaking until your image looks great (Figure 10.27). If you'd like to start with those same settings in the future, make sure to do all the adjustments as part of a single adjustment layer, and then click the Save button in the upper right of the Hue/Saturation dialog box and give that setting a name. Then the next time you want to apply those same settings to convert an image to grayscale, just add a Hue/Saturation adjustment layer, click the Load button, and point to the file you saved earlier.
Figure 10.24. Original image. (©2005 Stockbyte, www.stockbyte.com)

Figure 10.25. Result of lowering saturation.

Figure 10.26. Adjust individual colors to enhance the result.

Figure 10.27. After adjusting multiple colors, the image should start looking good.

I often like to create partially black and white images, where part of the image is in color and part is grayscale. To accomplish that, apply the technique we just talked about and then paint with black to prevent the adjustment from applying to the areas that you'd like to keep in color (Figure 10.28) (or make a selection before creating the adjustment layer to begin with). Also, if you'd rather not bring your image all the way to black and white, just don't move the Saturation slider all the way to the left, or lower the opacity of the adjustment layer once you're done (Figure 10.29). Or, if you'd rather just have certain objects turn black and white, you can use the techniques we talked about earlier (smash sliders together, Shift-click to spread them apart) to get the sliders to isolate a range of colors, and then move the Saturation slider all the way to the left to pull all the color out.
Figure 10.28. Painting on the adjustment layer's layer mask will limit which areas become black and white.
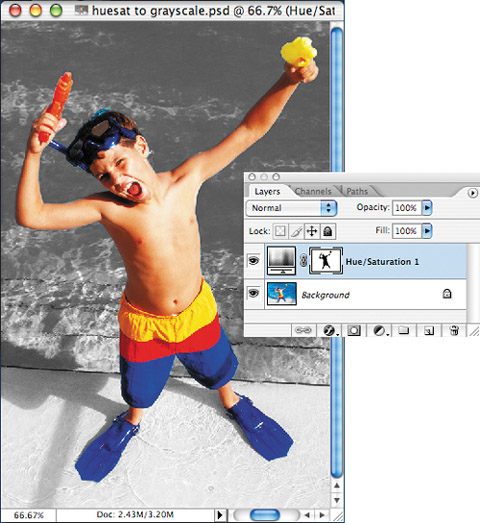
Figure 10.29. Lower the opacity of the adjustment layer to bring back a hint of color.

If you really want your image to end up with no color whatsoever, then you'll want to choose Image > Mode > Grayscale after you've removed the color using a Hue/Saturation adjustment layer. (FYI: Grayscale mode images are one-third the file size of RGB color images.)