
Reduce Noise
The Reduce Noise filter is new to Photoshop CS2 and is the most sophisticated method for reducing noise. It incorporates many of the tricks that we used to do piecemeal by using blending modes or applying filters to individual channels. It will often produce a result that looks smooth while retaining much of the detail from the original image (Figures 12.15 and 12.16). When applying the Reduce Noise filter, I suggest you start by moving all the sliders to the far left so they have no effect on the image.
Figure 12.15. Using the Reduce Noise filter with a Strength of 10 and a Preserve Details setting of 1 produced minimal distortion in the largest specks while making the smaller specks fade into their surroundings.
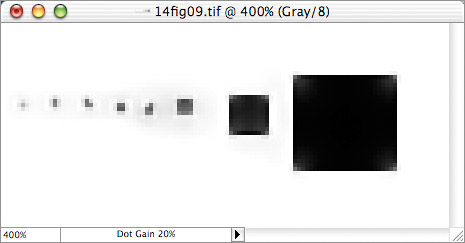
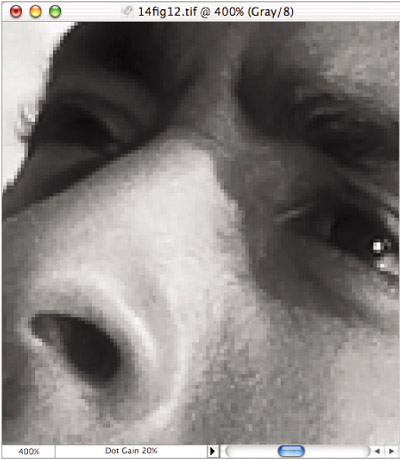
Figure 12.16. Reduce Noise produced a somewhat smoother result than the Dust & Scratches filter while retaining more highlight detail in the eye.
If you notice any multi-colored noise in your image (specks of yellow, blue, red, etc.), then adjust the Reduce Color Noise slider until those colors blend into their surroundings (Figures 12.17 and 12.18). If you find that the noise is primarily a single color, consider applying the features found in Advanced mode (which we'll talk about in a few minutes) before continuing with the techniques I mention below.
Figure 12.17. The original image contains specks of various colors. (©2005 Ben Willmore)
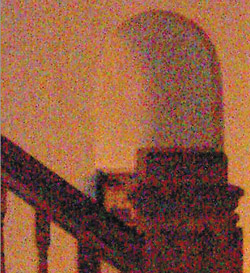
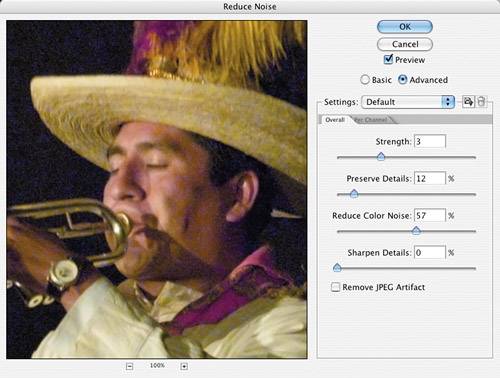
Figure 12.18. Result of adjusting the Reduce Color Noise slider.

After tackling any color noise problems, it's time to rid your image of luminance noise (specks that vary in brightness instead of color). Adjust the Strength slider until you've removed as much of the remaining noise as possible, then move the Preserve Details slider all the way to the right and then lower it until you find the highest setting that gives a good balance between noise reduction and image detail (Figure 12.19).
Images saved in the JPEG file format will exhibit artifacts that make the image look as if it has been divided up into 8x8 pixel squares. You can attempt to blend those squares into the surrounding image by turning on the Remove JPEG Artifact checkbox. Just remember to inspect the image to make sure it doesn't destroy too much important detail in the image.