
Even in today's world, people remember Mario, Sonic, and Mega Man. Of course, Mario was first introduced in the Eighties, followed by Mega Man and Sonic, but even now the new generation love these games. Yes, we are talking about the old style 2D platform games, which still exist.
In this book, we will start the first chapter with a 2D platform game because there are some basic tricks for a 2D platform game, which will help you—those who haven't got into the 3D world yet—to understand more before jumping into the 3D world for the project in later chapters.
We'll be creating a 2D platform or side-scrolling game, which is similar to Mario or other games that we have mentioned previously; it will have a simple character that the player will be able to move, jump, and collect a key item to be able to pass the level, and a Restart button for the player to play the game again.
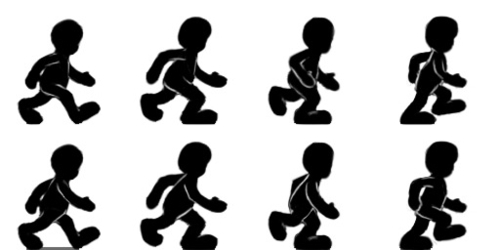
We will use the 2D character sprite sheet (as shown in the previous image), and create the sprite manager class to control it instead of the 3D character model. Some of you might have a few questions: Why are we doing this? Why don't we just use the 3D model, which should be easier to do, instead of creating the sprite manager class?
Well, there are some advantages of using a sprite manager class. Firstly, creating a 3D model and animation takes time. It takes more time to create a simple 3D character with animation than to create a 2D character with a sprite sheet because you don't have to deal with the polygon count, rigging the character, unwarping the textures, and animating it. You just draw it. Since the 2D sprite object only shows one view, we can use the plane object to save the number of polygons instead of using the 3D character object. It is also an advantage to learn this sprite technique to create an animated texture in your game.
The purpose of this chapter is to familiarize you with all the tools and language syntax in Unity, which is very important to create a playable game. We will also see how to use MonoDevelop for a JavaScript user (sometimes called UnityScript; in the rest of the book, we will call it Unity JavaScript) and what is good about MonoDevelop when compared to Unitron (or UniSciTE in PC).
In this project, we will start with creating a camera for our game, and adding light and level to the scene. Next, we want to create our character object as a plane, apply the transparent material, and use the 2D graphic sprite sheet for its texture. We will also create the script, which will control the sprite sheet to show the right graphic on our character object. This script will allow us to be able to control our character to walk and jump by pressing the arrow key. Also, we will learn how to set up the custom input manager. Then, we will have the right animation for the character idle, walking, or jumping.
For the level, we will create it by using a Unity built-in cube and give it a collision which will react with the character by using a Unity built-in physics. To end the game, we will create a trigger event by creating a door and a key. The player needs to collect the key to open the door and end the game. We will also add sound to make our game seem alive, but we are not finishing it yet. The game needs to be replayable. Lastly, we will add a Replay or Play again button to replay our game by using destroy and instantiate to reset our character position and key item.
When we are done with this chapter, we will get a good understanding of how to create a sprite and 2D platform game by using a 3D game engine such as Unity. Also, we will be able to create our own 2D platform style game like Sonic, Mario, Mega Man, and so on, and reuse some of our techniques, scripts, and concepts to create a 3D game at a later stage.
This project will be split into six tasks. Since we are not creating any enemies in our game, we don't have to deal with any complex scripting. It will be a simple step-by-step process from beginning to end. Here is the outline of the tasks:
- Creating a camera and a level
- Creating a 2D character
- Creating
CharacterControllerandSpriteManagerclasses - Jumping and physics
- Creating key and door
- Adding Sound and Replay button
Before we start, we will need to get the latest Unity version http://unity3d.com/unity/download/ which includes MonoDevelop that we will use for our scripting editor. We will also need a few graphics for our character, key, and door as well as a collection of sound FX. These could be downloaded as ZIP files from Packt's website: http://www.packtpub.com/support?nid=8267.
Browse to the preceding URL and download Chapter1.zip package and unzip it. Inside the Chapter1 folder, there are five subfolders, which are Buttons, Characters, FBX, Level, and Sound.