In the last section, we have a ready FBX with an animation clip, and a scene to use. In this step, we will add a character controller script to our character. This script will allow us to be able to access all the character control classes, which we can use to move the character, detect the collision, limit the slope we can walk up, and how big of stairs (step offset) we can climb. Then, we will add a third-person character controller and third-person camera script to our character and set up the parameter to be able to control our character.
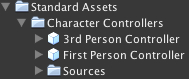
Make sure to include the unity built-in Character Controllers package included in our project. (We have alreay done this at the beginning of this chapter)
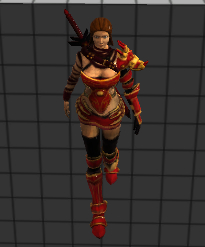
First, we will add the character controller script to our character by clicking on Heroine_animate
, and then we go to Component | Physics | Character Controller. Now, go to the Inspector view, under Character Controller, and change the parameters as follows:
- Height: 1.7
- Radius: 0.2
- Slope Limit: 45
- Step Offset: 0.3
- Skin Width: 0.08
- Min Move Distance: 0
- Center: X: 0, Y: 0.89, Z: 0
Right here, we set up the character controller script to fit with our character. We can see more details about each parameter from the following link:
http://unity3d.com/support/documentation/Components/class-CharacterController.html.
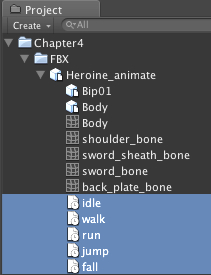
Next, we will attach the Third-person Controller script to the character by going to Component | Scripts | Third-person Controller and set the following:
- Idle Animation: idle
- Walk Animation: walk
- Run Animation: run
- Jump Pose Animation: jump
- Walk Max Animation Speed: 1.5
- Trot Max Animation Speed: 1.5
- Run Max Animation Speed: 1.5
- Jump Animation Speed: 4
- Land Animation Speed: 0.1
- Walk Speed: 2
- Trot Speed: 2
- Run Speed: 8
- In Air Control Acceleration: 5
- Jump Height: 2
- Gravity: 20
- Speed Smoothing: 10
- Rotate Speed: 300
- Trot After Seconds: 3
- Can Jump: check the box
Lastly, we will add the Third-person Camera script to make the camera follow our character smoothly; go to Component | Scripts | Third-person Camera and then go to
the Inspector view and set the following:
- Camera Transform: Drag the Main Camera in the Hierarchy view here
- Distance: 3
- Height: 1
- Angular Smooth Lag: 0.1
- Angular Max Speed: 175
- Height Smooth Lag: 0.3
- Snap Smooth Lag: 0.2
- Snap Max Speed: 720
- Clamp Head Position Screen Space: 0.6
- Lock Camera Timeout: 0.2
Before we finish this step, we need to create a new prefab for this game object. So, we go to Assets | Create | Prefab, name it Heroine_BuiltIn, and drag Heroine_animate in the Hierarchy View to the Heroine_BuiltIn prefab.
Finally, we click on Play and control the character by pressing W, A, S, D, or up, down, left, right arrow keys to move the character, Space key for jumping, and holding the Shift with pressing the move key to run. If we didn't press any key, the character will be playing the idle animation.
We just added the character controller and the built-in third-person character controller script to our character and set up the parameters that are suitable for our character.
In this step, we added the built-in third-person character controller, which is a good starting point to set up the third-person character. We can set up and adjust the parameter the way we want, such as the height or distance of the camera, speed of the animation clip, and so on, as we can see in the following screenshot:
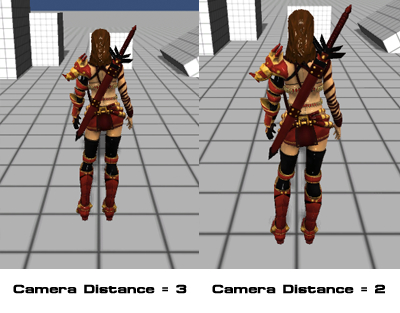
However, the built-in third-person character controller has its own limitations. For example, if we walk down from the box or try to fall down from the big box, we will see that our character still uses the walk animation. This is because the built-in third-person controller doesn't support the fall animation. We will solve this problem in the next step by creating our custom CharacterControl script and CharacterCamera
and adapt some of the code from the built-in script to get a result similar to the following screenshot: