
Finally, we are in the last step of this chapter. We will add sound effects and a simple replay button for us to be able play this again.
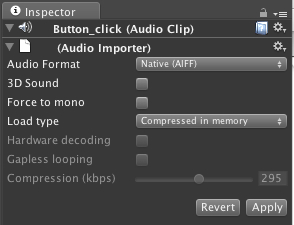
Let's make sure that we have all the graphics that we need for the replay button; go to the Chapter1 folder in the Project window, and make sure we have restartButtonOut.png and restartButtonOver.png in our subfolder Buttons. We also need some sound effects to use for our character, go to our Sound subfolder. We will see button_click. aiff, doorOpen.wav, getKey.aiff, and Jump.wav. Unity, by default, translates every sound that we import in our project to 3D, but we don't really need it as we are creating a 2D game. So, we will click on each sound in the Sound folder in the Project view and go to their Inspector window and uncheck 3D Sound and then click on the Apply button:
In this section, we will create the button and script for the restart button:
- First, we need to create a simple
TextureButtonclass to control our restart button (Assets | Create | Javascript) and name our script toTextureButton. Double-click to openMonoDevelopand add the following code:public var normalTexture : Texture2D; public var rollOverTexture : Texture2D; public var clickSound : AudioClip; public var key : GameObject; public var Player : GameObject;
From the preceding code, we have two
Texture2Dparameters,normalTextureandrollOverTexture, for the restart button when it's in the rollout and rollover state. We also have an audio to play a click sound FX. - Next, we have
keyandPlayerGameObject, which we will assign the prefab ofkeyandPlayerto use when the game is at an end. We are creating a function to change our restart button texture when the user performs rollover and rollout. Add the following script:public function OnMouseEnter () : void { //Mouse Roll over function guiTexture.texture = rollOverTexture; } public function OnMouseExit() : void { //Mouse Roll out function guiTexture.texture = normalTexture; } - Now, we will create the function that will reset our character back to the start position, and the key will appear in the scene again by using
Instatiateto clone our object from our prefab object in the projects, which we will create at a later state. - Finally, we have
@script RequireComponent(AudioSource)to basically force the script to add anAudioSourcescript to ourrestartButton, and to prevent the error when we are running this script without theAudioSourcescript. Let's add the following script:public function OnMouseUp() : IEnumerator{ // Mouse up function audio.PlayOneShot(clickSound); yield new WaitForSeconds (1.0); //Wait for 0.5 secs. until do the next function //Create a new Player at the start position by cloning from our prefab Instantiate(Player, new Vector3(Player.transform.position.x, Player.transform.position.y, 0.0), Player.transform.rotation); //Create a new key at the start position by cloning from our prefab Instantiate(key, new Vector3(key.transform.position.x, key.transform.position.y, 0.0), key.transform.rotation); //Hide restart button guiTexture.enabled = false; } @scriptRequireComponent(AudioSource) - Then, we go back to our
CharacterController_2D.jsto add sound code for playing the sound effect and a restart button. Add these parameters to the top of this class:private var restartButton : GUITexture; public var doorOpenSound : AudioClip; public var getKeySound : AudioClip; public var jumpSound : AudioClip;
- Add code to get the
restartButtonfrom our game scene; put this code in theStart()function://Get restartButton from the Game Scene restartButton = GameObject.FindWithTag("RestartButton").guiTexture; //make restart Button disabled restartButton.enabled = false; - Add a jump sound, inside the
Update()function and insideif (Input.GetButton("Jump")) {}as follows:if (Input.GetButton("Jump")) { //Jump b_isJumping = true; //Then make it Jump audio.volume = 0.3; audio.PlayOneShot(jumpSound); loopSprites[0].resetFrame(); loopSprites[1].resetFrame(); rigidbody.velocity = new Vector3(rigidbody.velocity.x, -Physics.gravity.y, 0); } - Next, we add the
getKeysound,doorOpensound, and enable ourrestartButton. Go toOnTriggerEnter()and update the code. First, insideif (hit.collider.tag == "Key") {}add the highlighted code:if (hit.collider.tag == "Key") { if (!b_hasKey) { //We hit our Key audio.volume = 1.0; audio.PlayOneShot(getKeySound); b_hasKey = true; Destroy (hit.gameObject); } } - Inside
if (hit.collider.tag == "Door") {}, add the highlighted code:if (hit.collider.tag == "Door") { if (b_hasKey) { audio.volume = 1.0; audio.PlayOneShot(doorOpenSound); //If we had Key and hit door the door will open hit.gameObject.renderer.material.mainTexture = doorOpenTexture; //wait for 1 second and destroy our character yieldWaitForSeconds(1); Destroy (gameObject); //We close the door hit.gameObject.renderer.material.mainTexture = doorCloseTexture; //Show Restart Button restartButton.enabled = true; } }And for the last thing before we go back to Unity, put this line at the end of the code to basically force the script to add an
AudioSourcescript toCharacterController_2D.js:@scriptRequireComponent (AudioSource)
- Then, we go back to Unity, and click on the
Playerto open the Inspector. We will see Door Open Sound, Get Key Sound, and Jump Sound. Then, we assign the sounds to these as follows:- Door Open Sound:
doorOpen.wav - Get Key Sound:
getKey.aiff - Jump Sound:
Jump.wav
- Door Open Sound:
- Next, we need to add an
Audio Sourcescript to be able to use our sound for thePlayer. This is because we already attached this script to the game object, so Unity doesn't add it for us. - Go to Component | Audio | AudioSource. There, create three prefabs for the
key,Player, andrestartButton. Go to Assets | Create | Prefab three times, and name all of them as follows: Key, Player, and restartButton. - Next, we drag our
Playerin Hierarchy to the Player Prefab in the Project window. We will also do the same withKey; drag ourKeyin Hierarchy to the Key Prefab in the Project window. - For the
restartButton, we need to create a new tag; go to Edit | Project Settings | Tags. Under Element 5 type RestartButton. - Next, create a new
GUI Textureobject, which is for our replay button GameObject | Create Other | GUI Texture and name itrestartButton, and in the object inspector set it as follows:- Tag: RestartButton
- Position: x: 0.5, y: 0.5, z: 0
- Rotation: x: 0, y: 0, z: 0
- Scale: x: 0, y: 0, z: 1
- GUITexture:
- Texture: Drag-and-drop
restartButtonOut.pnghere - Color: Leave it as default
- Pixel Inset:
- X: -64, Y: -16, Width: 128, Height: 32
- Drag
restartButtonin Hierarchy and drop to the restartButtonPrefab in the Project Window, click on the restartButtonPrefab in the Project window, and drag ourTextureButton.jsscript to restartButtonPrefab. In the Inspector, we add all objects needed for Texture Button (Script) as follows:- Normal Texture: Drag-and-drop
restartButtonOut.pngin here - Roll Over Texture: Drag-and-drop
restartButtonOver.pngin here - Click Sound: Drag-and-drop
button_click.aiffhere - Key: Drag-and-drop
Key Prefabhere - Player: Drag-and-drop
Player Prefabhere
- Normal Texture: Drag-and-drop
Ok, now we are done; click play to see what we have. Now, when we collect the key and go inside the door, we will see a restart button appear; click on this button and the game will restart.
We just finished creating a restart button for our platform game. We used Destroy and Instantiate to remove and create a new clone of the object from the prefab. We also added a sound effect to our restart button and character. Then, we set audio.volume to 1.0; to set the volume of our sound effect and used audio.PlayOneShot(AudioClip); to play a sound effect once it is triggered.
In restartButton, we can also add Application.LoadLevel(LevelName) to reset our game, which is much easier than using instantiate, but the Application.LoadLevel will destroy all the game objects in the scene and reload again. In this case, we use instantiate in our game because we only have one scene and don't want to load the whole game level again. However, we can also put DontDestroyOnLoad() in the Awake() function of the object that we don't want to destroy, but it needs a bit of setup. So, there is no right or wrong. It depends on what we want to use or where we want the project to go.