Creating AI can be the most difficult and complex task in the development of a game because we have to calculate every possible way to make it as smart as a human brain. Most games need the AI for the enemy to be able to react to the player. The AI will run towards and attack the player, or when the player hits the wall, he or she will jump or walk avoiding the obstacles, and so on.
However, we have to be careful with the balance between making the AI smart and the performance speed to get the best moves. To get the best moves means more calculation, so it might cause a problem with performance slowing down.
We can use A* Algorithm for the pathfinder or Minimax Algorithm to calculate the best move, but these algorithms are very complex for a beginner.
Note
A* Algorithm or A Star Algorithm is a computer algorithm that is widely used in path finding and graph traversal nodes. Noted for its performance and accuracy, it enjoys widespread use. Peter Hart, Nils Nilsson, and Bertram Raphael first described the algorithm in 1968. It is an extension of Edsger Dijkstra's 1959 algorithm. Reference from:
http://en.wikipedia.org/wiki/A*_search_algorithm.
Minimax Algorithm is a decision rule used in decision theory, game theory, statistics, and philosophy for minimizing the possible loss while maximizing the potential gain. Alternatively, it can be thought of as maximizing the minimum gain (maximin). Originally formulated for two-player zero-sum game theory, covering both the cases where players take alternate moves and those where they make simultaneous moves, it has also been extended to more complex games and to general decision making in the presence of uncertainty. Reference from:
The AI code is a lot to cover, and can be written in a whole new book, but we will learn how to create a simple and easy way to make our AI look smart by using a simple method like the random function instead of using search algorithm to get the possible move for the enemies. It might not make our AI as smart as using those algorithms, but we will get the basic idea of how to create the smart AI.
In this chapter, we will continue from Project 5, Creating a Rocket Launcher, reuse the code assets from the last chapter to implement the AI enemy. We will be creating an enemy by implementing the simple AI but smart enough to detect when to jump, run, walk, stop, or shoot at the player by creating the waypoint for the enemy to walk to each point, run towards the player then shoot when the player gets closer, and jump when it detects the wall.
We will be creating an enemy that responds to our character. This enemy will be able to walk from one point to another and check to see if the player is in shooting range, and he can then shoot or run towards the player.
Finally, we will add the hit point bar to the player character and AI character as well as the damage cost for the character weapon, which is the rocket from the last chapter.
We will start by adapting the old scripts from Project 5, Creating a Rocket Launcher, which are New3PSController, RocketLauncher, and Rocket to be able to apply the hit damage to the player or enemy.
Then, we will create the AIController script to control the enemy by adapting the CharacterControl script from Project 4, The Hero/Heroine Part II—Animation and Controls. In the CharacterControl script, we will use the Physics class to check if there are any walls in front of the direction in which the enemy is moving, so that it jumps over it.
Next, we will create the Waypoint script, which will control the AI moving towards each waypoint position randomly or in an order. The Waypoint script will also use the OnDrawGizmos() function, which will allow us to see the wireframe, ray cast line, icons, and the area while we are playing in the game or editing in the editor. This is very powerful for debugging.
In the last section, we will add the hit point bar for our character and the enemy to show how much is the damage caused when we are attacked by the enemy or when we shoot at the enemy.
When we complete this chapter, we will be able to create the simple AI behavior, which is smart enough to detect the player and response to the player's reaction. From this chapter, we begin to create a smart AI for any kind of game. Most of the methods or equations in this chapter are very straightforward and easy enough to create a simple AI, and can be developed to make the AI smarter.
We will use the New3PSController script from the last chapter for our character and the rocket launcher. For the enemy, we will adapt the CharacterControl script from Project 4, The Hero/Heroine Part II—Animation and Controls, to control the AI movement and behavior by implementing the new waypoint system to limit the movable area of our enemy. Then, we will create the hit point UI for both player and enemy, as well as the Restart button when either one dies. Here are the steps that we will go through in this chapter:
- Creating the waypoint and gizmos
- Creating an AI enemy
- Creating the enemy movement with
AIControllerscript - Creating a hit-point UI
First, we need the project created in Project 5, Creating a Rocket Launcher, and assets for this chapter . We can start a new project by going to the URL http://www.packtpub.com/support?nid=8267 and downloading the Chapter 6 package. The package will contain all resources from Project 5, Creating a Rocket Launcher, and some new assets for this chapter.
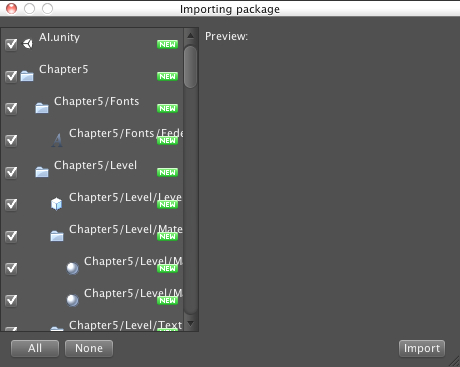
Then, we run the Unity editor, create a new project, and name it as AI. Next, we import the Chapter6.unitypackage to our project as we did in the last chapter by going to Assets | Import Package | Custom Package..., choose Chapter6.unityPackage, which we just downloaded, and then click on the Import button on the pop-up window link, as shown in the following screenshot:
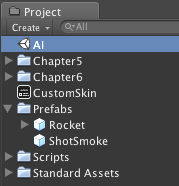
In the Project view, we will see the AI scene, Chapter5 folder, Chapter6 folder, CustomSkin GUISkin, Prefabs folder, Scripts folder, and the Standard Assets folder. The Chapter5 folder will contain the entire Chapter 5 assets. The Chapter6 folder will contain the Chapter 6 assets. The Prefabs folder will contain the Rocket prefabs and ShotSmoke prefab, and the Scripts folder will contain all the scripts we used in the last chapter.
Then, we need to double-click the AI scene to open the scene from the last chapter, as shown in the following screenshot: