
In this section, we will apply the ragdoll to the AI ragdoll game object and replace it with the current AI game object when it dies.
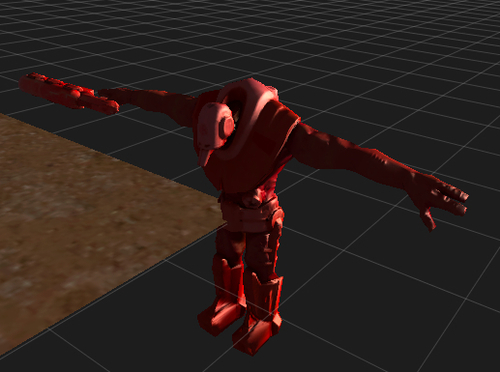
Go to the Project view and open the Prefabs folder inside the Chapter7 folder. Drag the robot_AI_ragdoll prefab to the Hierarchy view. Then, go to the Scene view and press the F key to zoom into the robot_AI_ragdoll game object in the scene.
Now, we can start applying ragdoll physics to the robot_AI_ragdoll:
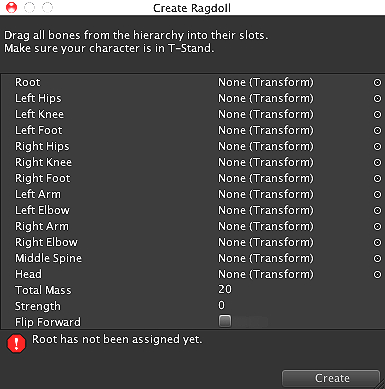
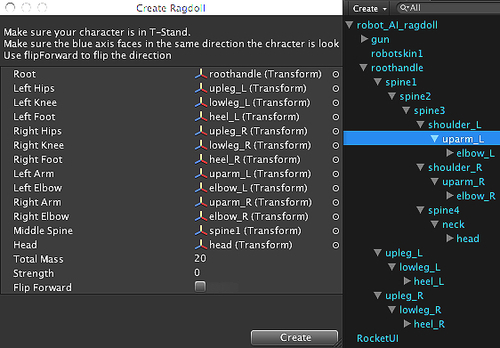
- Go to GameObject | Create Other | Ragdoll... and you will see the Create Ragdoll window pop up, as shown in the following screenshot:
- Go back to the Hierarchy view and click on the triangle in front of
robot_AI_ragdollto see the child namesroothandle, then drag it to the Root in the Create Ragdoll window, as shown in the following screenshot: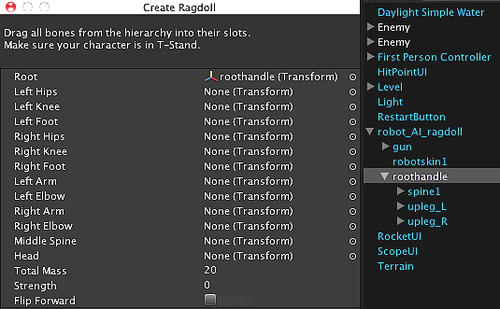
- Drag the
upleg_Lto the Left Hips in the Create Ragdoll window and click on the upleg_L to bring its child names lowleg_L. - Drag the
lowleg_Lto the Left Knee in the Create Ragdoll window. Then, we will click on the lowleg_L to bring up its child names heel_L and drag it to the Left Foot in the Create Ragdoll window. - Do the same thing with the right side by dragging the
upleg_Rto the Right Hips,lowleg_Rto the Right Knee, andheel_Rand drag it to the Right Foot in the Create Ragdoll window, as shown in the following screenshot: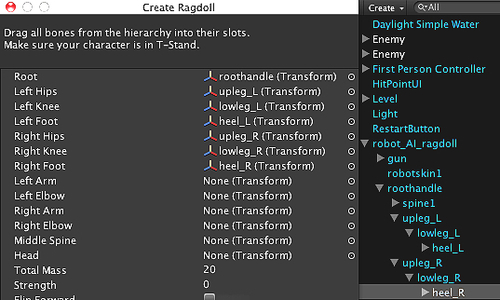
- We are done with the lower part of the character, so let's continue with the upper part of the body by applying everything as follows:
- Left Arm: uparm_L
- Left Elbow: elbow_L
- Right Arm: uparm_R
- Right Elbow: elbow_R
- Middle Spine: spine1
- Head: head
We can also see the results as shown in the following screenshot:
- Click on the Create button to create the ragdoll for our AI object. If you click on
robot_AI_ragdoll, you will see that the capsule and box colliders add on each joint, as shown in the following screenshot: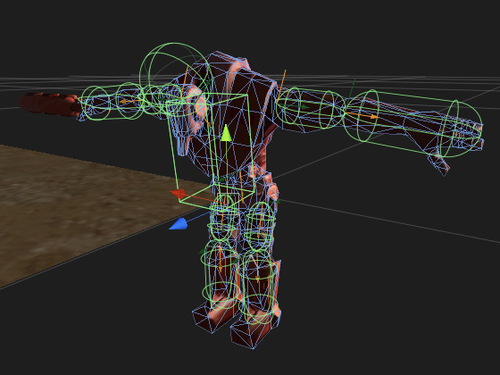
However, we are not done yet. From the preceding screenshot, we will see that we still need to adjust the colliders associated with the character shape.
- Click on
headin the Hierarchy view, go to the Inspector view, and set the following:- Sphere Collider
- Radius: 0.15
- Center: X: -0.04 Y: -0.06 Z: 0
- Sphere Collider
- Next, click on
roothandlein the Hierarchy view, go to the Inspector view, and set the following:- Box Collider
- Size: X: 1.3 Y: 0.5 Z: 0.35
- Center: X: -0.5 Y: -0.1 Z: -0.175
- Box Collider
- Click on
spine1in the Hierarchy, go to the Inspector view, and set the following:- Box Collider
- Size: X: 1.3 Y: 0.5 Z: 0.35
- Center: X: -0.32 Y: 0.1 Z: -0.175
- Box Collider
- We just set up the ragdoll for the AI game object, but we still need to apply the collider and Rigidbody to the gun. So click on the gun game object and apply the Rigidbody to it by going to Component | Physics | Rigidbody. Go to the Inspector view of this game object and set the following:
- Rigidbody
- Mass: 20
- Rigidbody
- Next, click on the triangle in front of the gun game object to bring up the gun_model, as shown in the following screenshot:
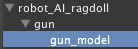
- Apply the Box Collider to the gun_model, (which will make the gun collide with other objects when it falls down), by going to Component | Physics | Box Collider. We are now done with the creation of the
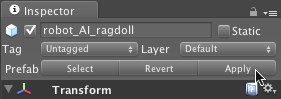
robot_AI_ragdollgame object. - You can also click on the robot_AI_ragdoll game object in the Hierarchy view and go to the Inspector view, and then click on the Apply button to update the prefab, as shown in the following screenshot:
- As we have already updated the
robot_AI_ragdollprefab in the Project view, we don't need therobot_AI_ragdollgame object in the Hierarchy view anymore, so we just delete it by right-clicking on it and choosing Delete.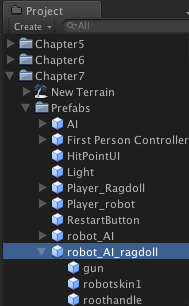
- Now, we need to go back to the
AIControllerscript to enable therobot_AI_ragdollgame object when the AI is dead. Let's open theAIControllerscript and add this script at the beginning, as highlighted in the following code:@script RequireComponent(CharacterController) //Ragdoll public var aiRagdoll : GameObject; //Waypoint public var wayPoint : Waypoints;
- Then, go to
OnCollisionEnter(collision : Collision)and add the following highlighted lines of code://Checking for the collision if the rocket hit the AI public function OnCollisionEnter(collision : Collision) : void { if (collision.transform.tag == "Rocket") { var rocket : Rocket = collision.gameObject.GetComponent(Rocket); var f_damage : float = rocket.getDamage(); aiHP -= f_damage; b_isGotHit = true; if (aiHP <= 0) { aiHP = 0; var obj_aiPrefab : GameObject = Instantiate(aiRagdoll, transform.position, transform.rotation); GameObject.Destroy(transform.parent.gameObject); } } } - Save the
AIControllerscript, and go back to the Project view; click on the AI Prefab, and go to the Inspector view.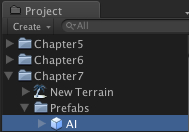
- We will go to the Ai Ragdoll under the AIController (Script) and drag
robot_AI_ragdollto this Ai Ragdoll parameter, as shown in the following screenshot:
With that we are done with this step. We can click Play and see the result—when we kill the AI, we will see that the ragdoll game object ( the one that we just created) replaces the AI.
We just created the ragdoll prefab game object to replace the AI when the AI is dead, which will make it look realistic. We also have used GameObject.Destroy() to destroy the AI game object in the scene and use the Instantiate() function to clone the ragdoll prefab to replace the AI game object that has already been destroyed.
In this section, we created the ragdoll object to replace our Enemy when it dies, which looks good. However, we will see that robot_AI_ragdoll just fell down to the ground without any force from the rocket that was fired at it.
To make it much more fun and realistic, we can do this using two different equations.
First, we can add force (using the AddForce() function) to our ragdoll's rigidbody, which will make our ragdoll move following the rocket direction. We can do this by adding a script in the OnCollisionEnter(collision : Collision) in the AIController script, as highlighted in the following code:
//Checking for the collision if the rocket hit the AI
public function OnCollisionEnter(collision : Collision) : void {
  if (collision.transform.tag == "Rocket") {
    var rocket : Rocket = collision.gameObject.GetComponent(Rocket);
    var f_damage : float = rocket.getDamage();
    aiHP -= f_damage;
    b_isGotHit = true;
    if (aiHP <= 0) {
      aiHP = 0;
      var obj_aiPrefab : GameObject = Instantiate(aiRagdoll, transform.position, transform.rotation);
      var obj_aiPrefab : GameObject = Instantiate(aiRagdoll, transform.position, transform.rotation);
      /* Make the ragdoll react to the rocket force*/
      var f_force : float = 1000;
         //Get transform direction of the rocket
      var v3_rocketDir : Vector3 = rocket.transform.TransformDirection(Vector3.forward);
      //Get the rigid body of gun and the ragdoll
      var a_rigid : Rigidbody[] = obj_aiPrefab.GetComponentsInChildren.<Rigidbody>();
      //Apply force to the gun rigidbody and ragdoll
      for (var r : Rigidbody in a_rigid) {
        r.AddForce(v3_rocketDir * f_force);
      }
      GameObject.Destroy(transform.parent.gameObject);
    }
  }
}
The second is using the explosive force (using the AddExplosionForce() function), which will make our ragdoll move in a different direction depending on the distance from the explosive position to our ragdoll's rigidbody object. We can do this by replacing the following script in the same function as in the preceding code:
//Checking for the collision if the rocket hit the AI
public function OnCollisionEnter(collision : Collision) : void {
  if (collision.transform.tag == "Rocket") {
    var rocket : Rocket = collision.gameObject.GetComponent(Rocket);
    var f_damage : float = rocket.getDamage();
    aiHP -= f_damage;
    b_isGotHit = true;
    if (aiHP <= 0) {
      aiHP = 0;
      var obj_aiPrefab : GameObject = Instantiate(aiRagdoll, transform.position, transform.rotation);
      /* Make the ragdoll react to the explosion force*/
      var f_force : float = 1000;
     //Get the rigid body of gun and the ragdoll
      var a_rigid : Rigidbody[] = obj_aiPrefab.GetComponentsInChildren.<Rigidbody>();
      //Apply force to the gun rigidbody and ragdoll
      for (var r : Rigidbody in a_rigid) {
        r.AddExplosionForce(f_force, rocket .transform.position, 100.0);
      }
      GameObject.Destroy(transform.parent.gameObject);
    }
  }
}
Note
The AddExplosionForce() function basically applies a force to the rigidbody, which will simulate the explosion effects. You can see more details on the AddExplosionForce() function from the following Unity scripting document:
http://unity3d.com/support/documentation/ScriptReference/Rigidbody.AddExplosionForce.html.