You can use Outlook to send and receive messages for several different types of e-mail accounts. Outlook supports Microsoft Exchange Server, POP3 services such as a typical account from an Internet service provider (ISP), IMAP services such as CompuServe 2000, and HTTP-based e-mail services such as Hotmail. You can easily add a new account or import e-mail account settings from Microsoft Outlook Express, Windows Mail, or Eudora. (Outlook 2007 does not support import from other applications such as Netscape or Firefox.)
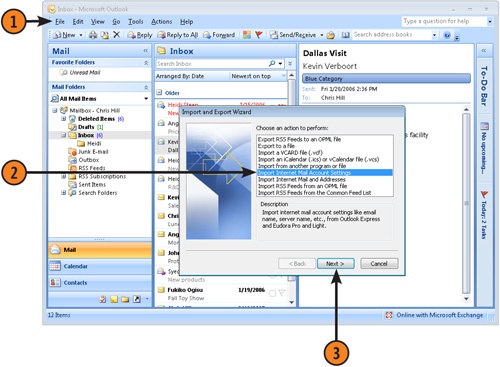
 Open Outlook, and choose Import And Export from the File menu.
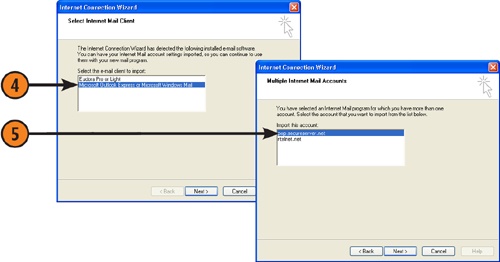
 Select the program from which you’re importing accounts, and click Next.
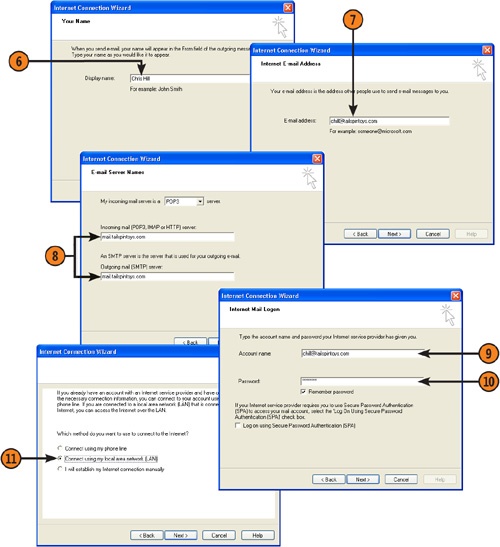
 Verify or change your e-mail address for the account, and click Next.
 Verify the server type, incoming and outgoing mail server addresses, and click Next.
 Select the type of connection to use for the account, and click Next.
Try This!
Entering your e-mail address on Web sites is a good way to fill your Inbox with spam, but some sites require your address when you register. One option is to set up an Internet mail address with Hotmail or one of the other providers, and use this exclusively for password verification. That way the unsolicited e-mail goes to an address that you check only occasionally.
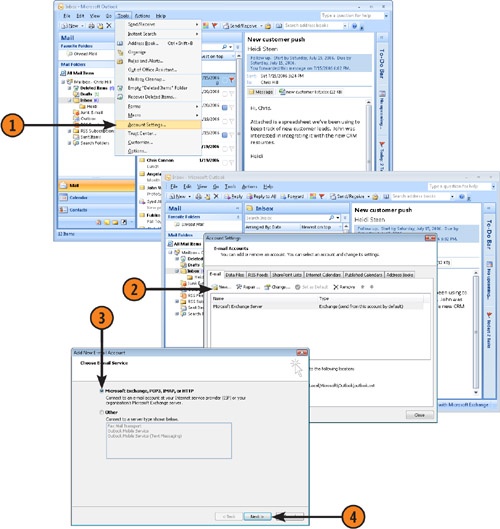
- Open Outlook, and choose Account Settings from the Tools menu.
Tip
You can add, change, and remove Outlook e-mail accounts, personal folders, address books, and directory services through the Mail icon in Windows Control Panel.
Try This!
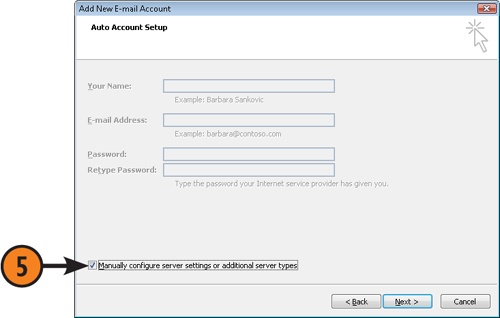
Outlook can often add e-mail accounts automatically. In the Add New E-mail Account dialog box, fill in your name, e-mail address, and password, and click Next. Outlook attempts to identify the mail server based on your e-mail address and performs some tests to verify that it can send and receive using the specified server(s). If Outlook cannot determine the right settings, Outlook prompts you to enter them manually.
 Select Manually Configure Server Settings Or Additional Server Types, and then click Next.
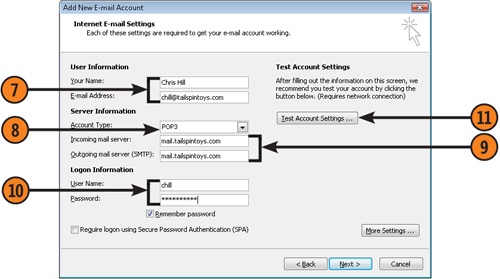
- Click Test Account Settings to have Outlook test your settings, then close the test window when the test is completed successfully. Click Next and Finish to return to the Account Settings window.
See Also
For information on keeping messages from different accounts separated from one another, see "Working with the Rules Wizard".