When you have only a dozen or so contacts, finding and managing them is fairly easy. You can simply open the Contacts folder, scroll through the list and find what you’re looking for. However, once the Contacts folder grows, you need to organize your contacts to make them easier to find and update. Outlook provides three ways to organize your contacts. You can use folders to store related contacts, use categories to set up relationships between contacts, or use views to sort contacts in ways that make sense to you.
 Choose Folder from the File menu, and then select New Folder from the submenu.
 Click the Folder Contains drop-down list, and select Contact Items.
Try This!
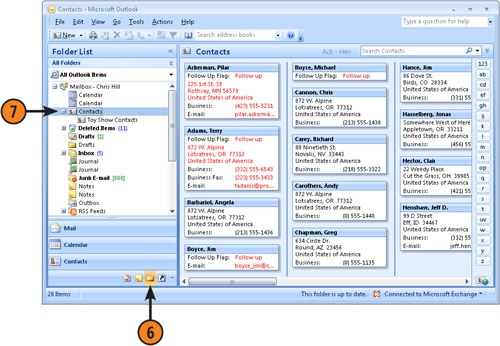
Once you create a folder for contacts, you can drag existing contacts to your new folder to organize them as necessary. For example, create a folder named "Project Team" in the Contacts folder. Open the Folder List in the Navigation Pane so you can see the new folder, but keep the focus on the Contacts folder. Drag members from your project team into the Project Team folder. You now can quickly see who is on your team by clicking this folder.


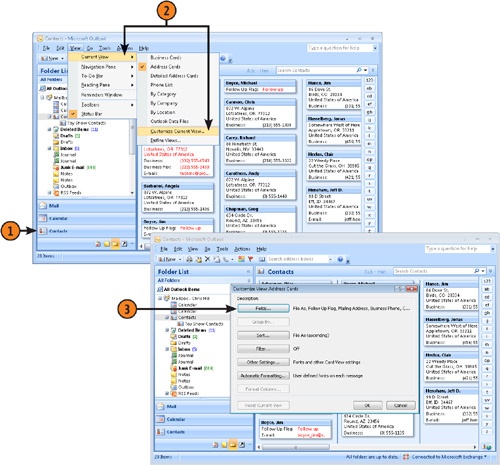
- Choose Current View from the View menu, then choose Customize Current View.
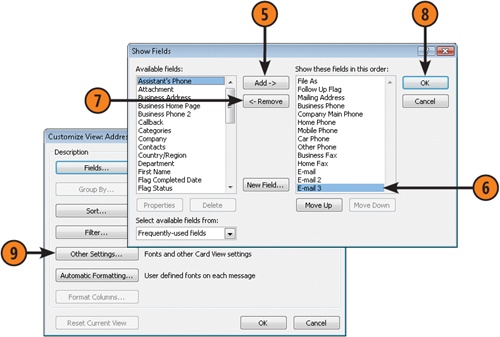
- Click a field in the Available Fields list.
Try This!
Create a customized view by selecting Customize Current View from the Current View submenu. Click Filter, and specify the filtering criteria for your custom view. For example, if you want Outlook to show only those contacts that have a specific e-mail domain name, type that domain name in the E-mail field.
 Use the Font buttons to choose a font for Card Headings and Card Fields.
 Enter desired card dimensions in Card Width And Multi-Line Field Height.
 Click Font and choose a font for the new rule, then click OK.