Adding an Appointment

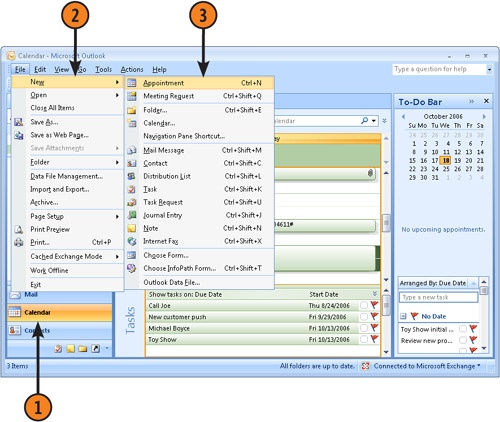
An appointment in Outlook is an activity you enter for a specific time that, unlike a meeting, does not involve other people or resources. When you schedule an appointment, you block out a day, a time, and a location for that appointment to occur. Outlook also makes it easy to set a reminder that flashes on your screen and plays a sound to alert you to the appointment.

Add an Appointment with the Menu

  1. Click the Calendar icon on the Navigation Pane.

  2. Choose New from the File menu.

  3. Choose Appointment from the New submenu.

    Add an Appointment with the Menu

    Tip

    Tip

    Keep your appointment subjects as short as possible so that they are easy to read in the Calendar view.

  4. Type a description of the appointment in the Subject box.

  5. Type the location of the appointment in the Location box.

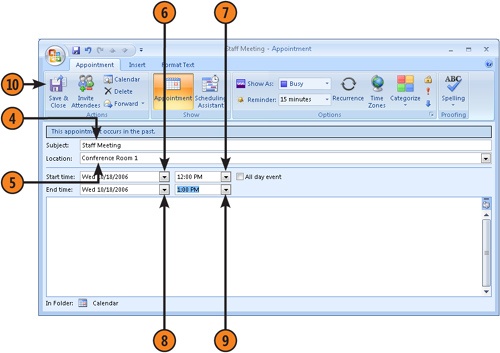
  6. Click the down arrow to the right of the Start Time date, and select the day of the appointment.

  7. Click the down arrow to the right of the Start Time hour, and select the starting time of the appointment.

  8. Click the down arrow to the right of the End Time date, and select the ending day of the appointment if it is a multiple-day appointment.

  9. Click the down arrow to the right of the End Time hour, and select the ending time of the appointment.

  10. Click Save & Close.

    Tip

    Try This!

    Try This!

    If you’d like to add extended information about an appointment, click in the text area at the bottom of the Appointment window. Type a longer description here, such as directions to the appointment location, important information about the appointment, and so on.

    Tip

    Tip

    You can print your appointments to the default printer by clicking the Print button on the Standard toolbar.

Add an Appointment Right on the Calendar

  1. Click the Calendar icon on the Navigation pane.

  2. Click and drag to select a block of time for the appointment on the Calendar.

  3. Begin typing the Subject of the appointment, and the subject appears in the blocked-out space on the Calendar.

  4. Press Enter.

  5. Double-click the appointment to open the appointment form.

  6. Add the location, notes, and other information to the appointment.

  7. Click Save & Close.

    Add an Appointment Right on the Calendar
    Add an Appointment Right on the Calendar

    Tip

    Tip

    If you use Outlook on a network running Microsoft Exchange Server, you can share your appointment information with other users. This way they know when you’re busy and can schedule meetings with you based on this information.

    Tip

    Tip

    To categorize the appointment, right-click the appointment and choose Categorize, then choose a category from the submenu.

..................Content has been hidden....................

You can't read the all page of ebook, please click here login for view all page.
Reset
18.191.253.62