Chapter 12. Managing Items and Folders

In this section:

Microsoft Office Outlook 2007 provides several ways you can manage your Outlook items and folders, including organizing items in categories, creating and using folders to store items, using the Mailbox Cleanup tool, and using the Journal to organize your work. For example, you can create folders to store e-mail messages relating to projects on which you work, making it easier to locate those messages when you need them.

Categories let you organize and sort your data in Outlook. You might assign a project category to all items for a specific project and then set up a view in each Outlook folder that displays the items grouped by category. This helps you quickly locate items associated with a specific project. Outlook 2007 adds color to categories, making them even more useful—you can now tell at a glance the categories assigned to specific items.

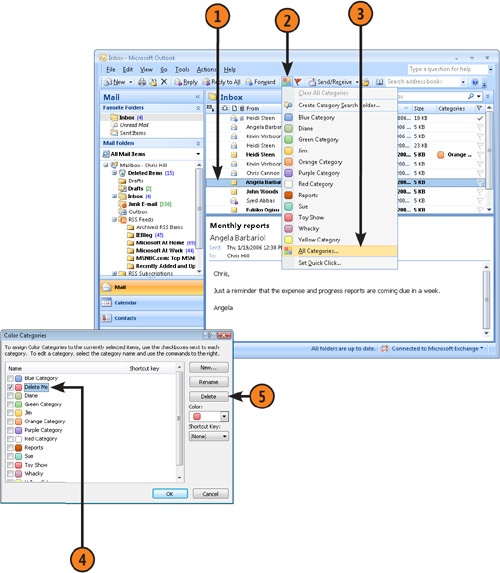
This section covers how to manage your items and folders in Outlook 2007. It covers how to categorize items, organize folders, delete items, and clean up folders.

Using Categories

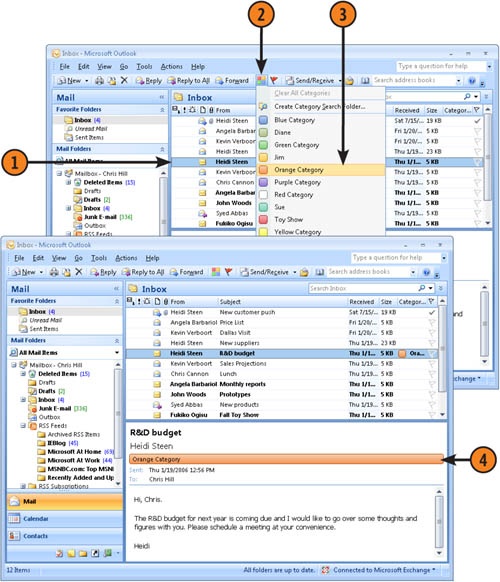
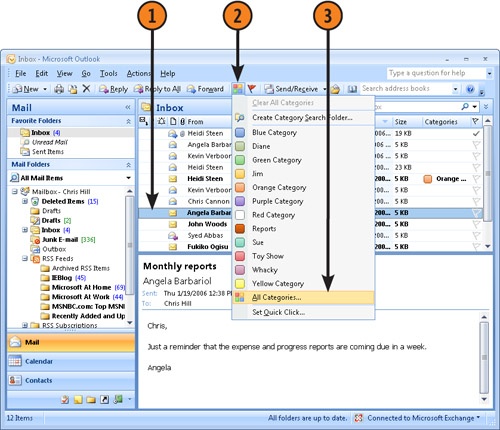
Categories are colors with associated keywords or phrases that help you manage Outlook items, such as contacts, e-mail messages, journal entries, and meetings. With categories, you can set up relationships between items stored in different places in Outlook. For example, you can categorize a piece of e-mail and a meeting reminder as business items. Then when you sort, filter, or search for all your business-related items, that e-mail message and meeting reminder appear. The addition of color to categories in Outlook 2007 lets you tell at a glance what categories are assigned to an item.

Categorize an Item

  1. Select an item.

  2. Click Categorize on the Standard toolbar.

  3. Choose a category to assign to the item.

  4. A category indicator appears in the Categories column and in the header.

    Categorize an Item

    Tip

    Tip

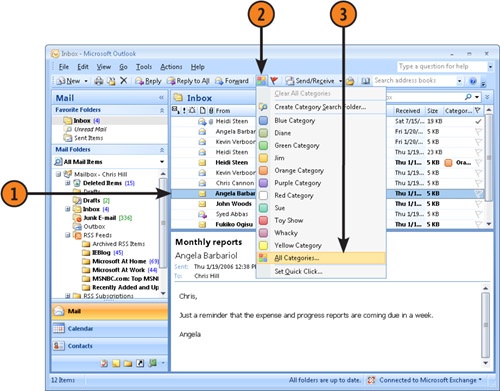
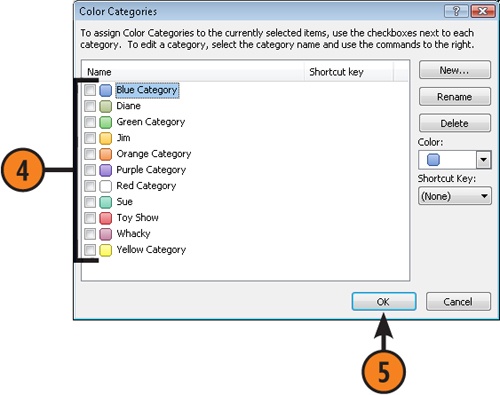
    You can associate an item with as many categories as you like. The more categories with which you associate an item, the easier it is to find when you conduct searches.

    Tip

    Tip

    You can also choose Categorize from the Edit menu, and then choose a category from the resulting cascading menu.

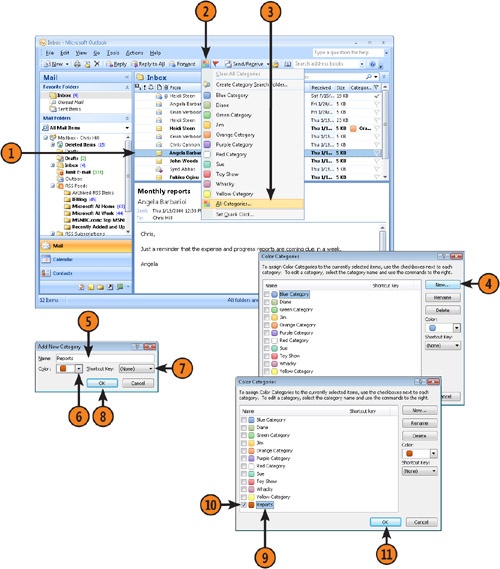
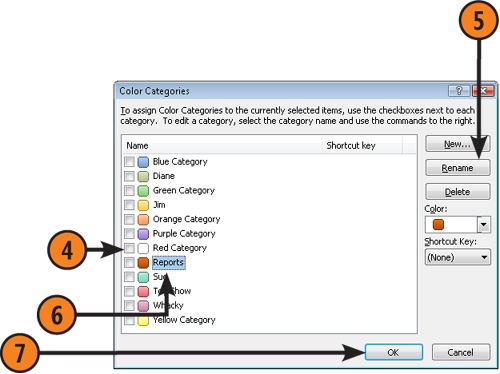
    If this is the first time you have used the category, Outlook asks if you want to change the color. For now, just click No. You learn about changing category properties later in this section.

Assign Multiple Categories

  1. Select an item.

  2. Click Categorize on the Standard toolbar.

  3. Choose All Categories.

  4. Place a check beside each category you want to assign.

  5. Click OK.

    Assign Multiple Categories
    Assign Multiple Categories

Add Categories to Your Category List

  1. Select an item.

  2. Click Categorize on the Standard toolbar.

  3. Choose All Categories.

  4. Click New.

  5. In the Add New Category dialog box that appears, type a new category name in the Name field.

  6. Select a color.

  7. Choose a shortcut key (if desired).

  8. Click OK.

  9. The new category appears in the Color Categories dialog box.

  10. Deselect the check box if you only want to create the category but not assign it yet.

  11. Click OK.

    Add Categories to Your Category List

    Caution

    Caution

    If you assign a category to an item and then remove it from the Master Category list, the category is not deleted from that item. You can still sort, view, or filter items based on deleted categories.

Rename a Category

  1. Select an item.

  2. Click Categorize on the Standard toolbar.

  3. Choose All Categories.

  4. Click the category.

  5. Click Rename.

  6. Type a new name and press Enter.

  7. Click OK

    Rename a Category
    Rename a Category

Delete a Category

  1. Select an item.

  2. Click Categorize on the Standard toolbar.

  3. Choose All Categories.

  4. Click the category you want to delete.

  5. Click Delete.

    Delete a Category

    Tip

    Tip

    Deleting a category that is in use only clears the color from the category. To remove the category altogether, you must clear the category from all items where it is used.

    Tip

    Tip

    If you want to clear a category from all items where it is used, arrange the view by category. Locate the grouped category you want to remove, select all of the items in the group, right-click an item in the group, click Categorize, and click the category you want to remove.

..................Content has been hidden....................

You can't read the all page of ebook, please click here login for view all page.
Reset
18.223.33.157